
How to Track a Contact's Tag History (When Tags Were Added or Removed)
See the full history of when tags were added or removed from a contact in ChatDaddy — including who made the change and when. Track tag changes from the contact's Profile panel in the Inbox.
🏷️ Tags tell you a lot about a contact — and now you can see how they changed. ChatDaddy keeps a history of tag activity on every contact, so you always know when a tag was added or removed and who did it.
What you can see
- When a tag was added to a contact — and by which team member.
- When a tag was removed — preserved in the contact's Tag History.
- The full timeline of tag changes, right inside the contact profile.
- How a contact has been categorised over time, keeping your whole team on the same page.
Before you start
- Open the ChatDaddy Inbox — the tag history lives in each contact's profile panel.
- You need at least one conversation with a contact that has (or had) tags.
✅ Tag history is recorded automatically from now on. Every time you add or remove a tag, ChatDaddy stores who made the change and when — no setup required.
Step 1 — Open a conversation in the Inbox
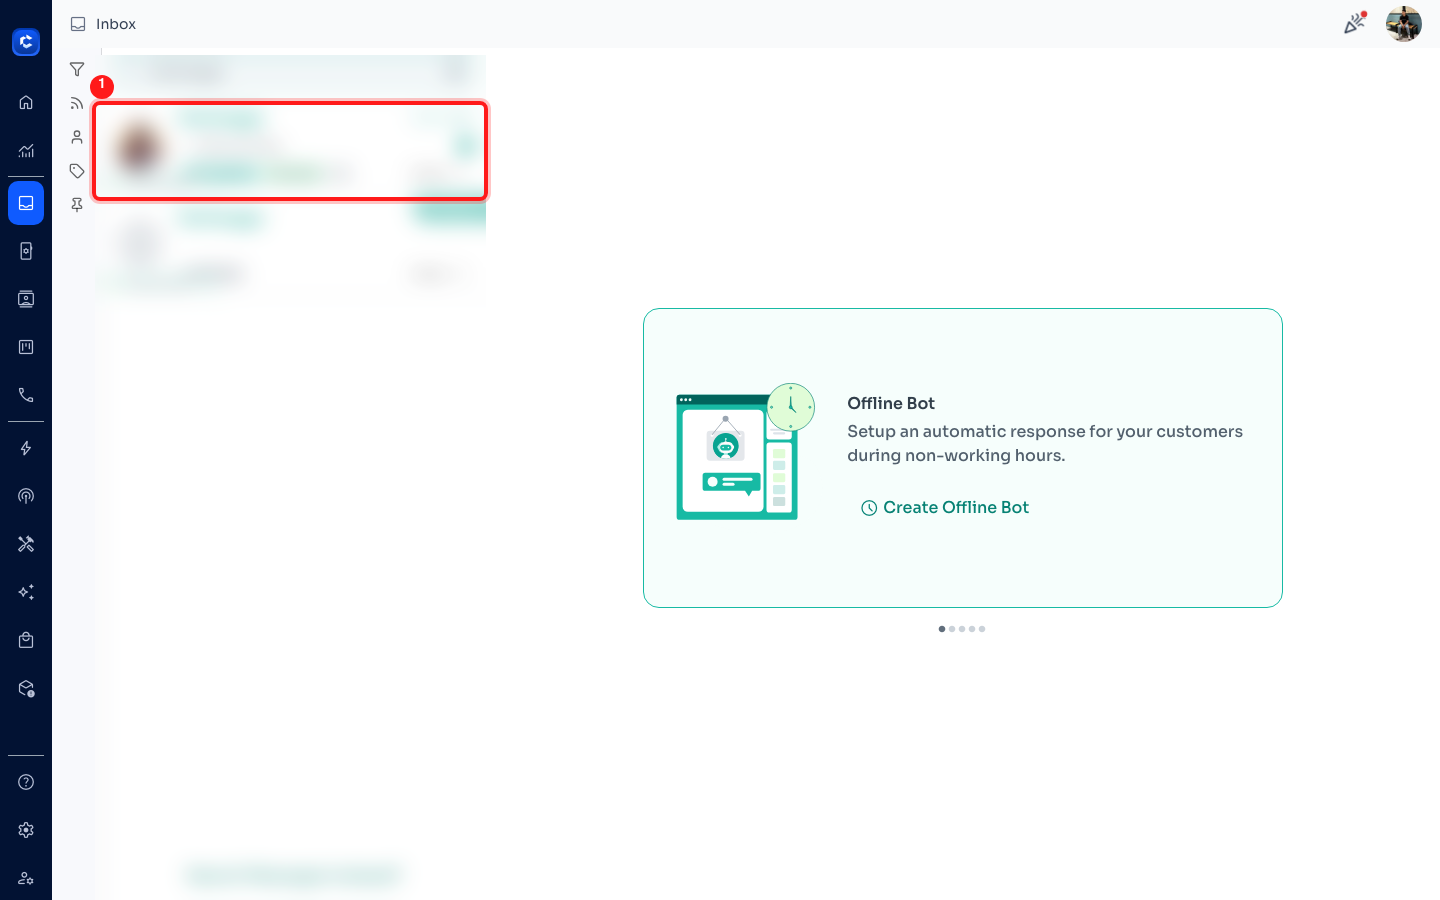
Go to the Inbox and click the conversation for the contact whose tags you want to review. This opens the chat on the right.
Step 2 — Open the contact info panel
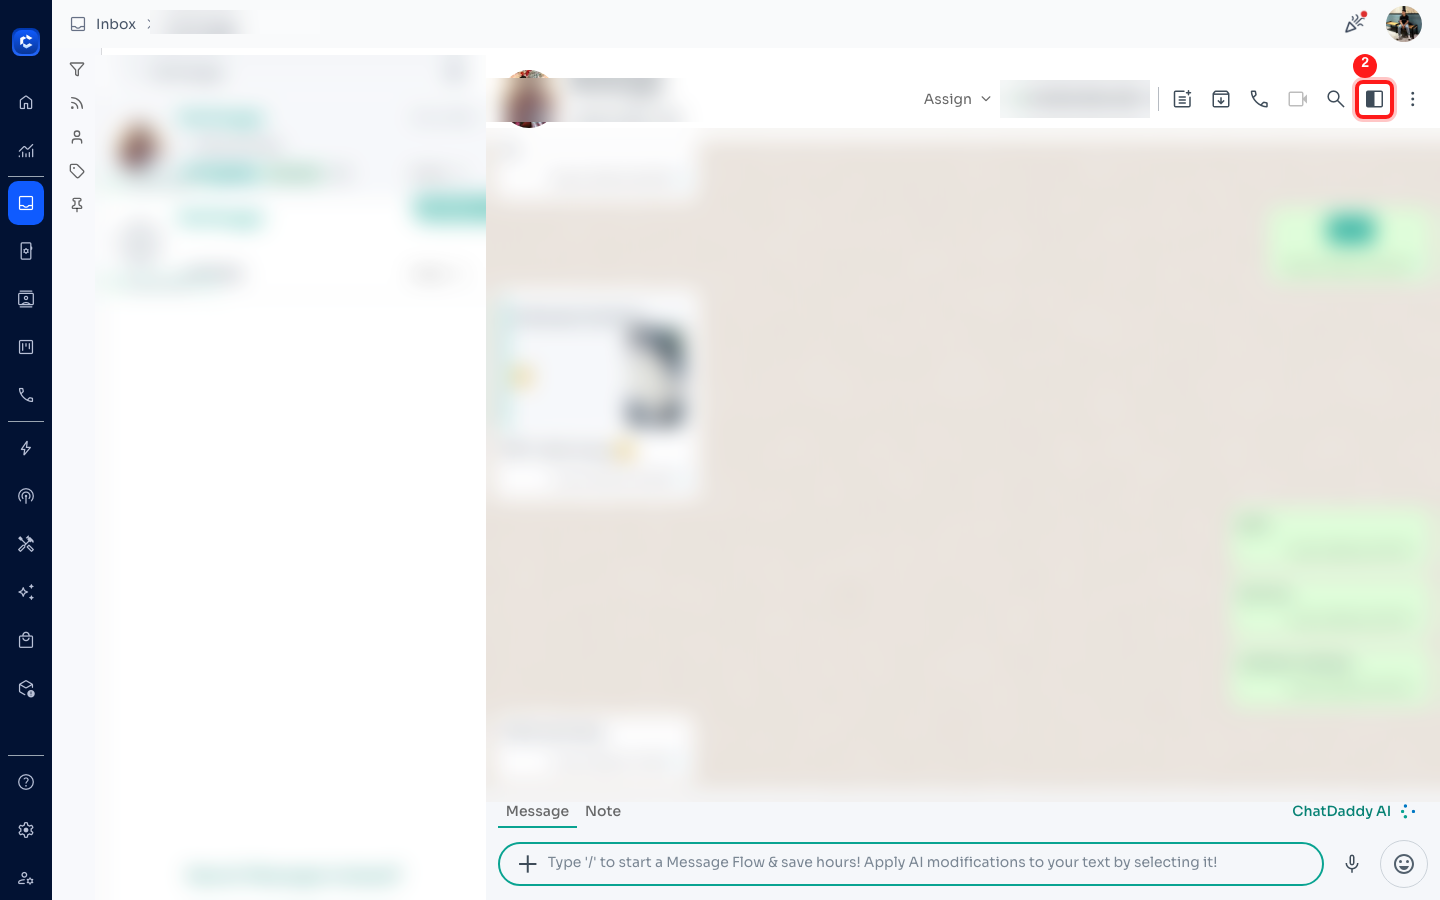
In the chat header (top-right), click the panel / side-navigation icon to open the contact's Profile panel. This is where the contact's tags and tag history are shown.
Step 3 — Find the Tags section
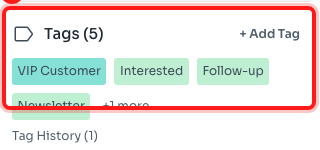
In the Profile panel, scroll to the Tags section. It shows the tags currently applied to this contact. Just below it you'll also see a Tag History section that keeps a record of tag changes.
Step 4 — Hover a tag to see when it was added
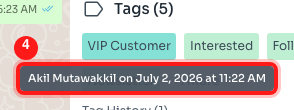
Hover your mouse over any tag to reveal a tooltip showing who added the tag and the exact date and time — for example, "Added by Akil Mutawakkil on July 2, 2026 at 11:22 AM". If a tag was applied automatically by a Message Flow or automation, the tooltip shows a link to that automation instead of a team member.
Step 5 — Review the full Tag History
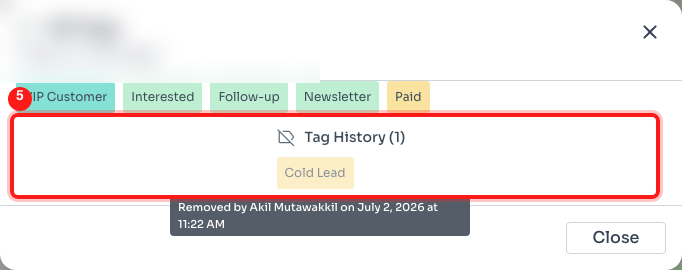
Click the "+ N more" link (or open All Tags) to open the tag overview. It has two parts: All Tags shows the tags currently on the contact, while Tag History lists tags that were removed. Hover any removed tag to see who removed it and when — for example, "Removed by Akil Mutawakkil on July 2, 2026 at 11:22 AM".
Understanding what you see
- **Added by **{name} on {date} — a tag currently on the contact, showing who applied it and when.
- **Removed by **{name} on {date} — a tag that was taken off the contact, kept in the Tag History so nothing is lost.
- Automation-applied tags link straight to the Message Flow or automation that added them, so you can see the source.
- All Tags = what's on the contact right now. Tag History = what changed over time.
Tips
- Use tag history to understand why a contact is categorised the way it is before replying.
- It keeps your whole team aligned — anyone can see who tagged (or untagged) a customer and when.
- Never lose context: even after a tag is removed, the record stays in the Tag History.
🔒 Note: the screenshots in this guide use a demo contact, and customer names, phone numbers and message content have been blurred for privacy. The "added by / removed by" name shown is the account owner.