How to add buttons and lists in message flows
Learn the difference between buttons and lists, and how to use them in ChatDaddy!
Interactive messages provide users with a simpler, more efficient way to interact with your business on WhatsApp. They achieve significantly higher response rates and conversions compared to traditional text-based messages.
ChatDaddy supports two types of interactive messages:
- Buttons: Quick-select options with up to 3 buttons.
- Lists: A menu-style format with up to 10 options.
**Important
- You can only use EITHER buttons or lists in a single message.
- These features are available only for WhatsApp Business or WABA accounts.
- Without these accounts, messages will be sent as poll buttons. **
1. Buttons
Buttons include up to 3 options, making it faster for users to choose from a menu when interacting with your business.
How to Add Buttons
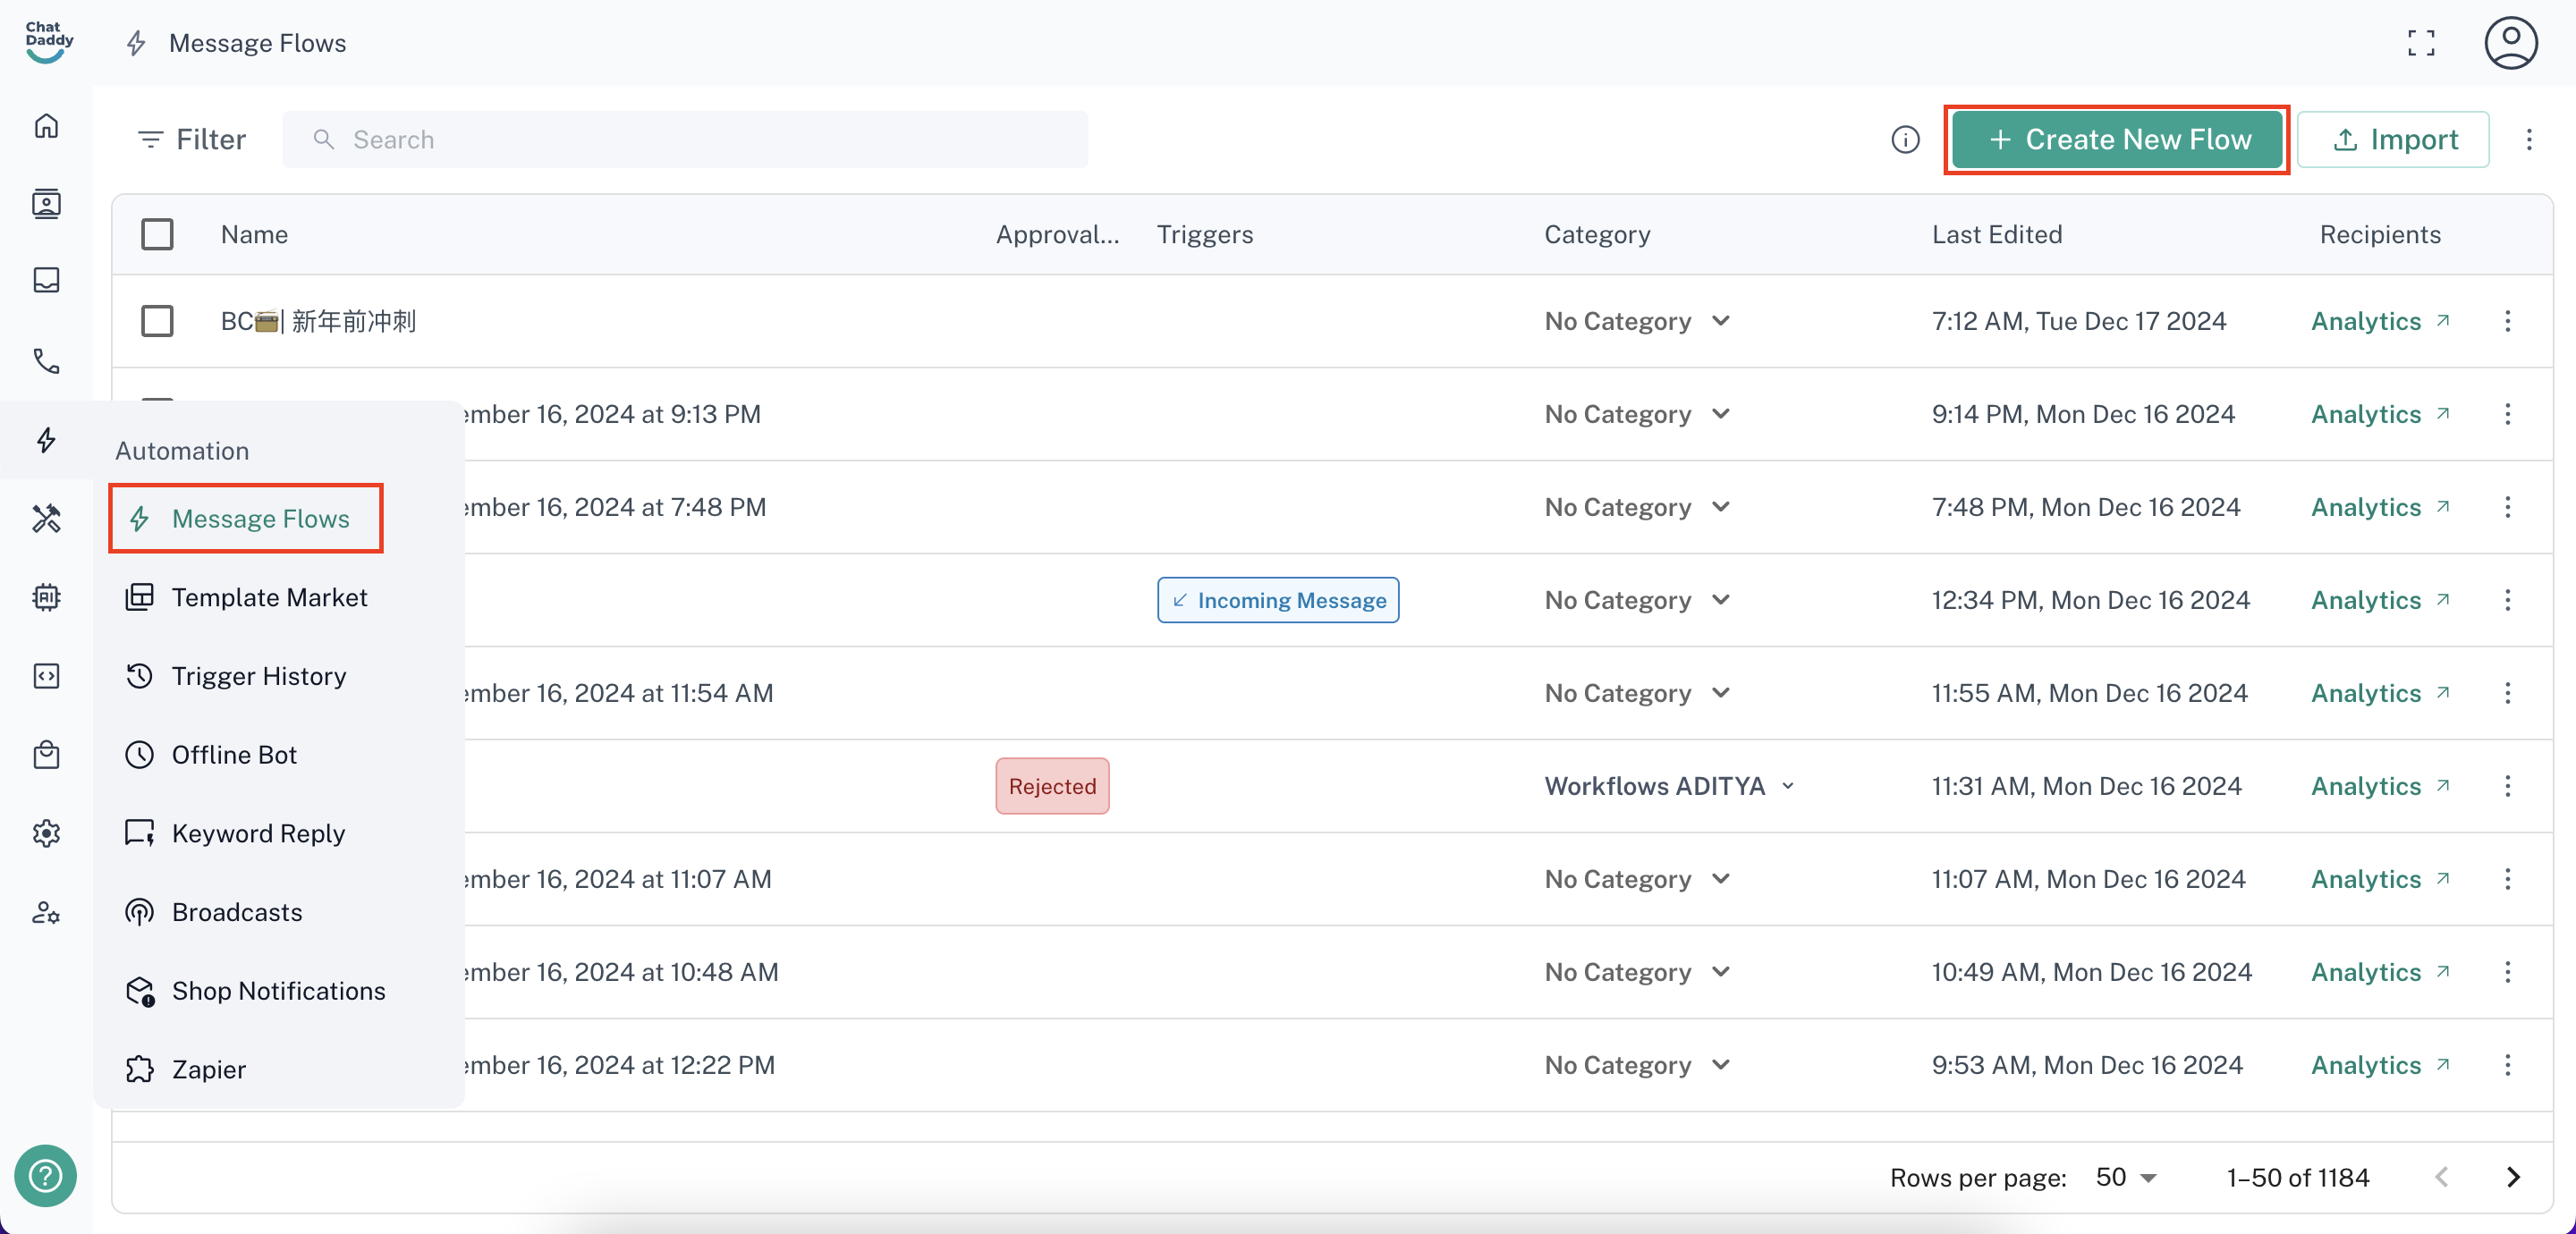
Step 1: Navigate to the Automation Section
- Hover over the left-hand sidebar.
- Go to “Message Flows” and click on “+ Create New Form”.

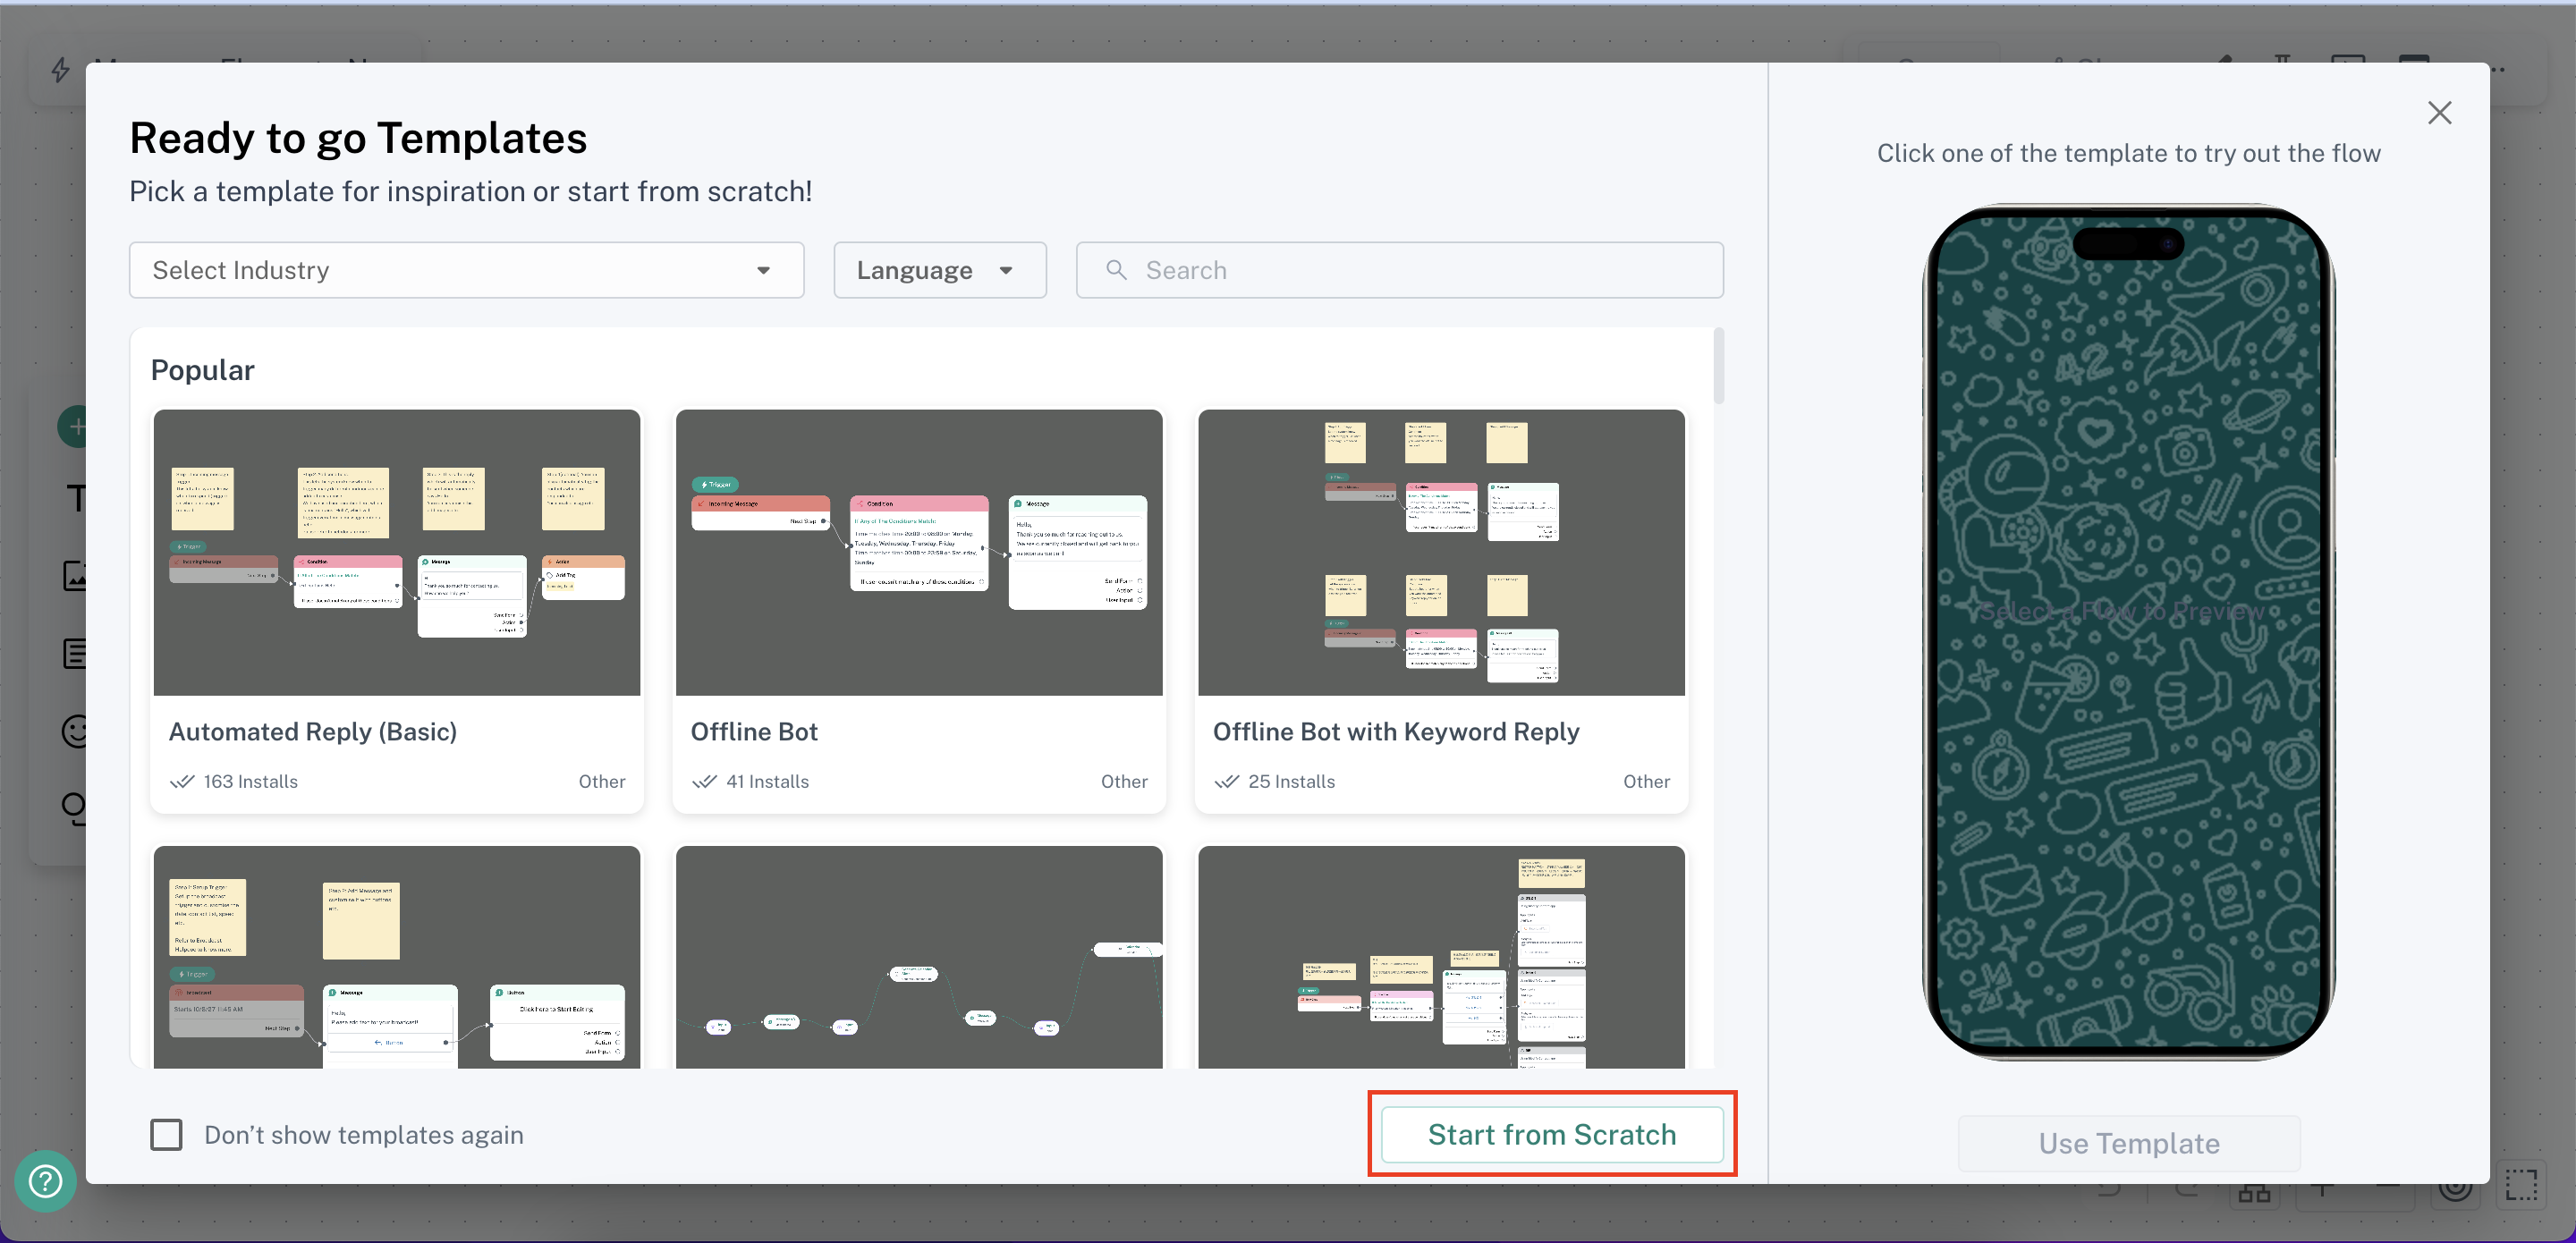
Step 2: Choose a Template or Start from Scratch
- Pick a pre-made template or click “Start from Scratch” to create your own.

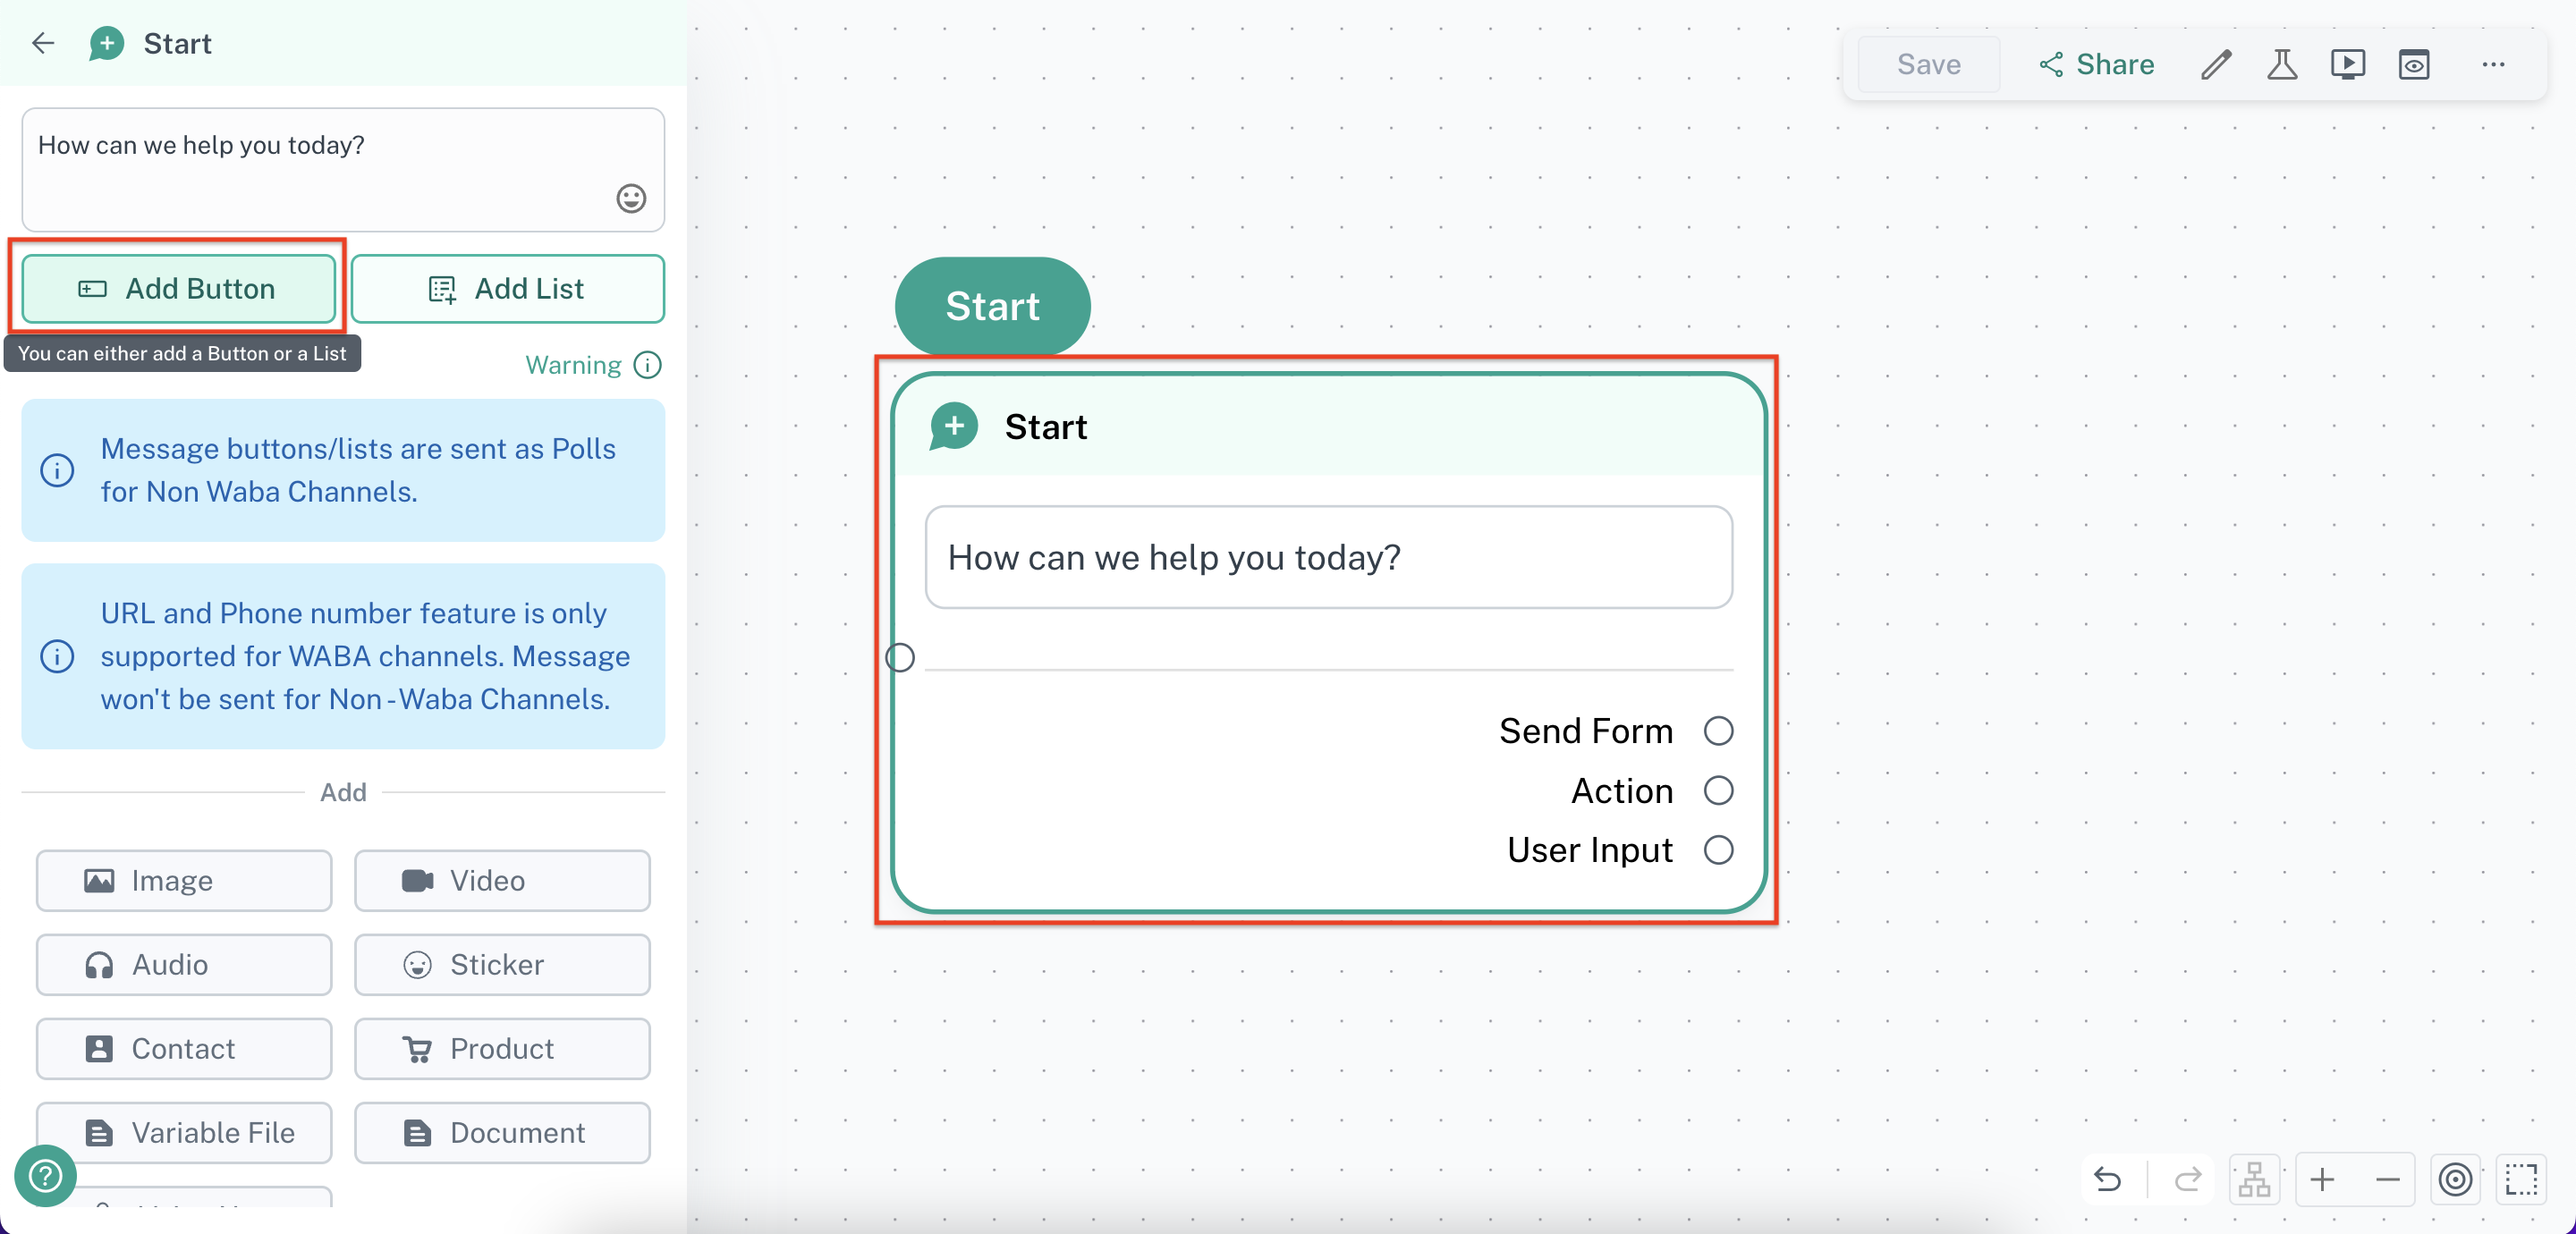
Step 3: Add Buttons to a Message
- Click on the message where you want to add buttons.
- Select “Add Button”.
**Note: You cannot send a message containing buttons alone - you must include some message content. **
Step 4: Set Up Button Content and Actions
- Define the text (less than 20 characters) for each button.
- Configure the action that occurs when a user clicks the button.
**The button text must be 20 characters or fewer. **
Example of Buttons on WhatsApp
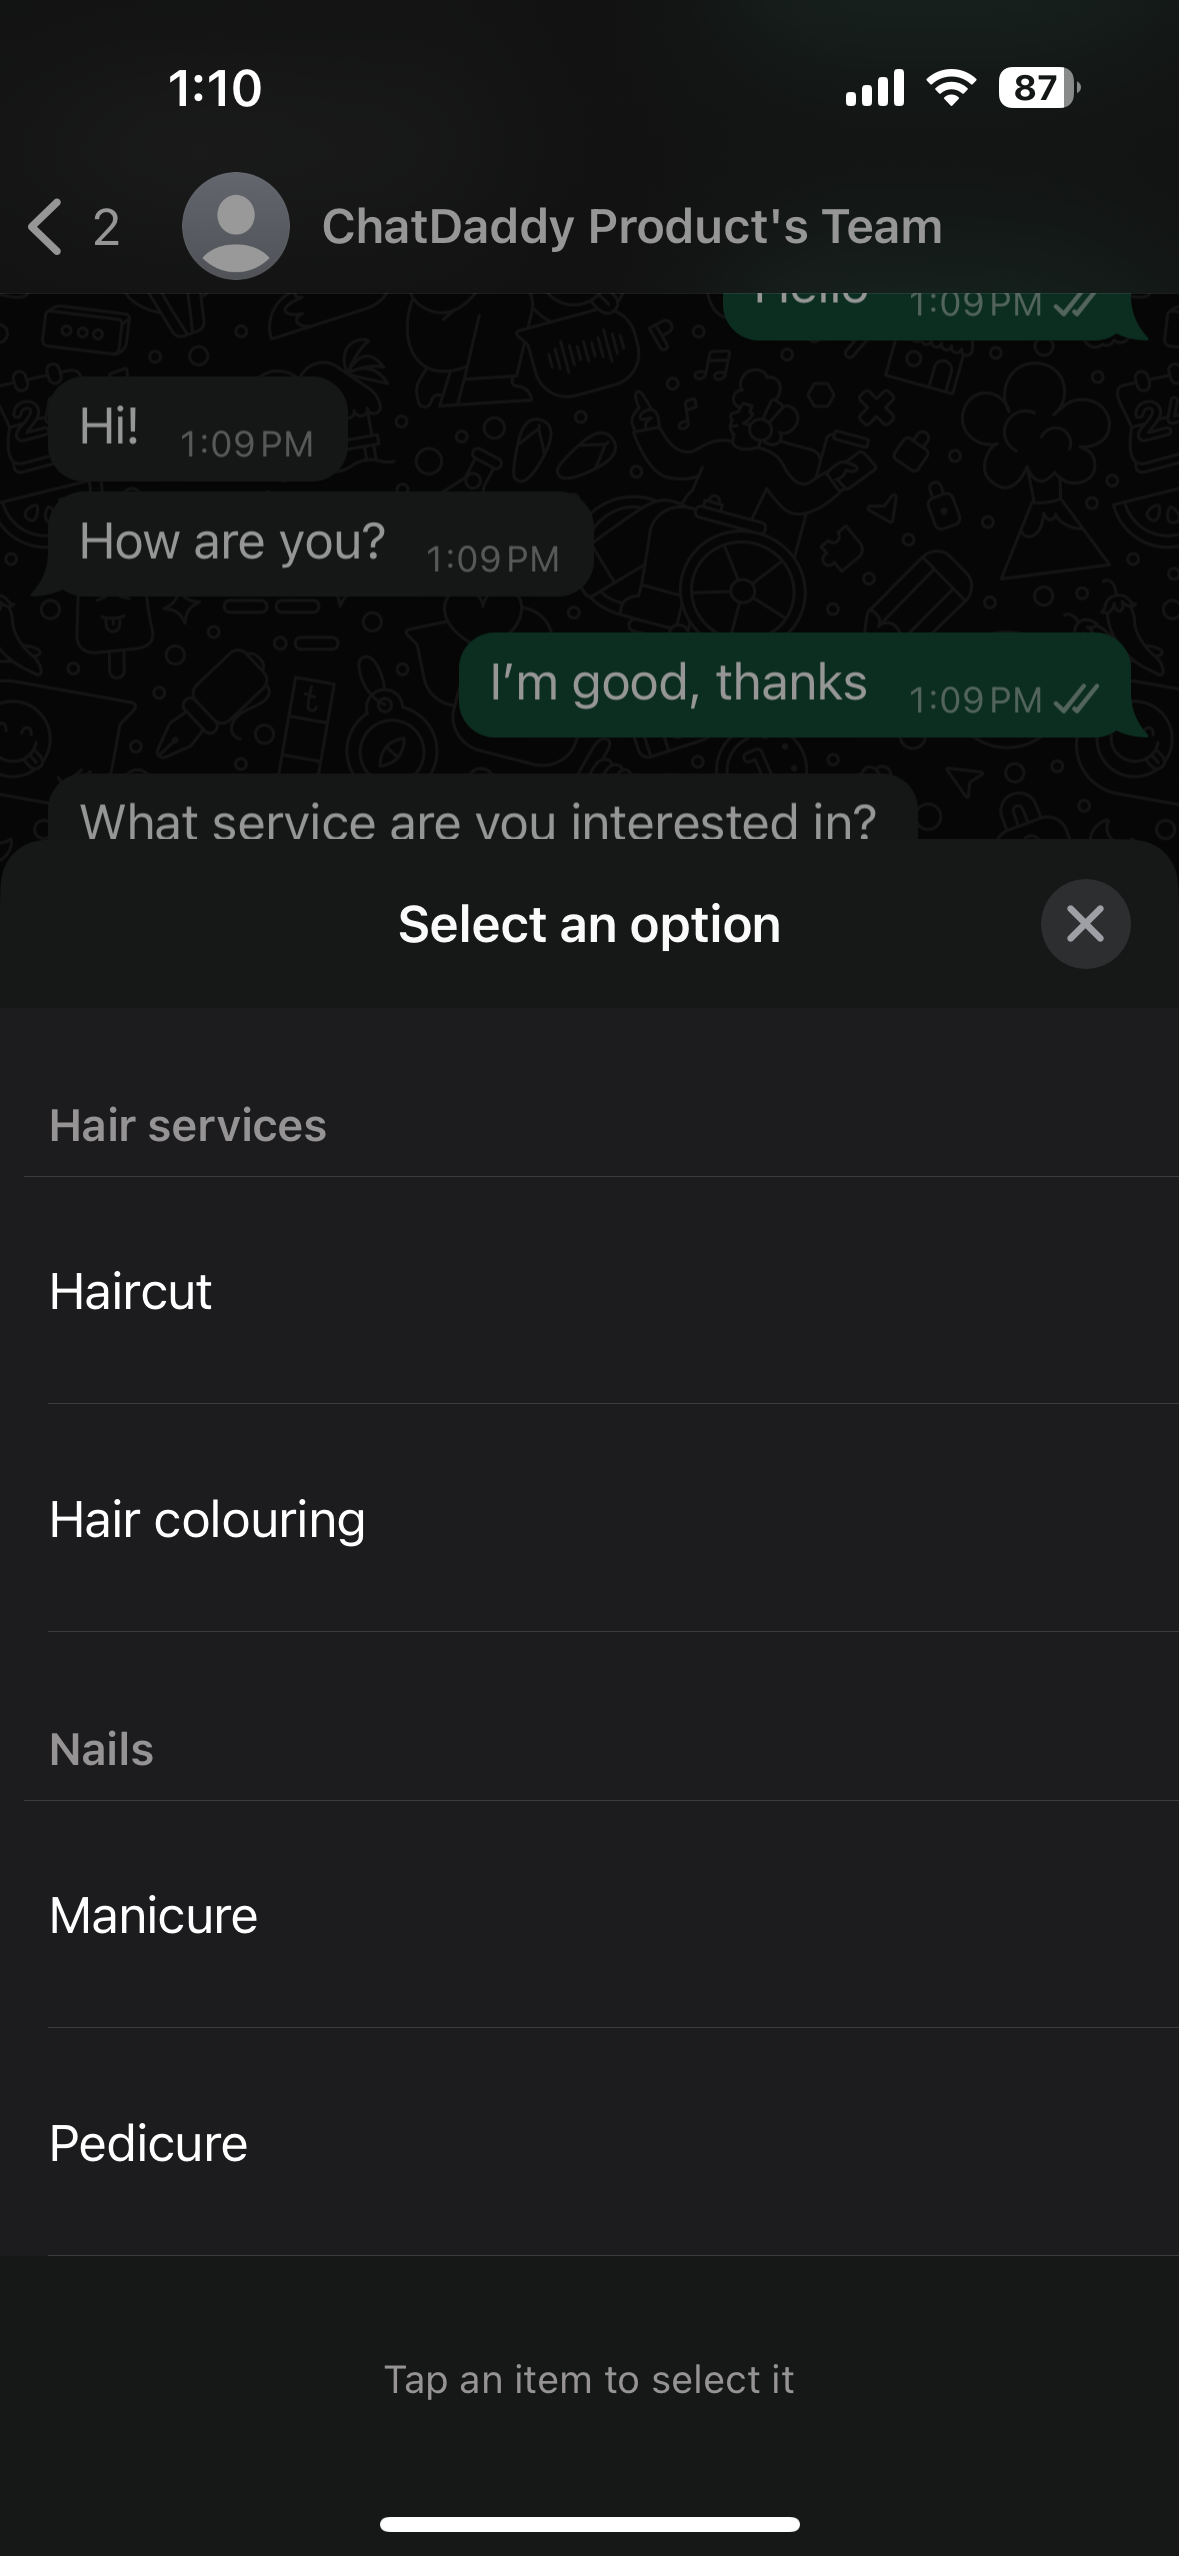
2. Lists
Lists include a menu of up to 10 options, offering a clean and consistent way for users to select an item when interacting with your business.
How to Add Lists
Step 1: Navigate to the Automation Section
- Hover over the left-hand sidebar.
- Go to “Message Flows” and click on “+ Create New Form”.
Step 2: Choose a Template or Start from Scratch
- Pick a pre-made template or click “Start from Scratch” to create your own.
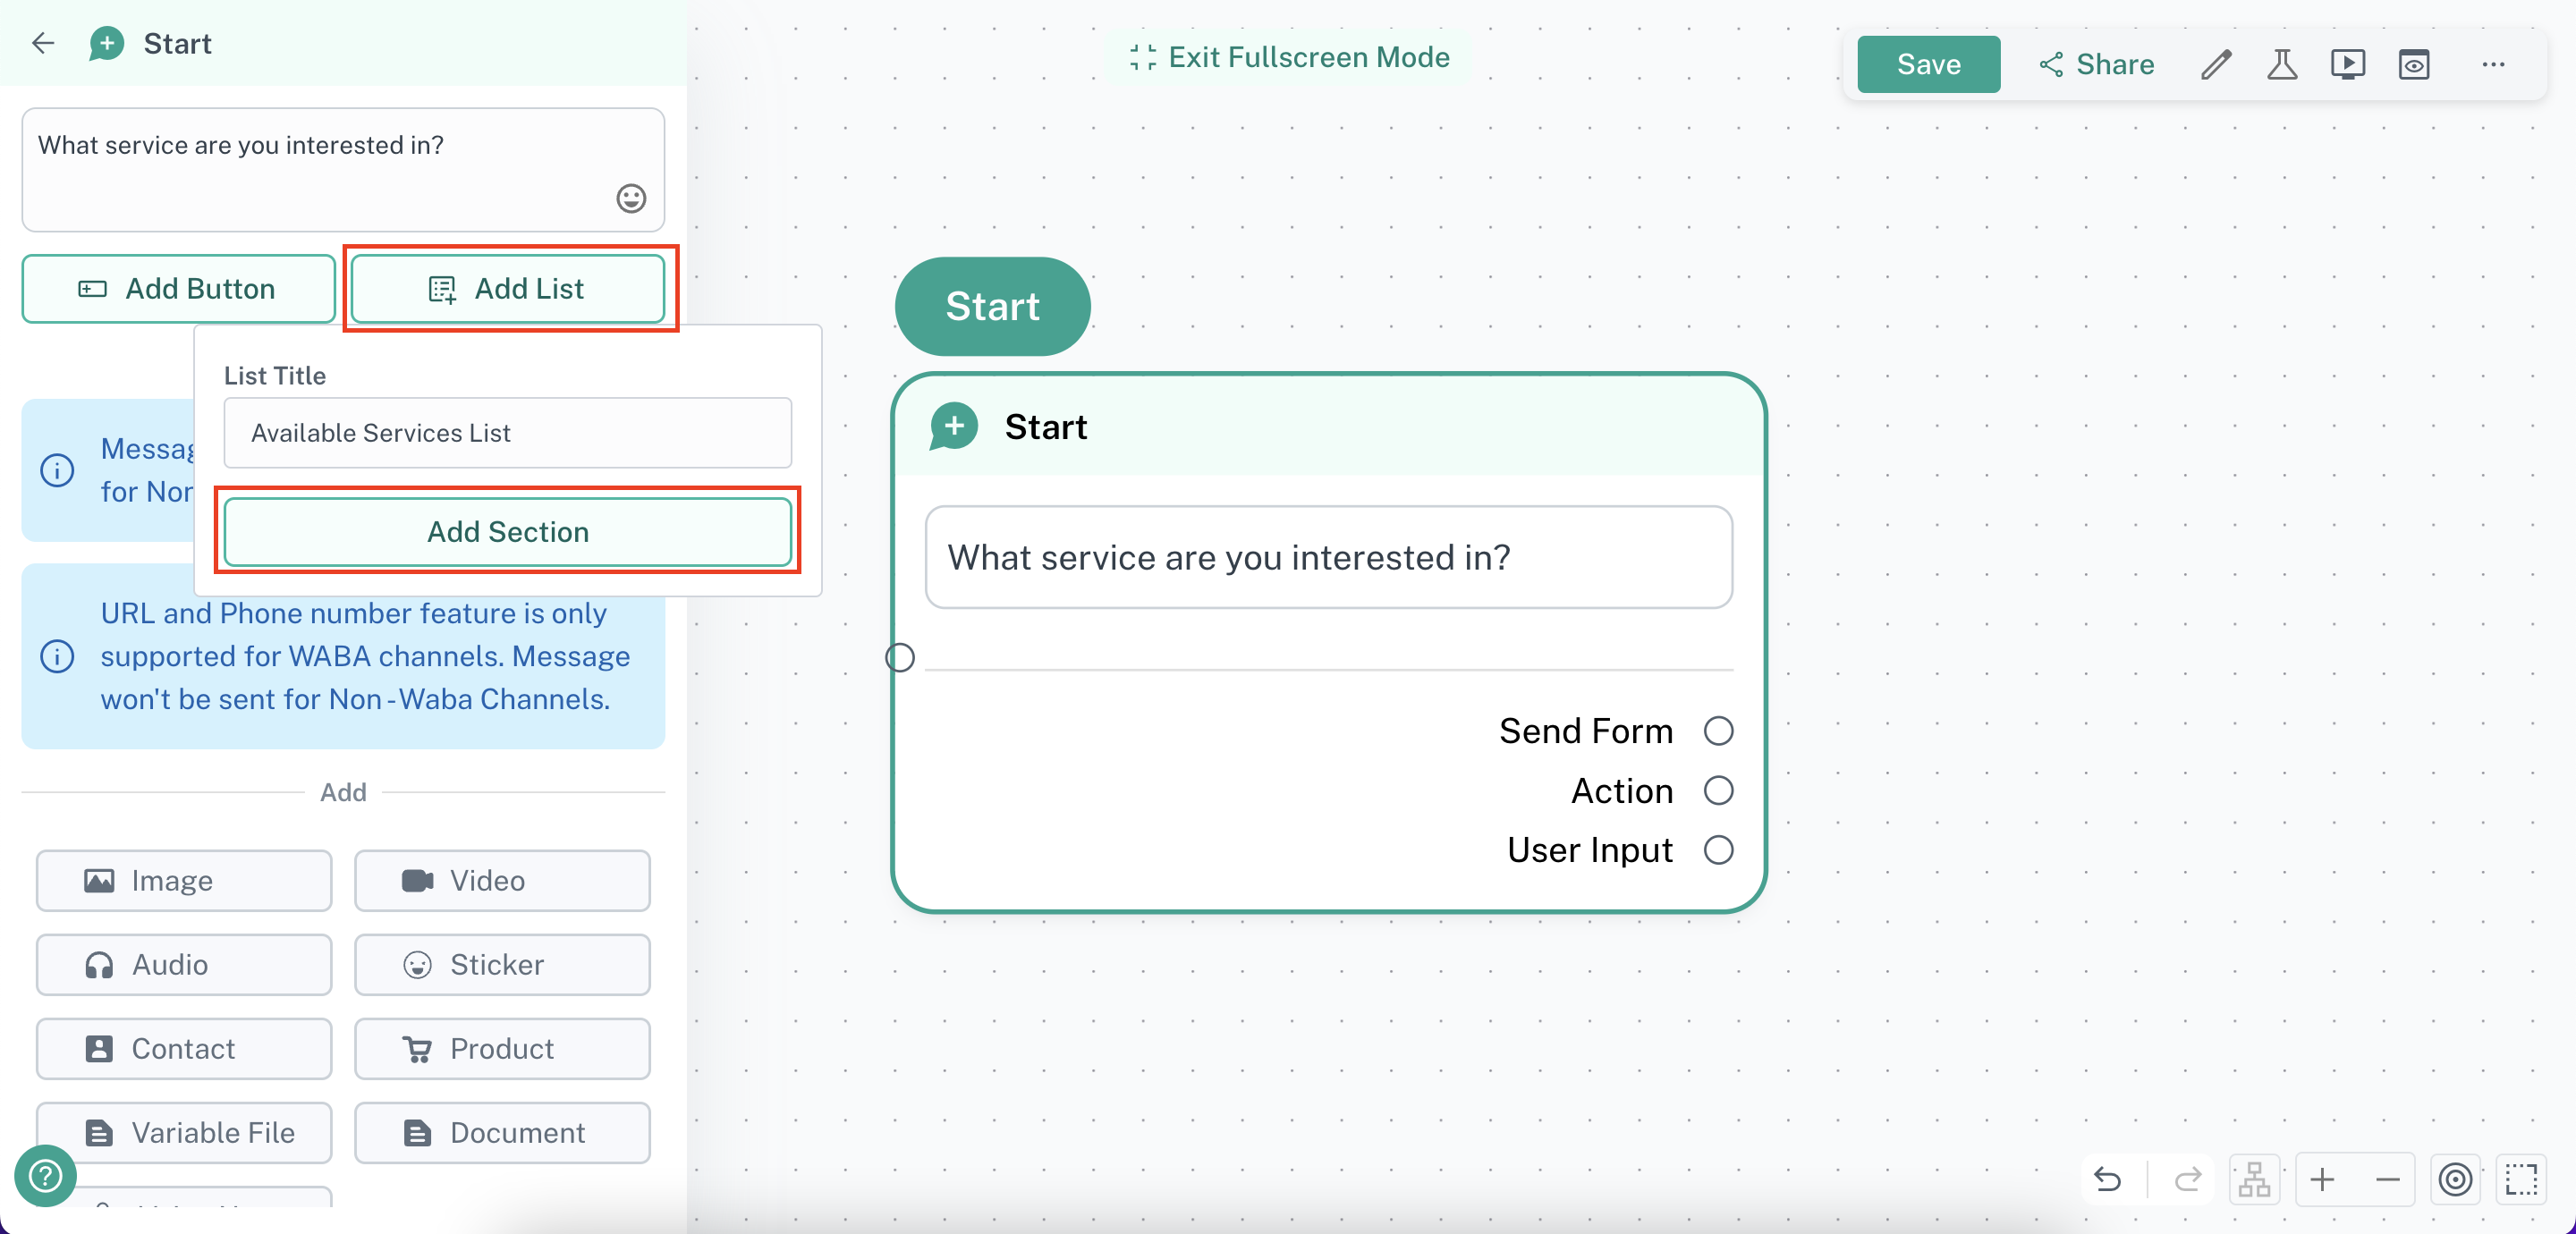
Step 3: Add Lists to a Message
- Click on the message where you want to add a list.
- Select “Add List” and give it a name.
**Note: You cannot send a message containing a list alone - you must include some message content. **
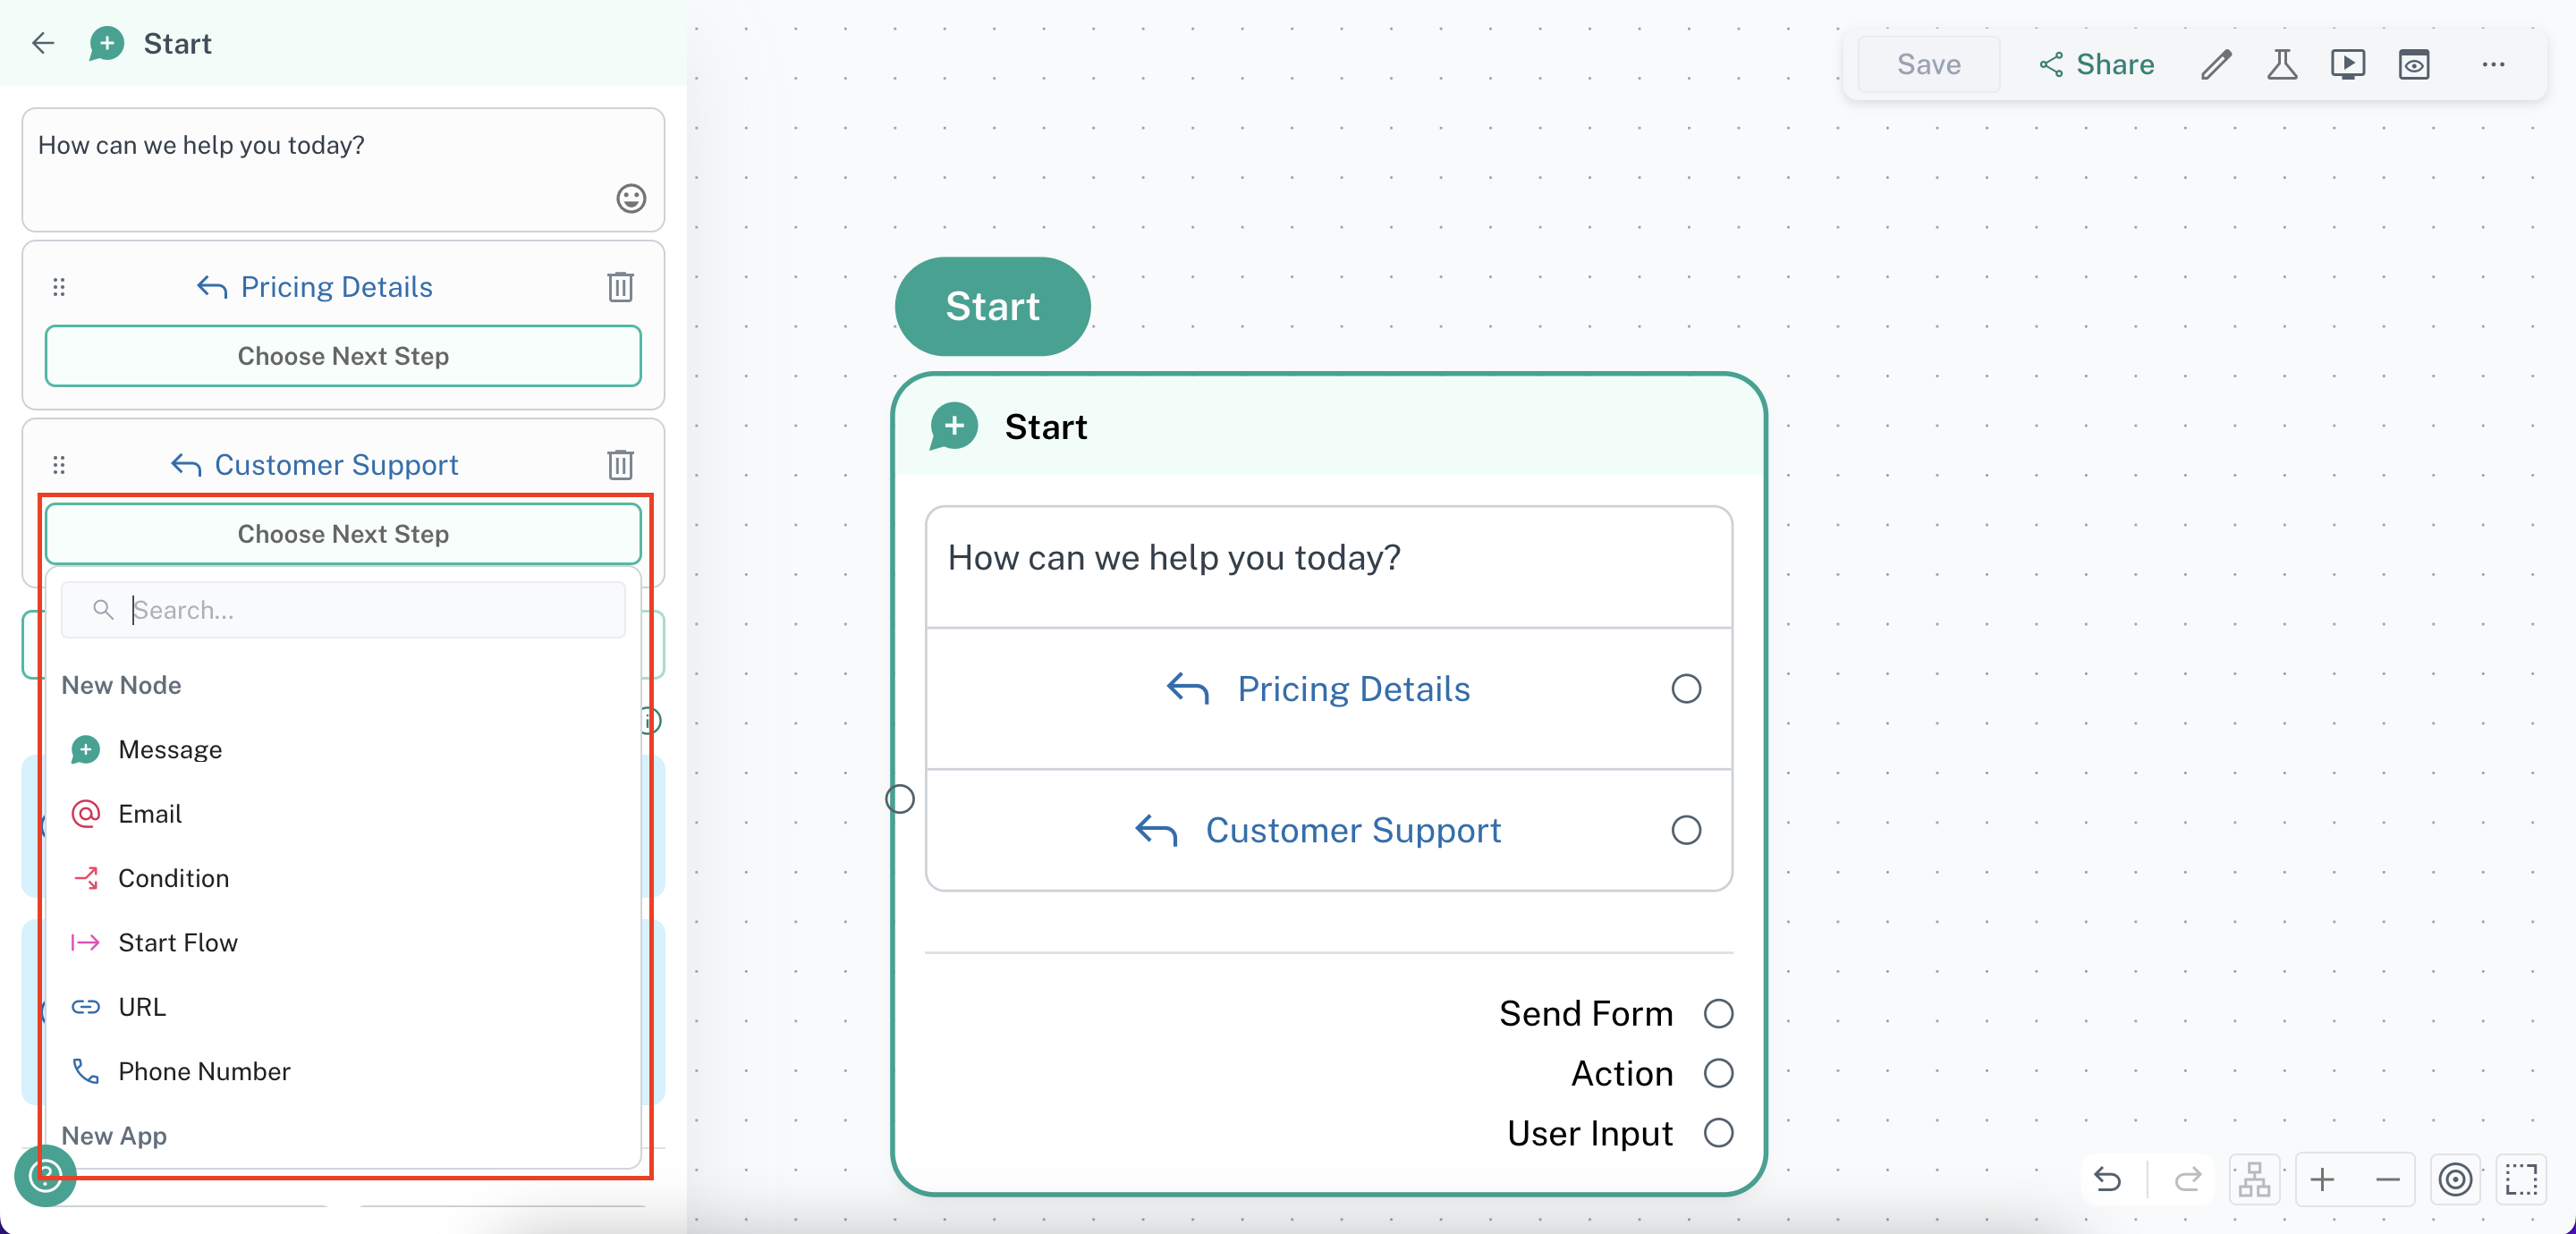
Step 4: Add Sections and Options
-
Configure sections and add options relevant to your use case.
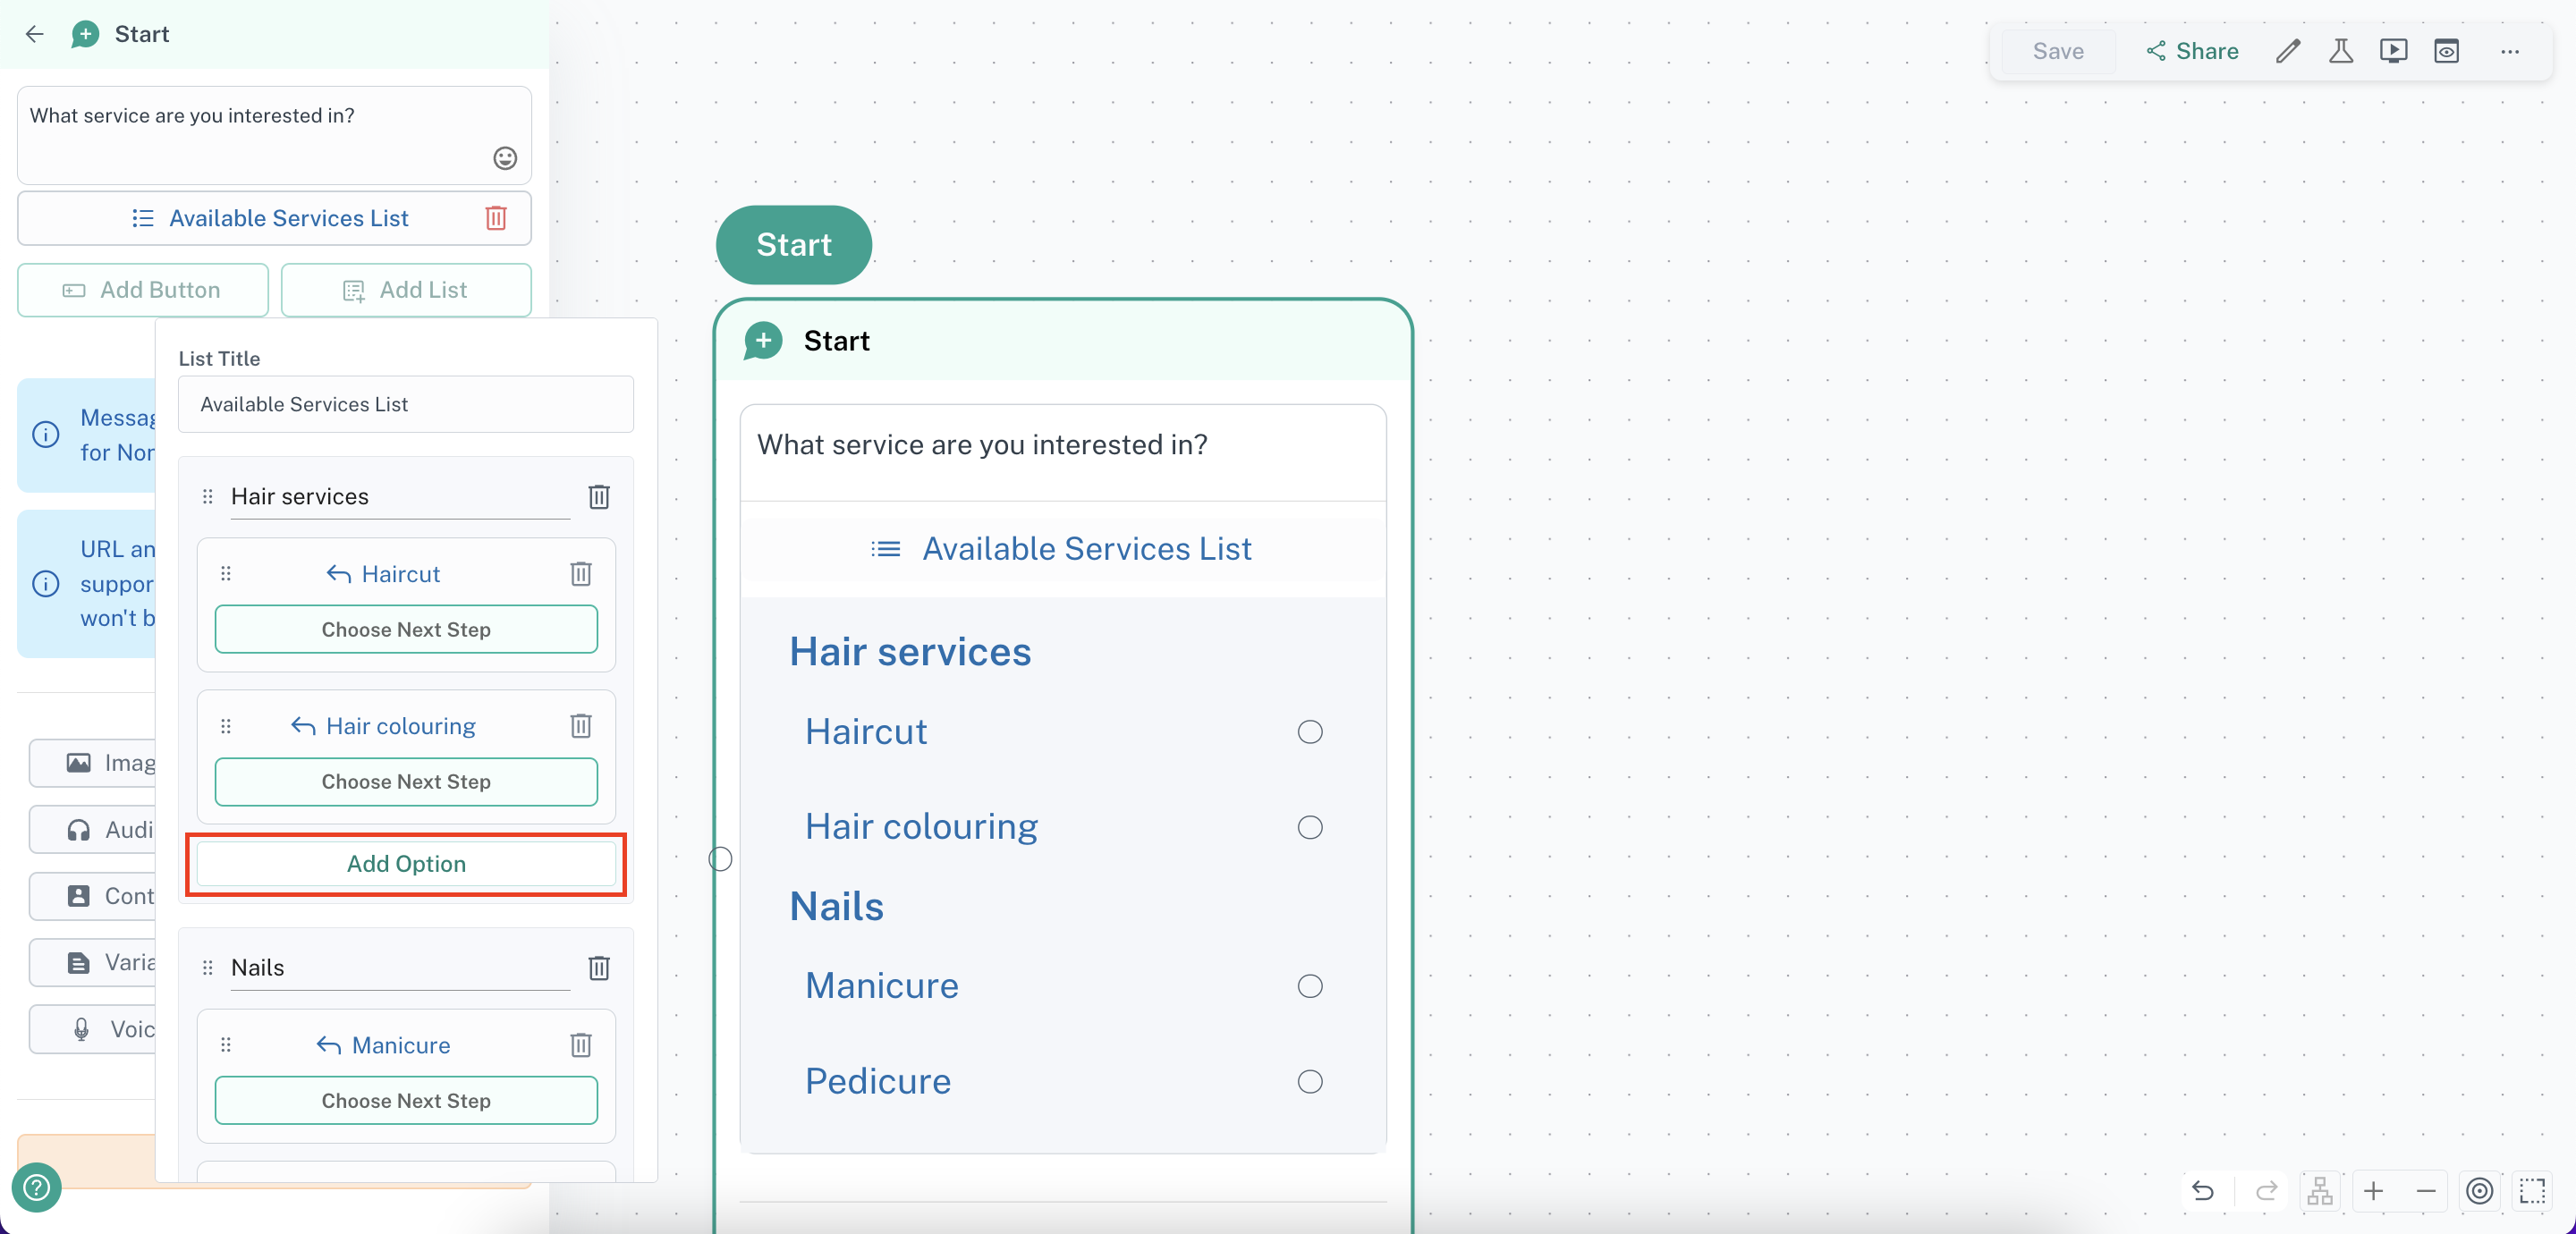
-
Click on “Choose Next Step” to set up actions for each list item.
**Make sure you fill out all options and delete any empty ones. Empty options will cause the message to fail to send. **
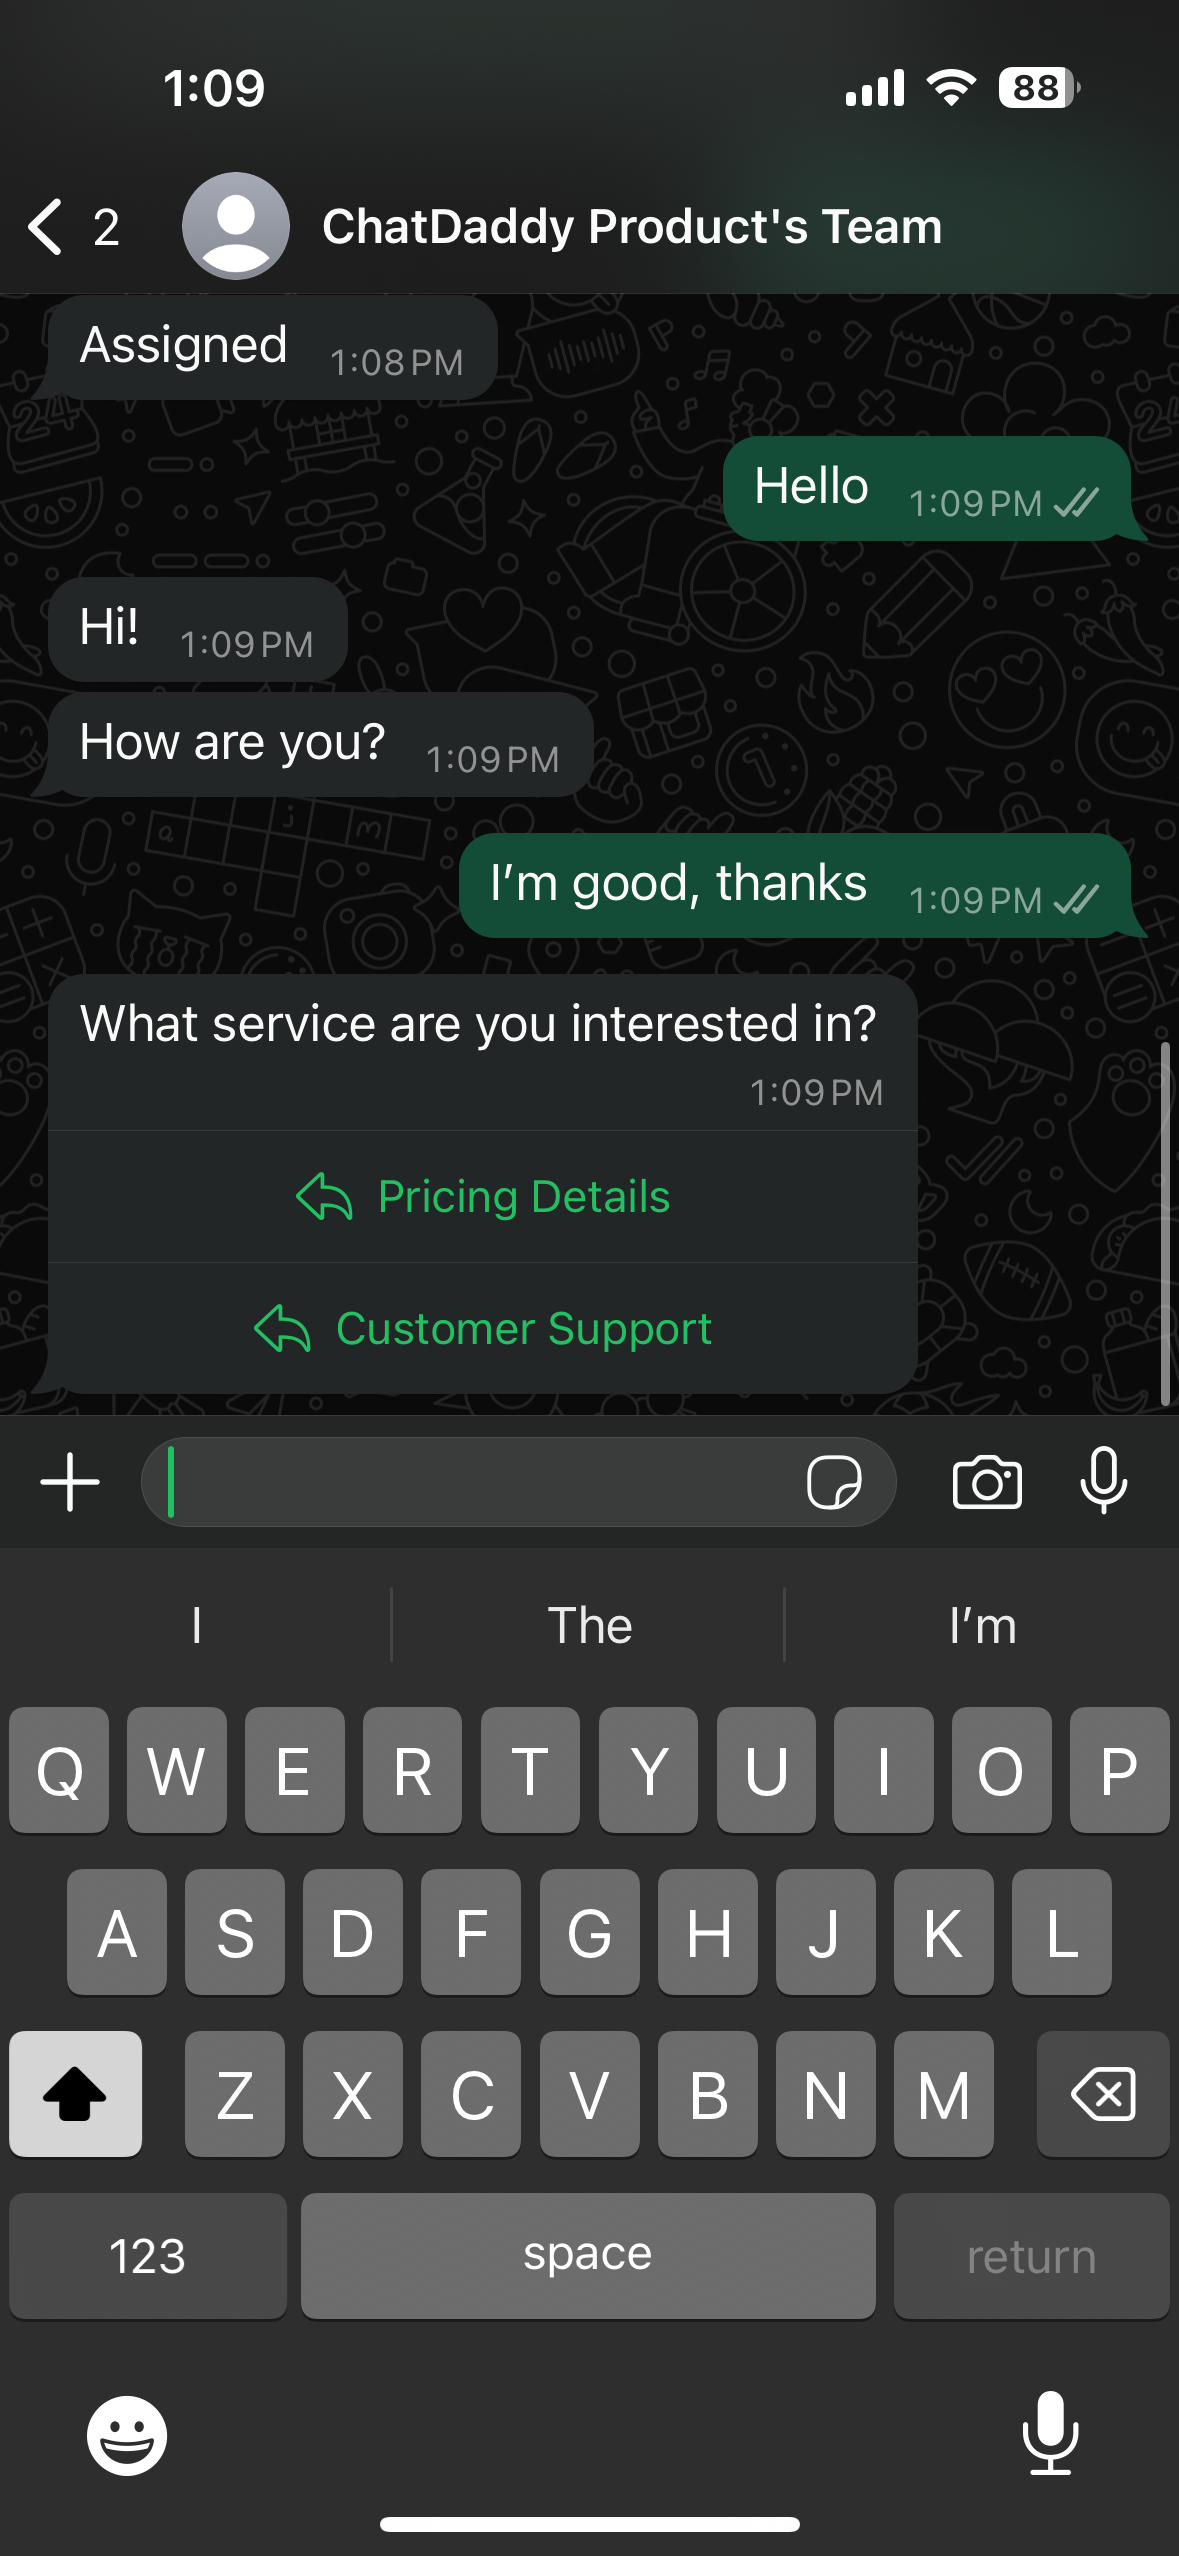
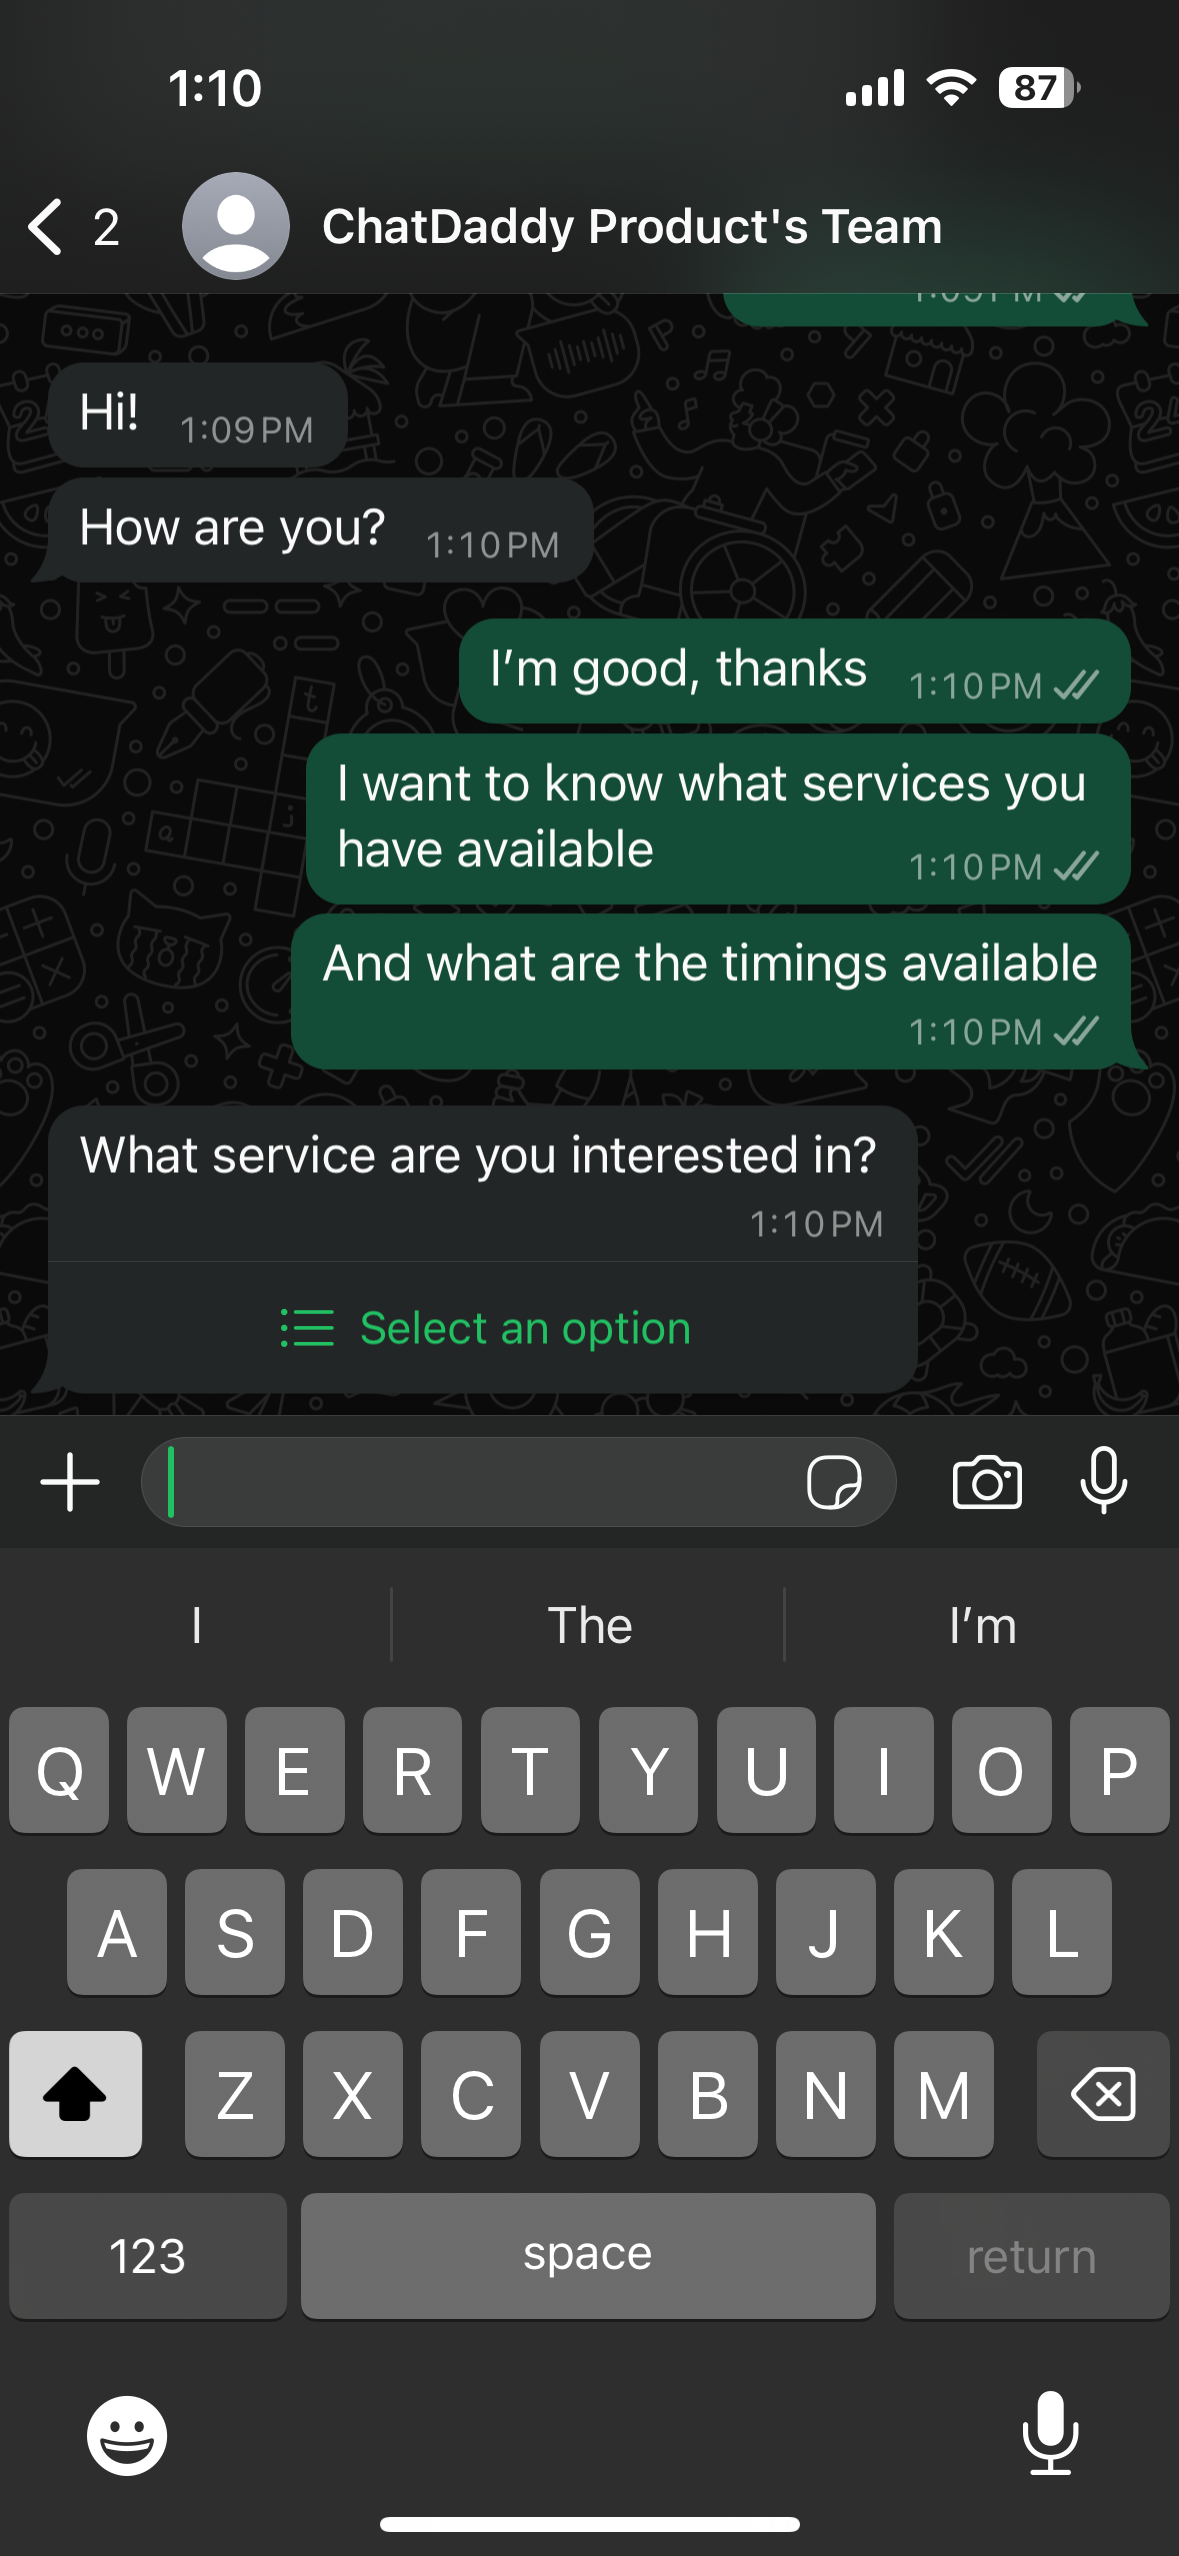
Example of Lists on WhatsApp
By following these steps, you can quickly integrate interactive messages—either buttons or lists—into your workflows to enhance customer engagement and response rates!