How to create a broadcast
Broadcast is a powerful tool that allows you to send targeted messages to a large group of users at once, saving you time and effort.
Broadcast is a powerful tool that allows you to send targeted messages to a large group of users at once, saving you time and effort.
Steps to Create a Broadcast
1. Select Contacts
- Go to the ChatDaddy Dashboard.
- Hover over the left-side menu and find Automation > Broadcasts.
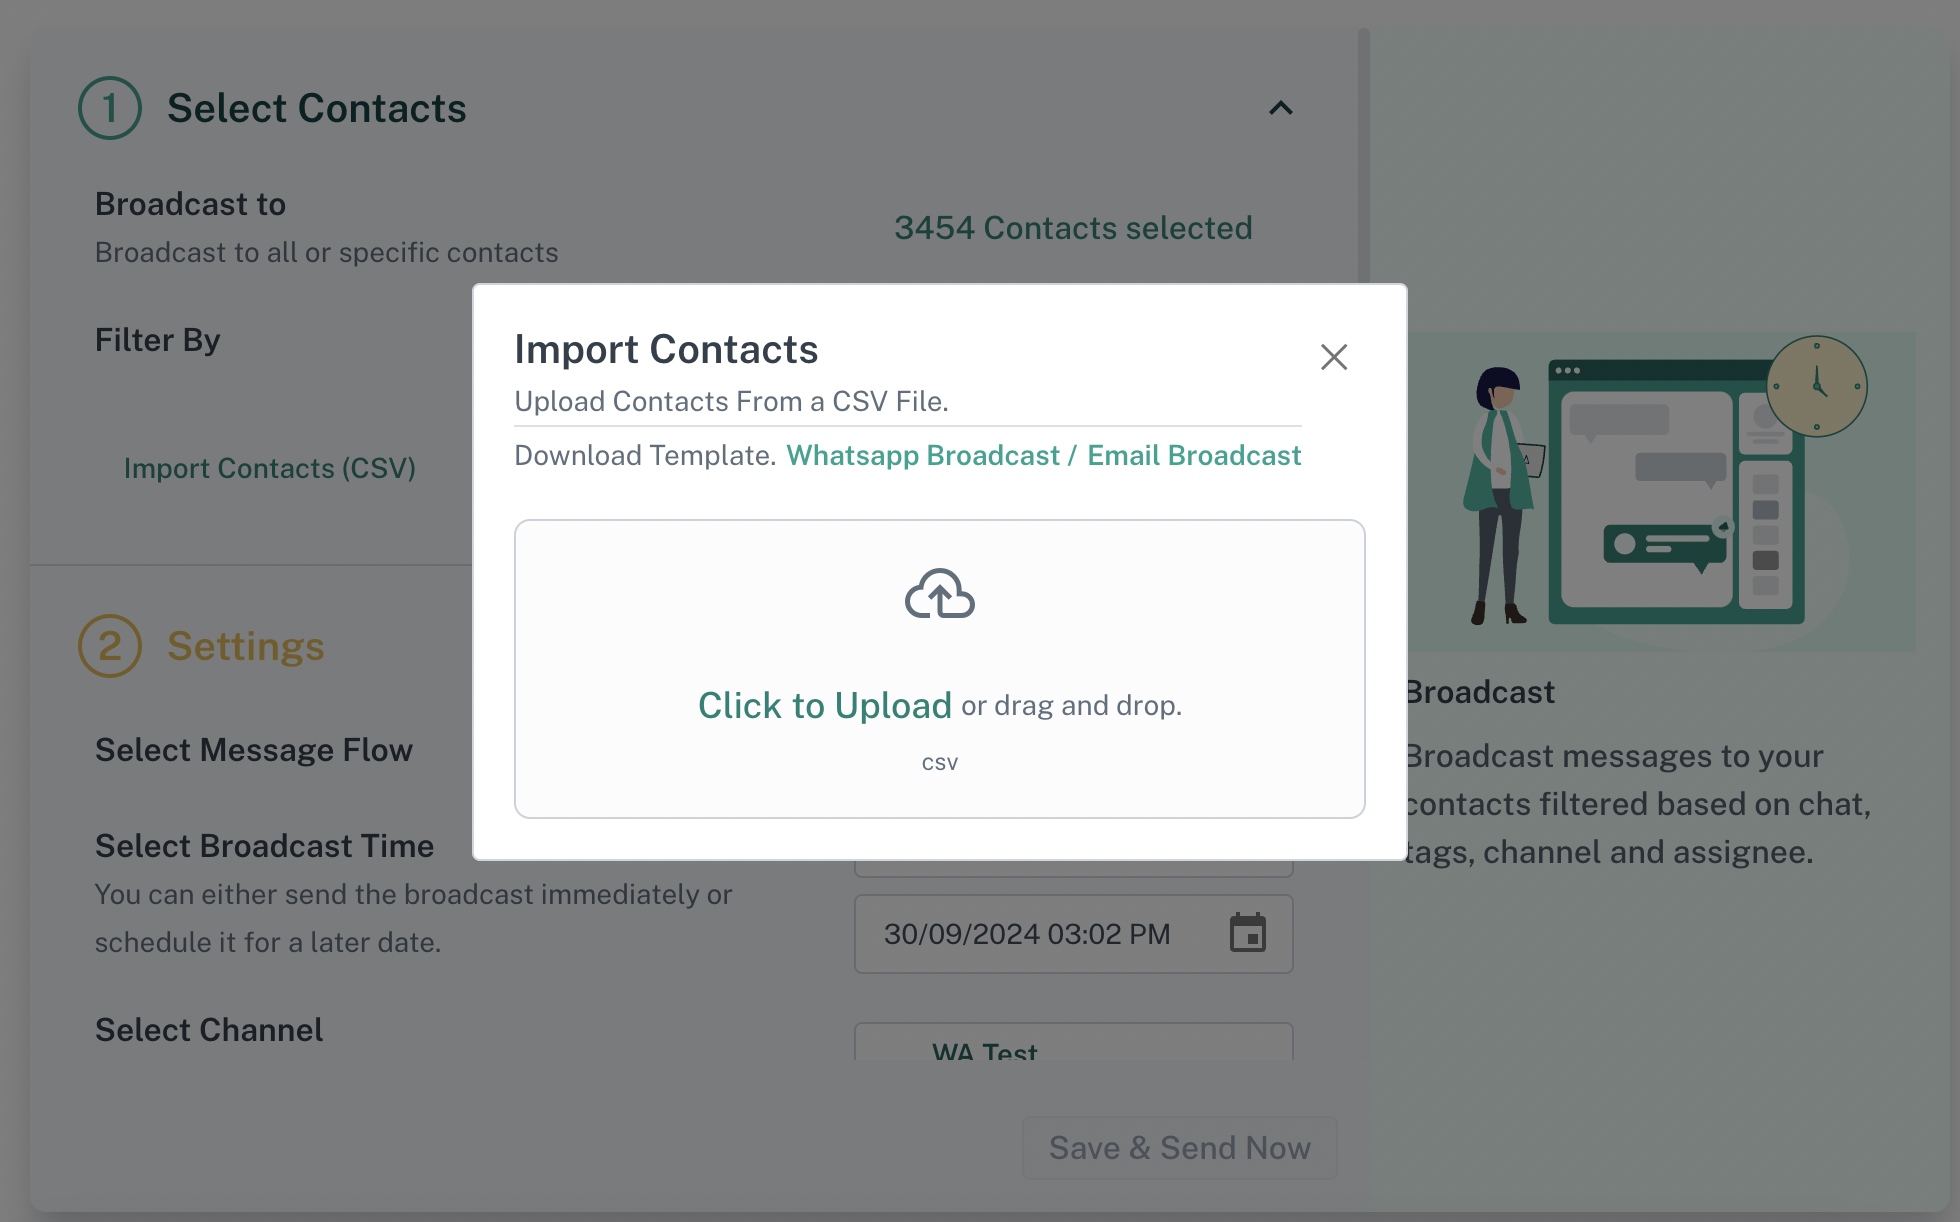
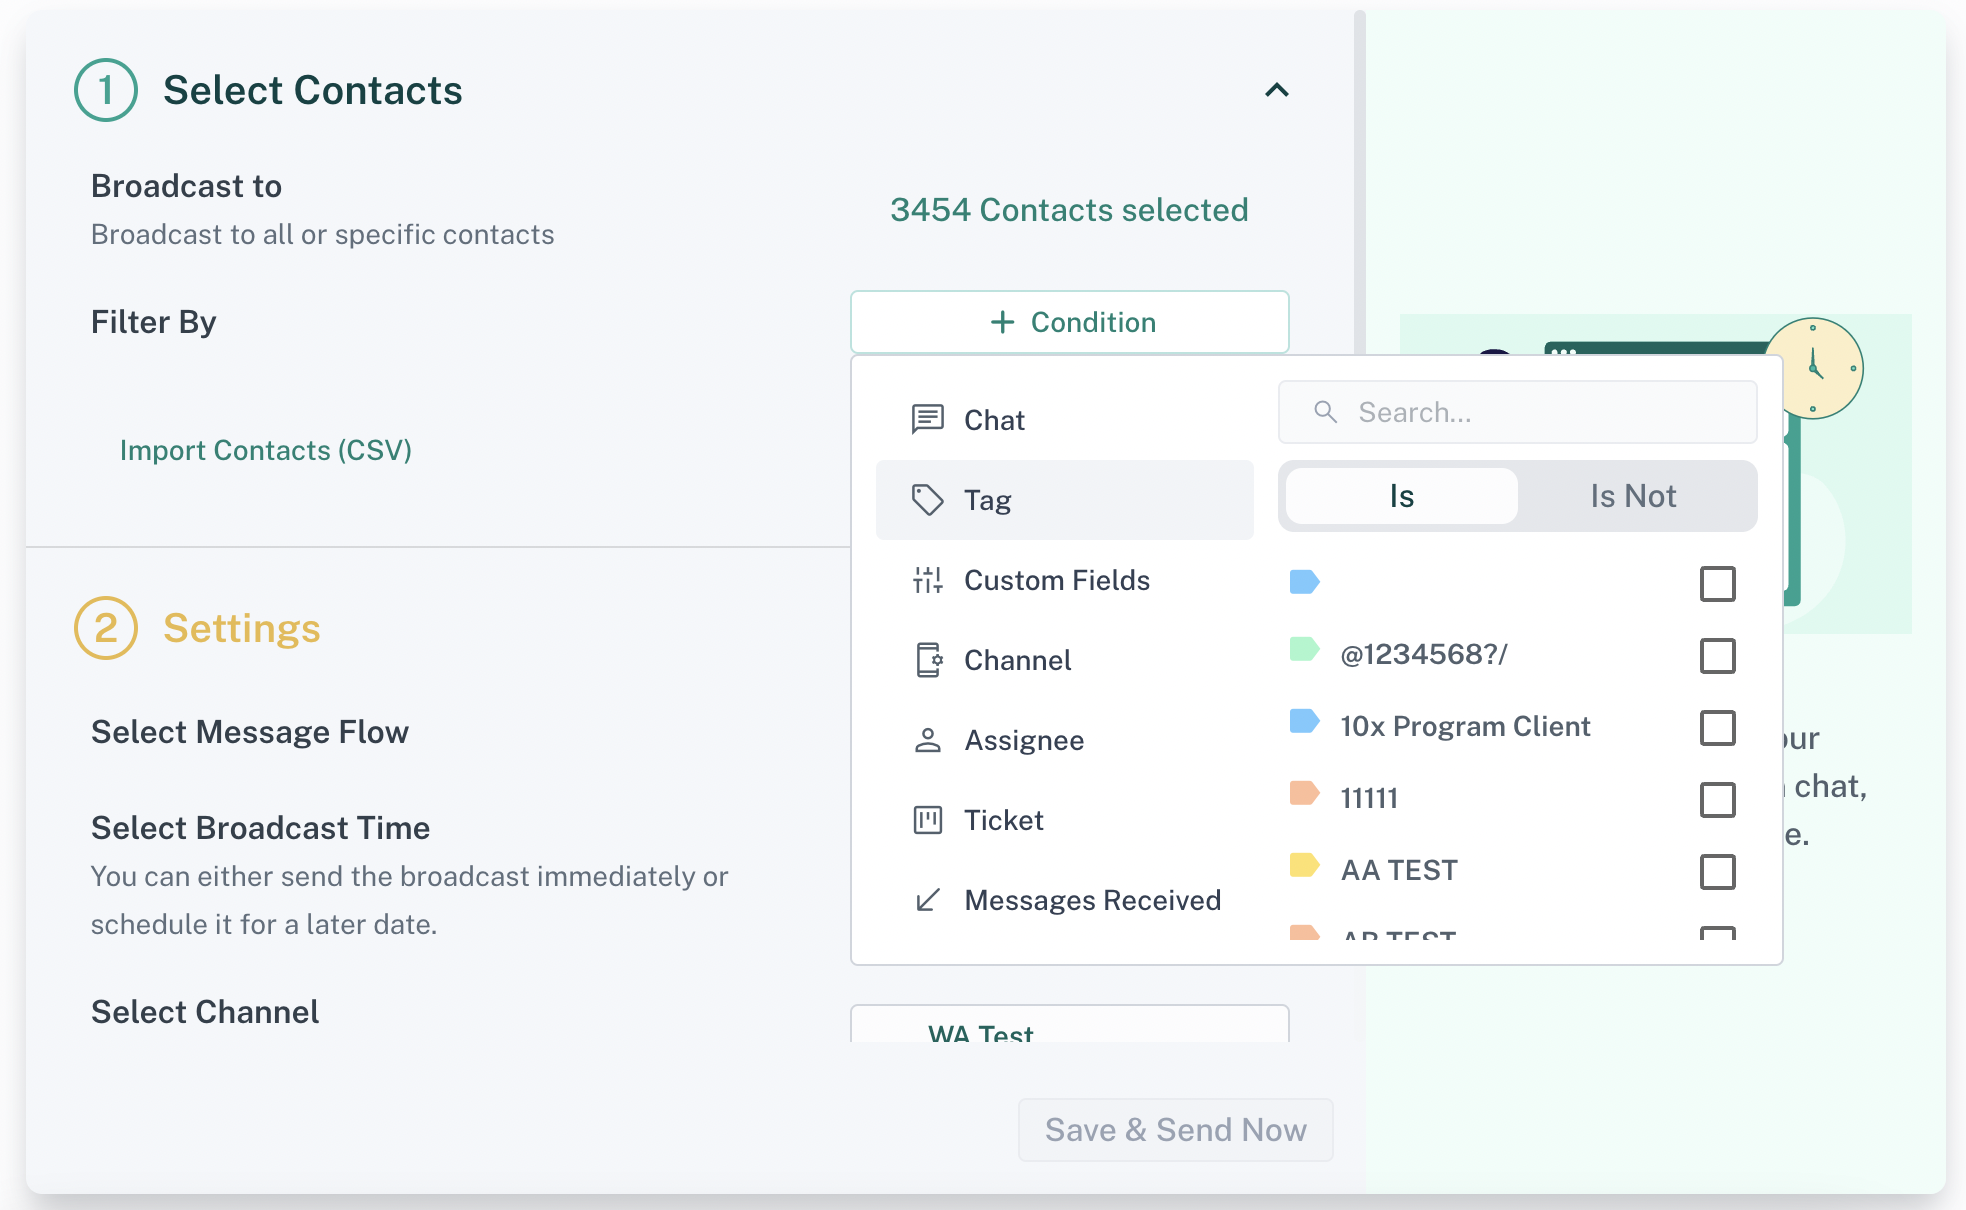
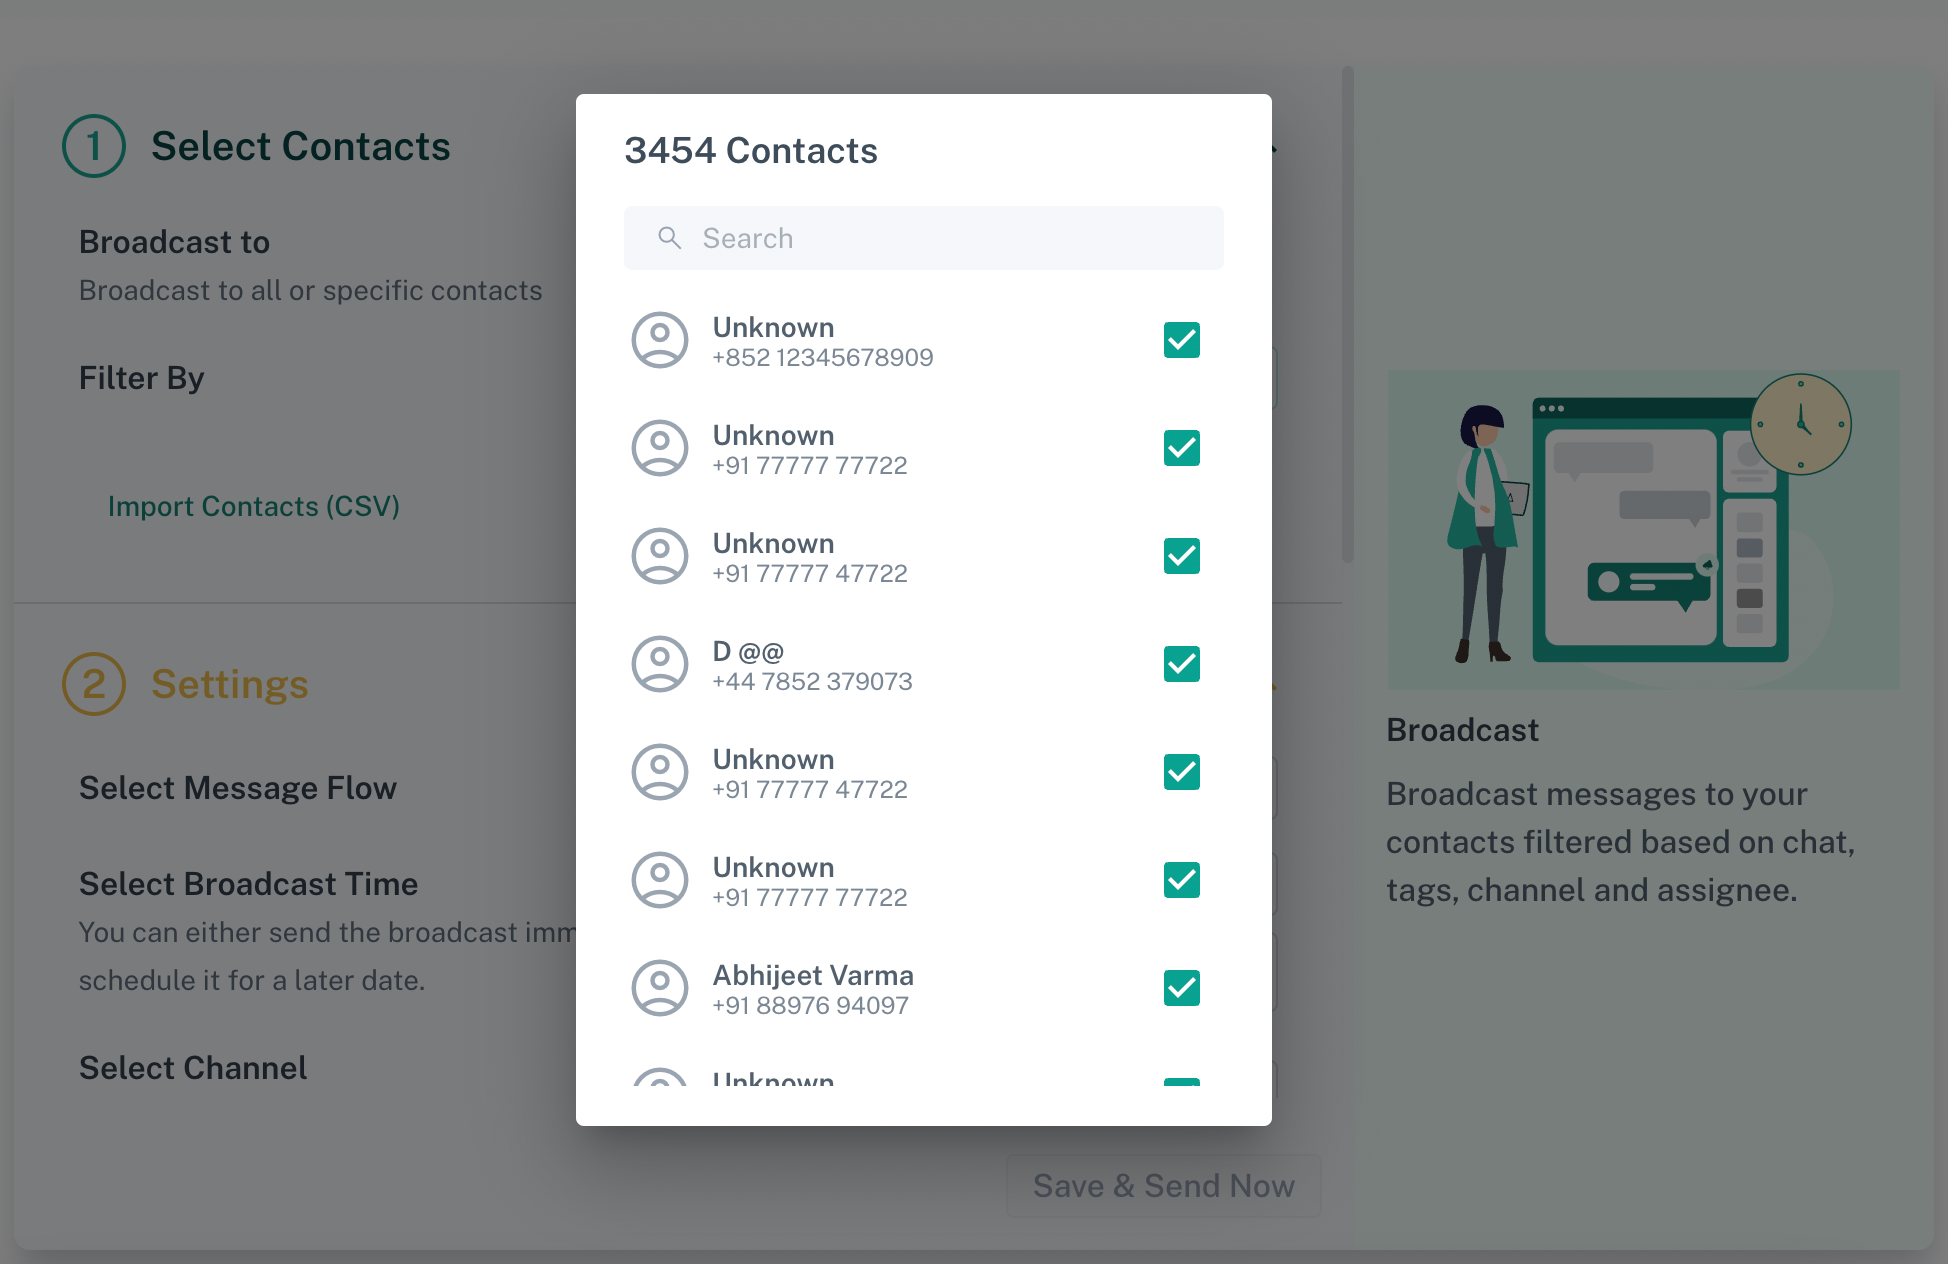
- Click the Create button in the top-right corner to start. You have 3 ways to choose your target recipients:
- Import CSV Download the provided template, fill it with your contacts, and upload it.
- Filter Contacts Using Conditions Use tags, assignee, channel, or other filters to narrow down your audience.
- Manually Select Contacts Manually pick contacts from a dropdown list.
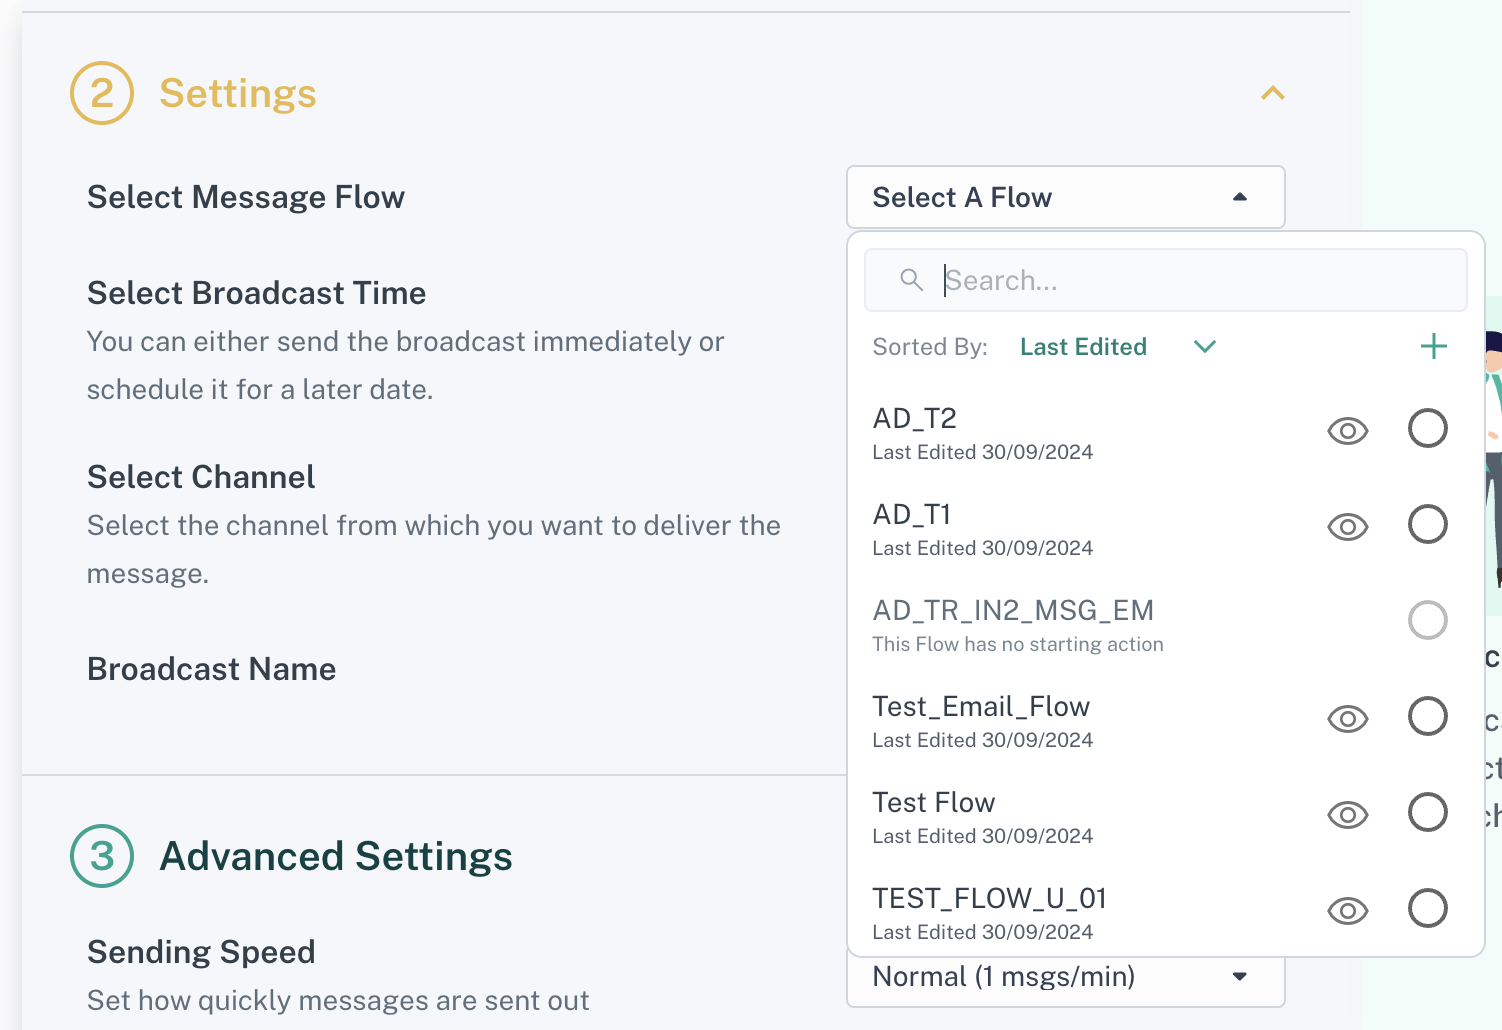
2. Configure Settings
- Choose or Create a Message Flow Select the message flow you want to send.
- Schedule Your Broadcast Send the message immediately or schedule it for a later time.
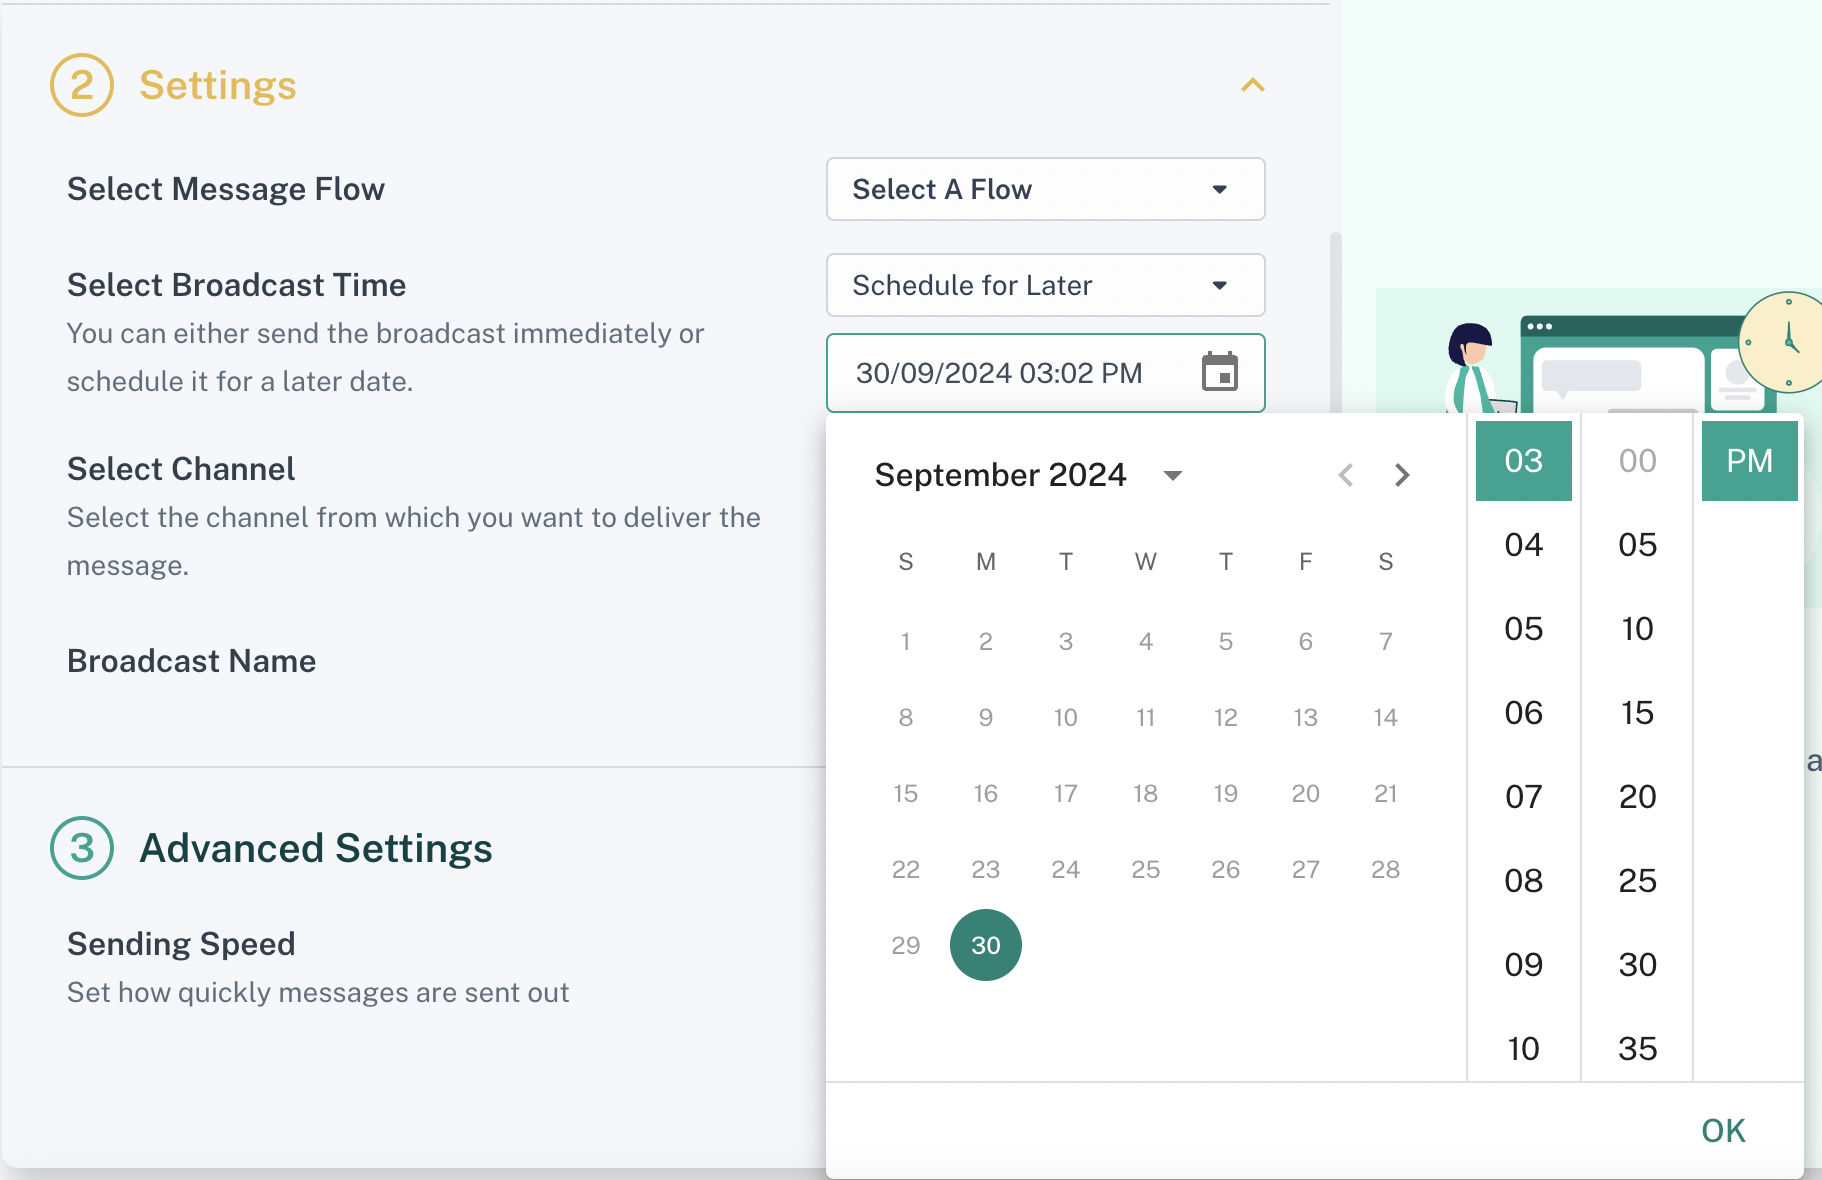
- Select a Channel Choose the channel to send your broadcast.
Note: Avoid selecting multiple channels in one broadcast. This may cause inconsistent delivery. Stick to one channel for reliable results.
- Assign a Name Add a clear, recognizable name to your broadcast for future reference.
3. Adjust Advanced Settings
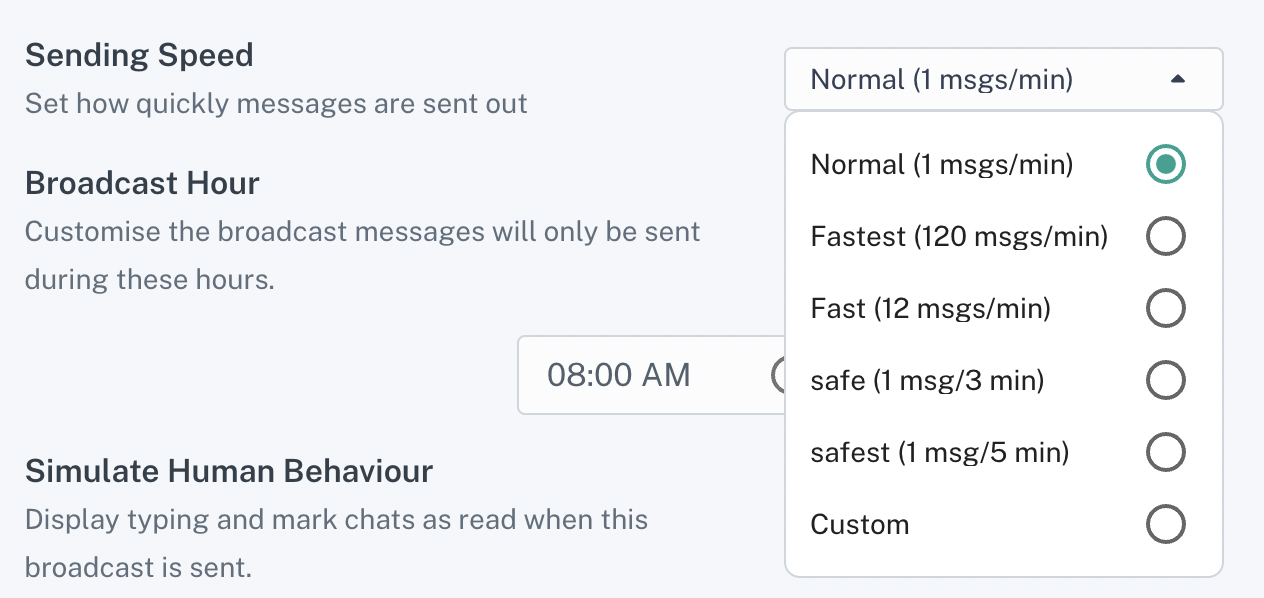
- Sending Speed Decide how quickly messages are sent:
- Safe (lower risk)
- Fastest
- Custom speed
❗ Important for Non-WABA Users:
- Only broadcast to contacts with whom you have chat history.
- Keep sending speed at Slow/Normal to avoid bans.
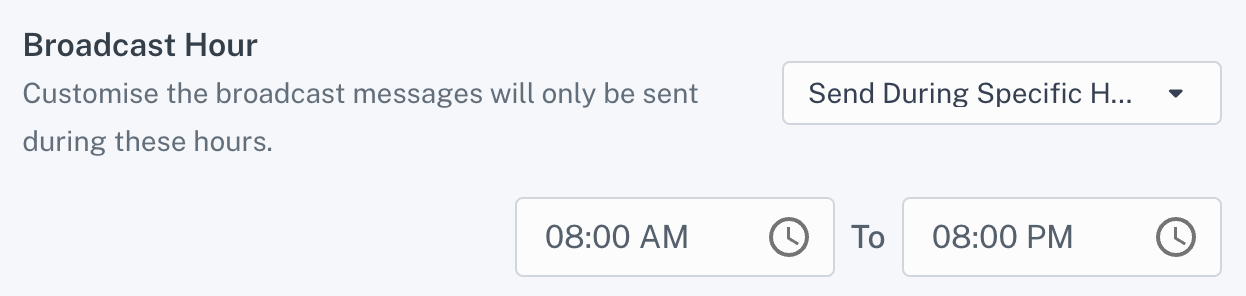
- Broadcast Hours Specify a time window for message delivery.
-
Simulate Human Behavior Make broadcasts appear natural by simulating typing and marking messages as read.
-
Cancel Following Messages on Client Response If your message flow has branches, this setting stops further messages when the recipient responds.
4. Final Review and Send
- Review all settings:
- Recipients
- Message content
- Scheduling
- Channel
- Once everything looks good, click Save & Send at the bottom-right.
By following these steps, you can efficiently send broadcasts to reach your target audience while ensuring consistency and effectiveness.