How to Auto-Update Contact Info from ChatDaddy to Notion
This guide will walk you through how to set up a ChatDaddy automation flow that automatically sends contact info into a Notion database when a tag is updated.
This guide will walk you through how to set up a ChatDaddy automation flow that automatically sends contact info into a Notion database when a tag is updated.
🔁 Use Case
Once completed, your flow will:
- Detect when a contact is updated (e.g. added a new tag “Testing”)
- Send the contact infos to a Notion database
- Auto-create a new row in your chosen Notion table
🛠️ Step-by-Step Setup
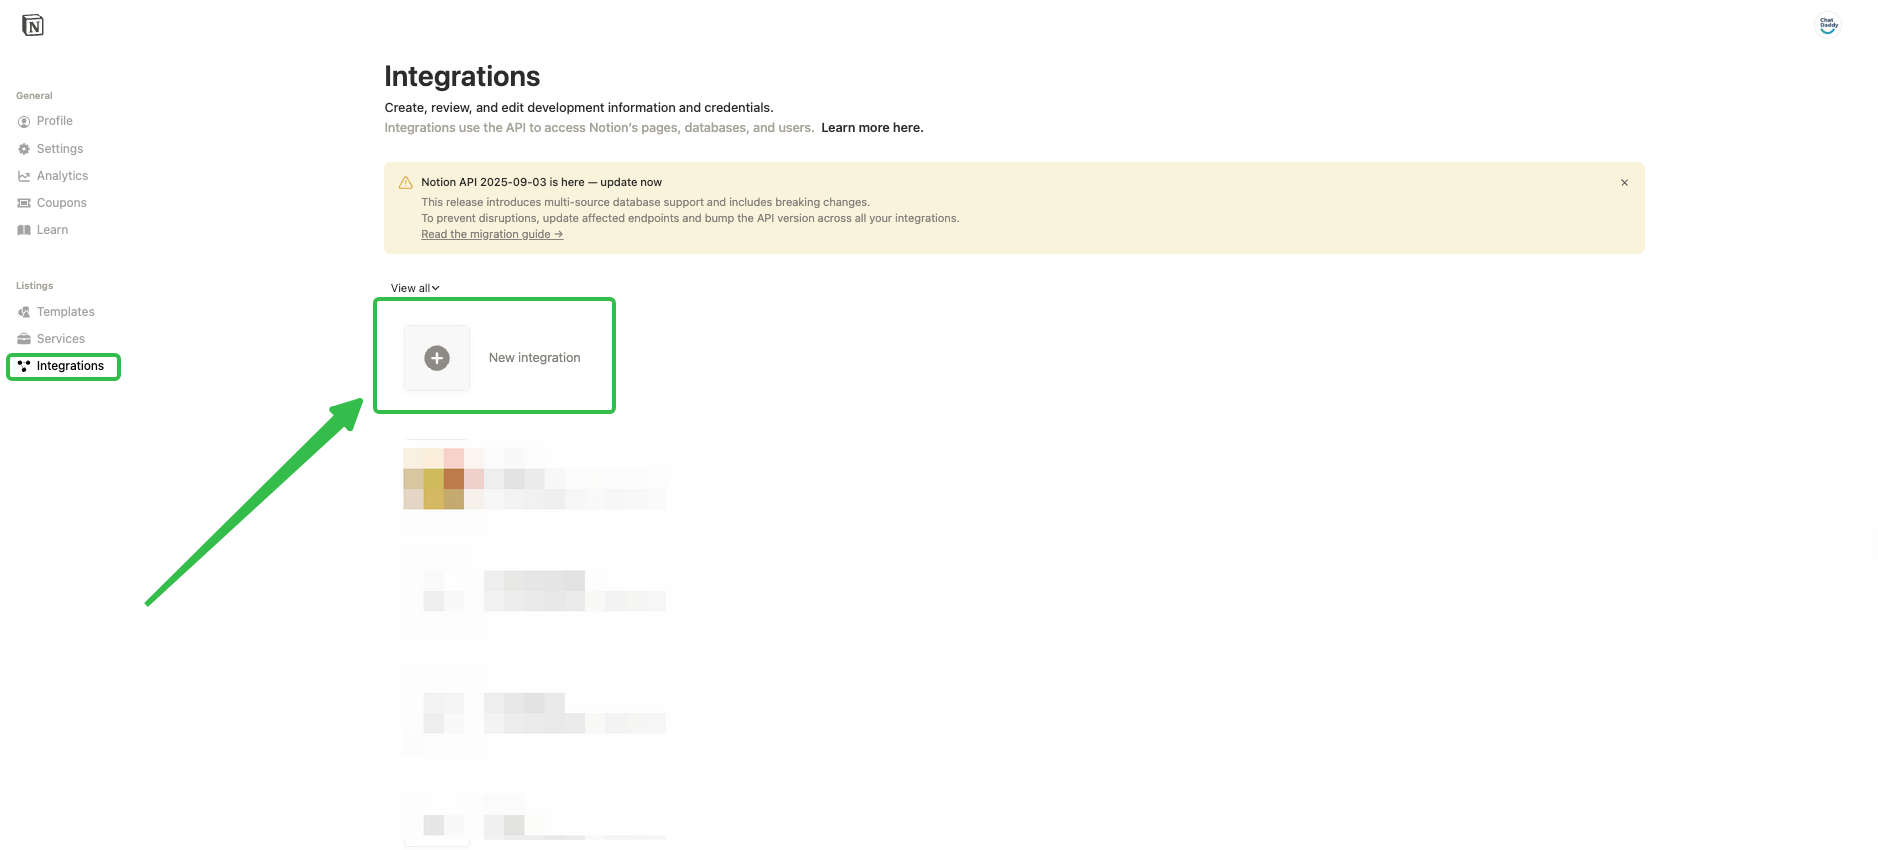
🧩 Step 1: Create a Notion Integration and Share Access
-
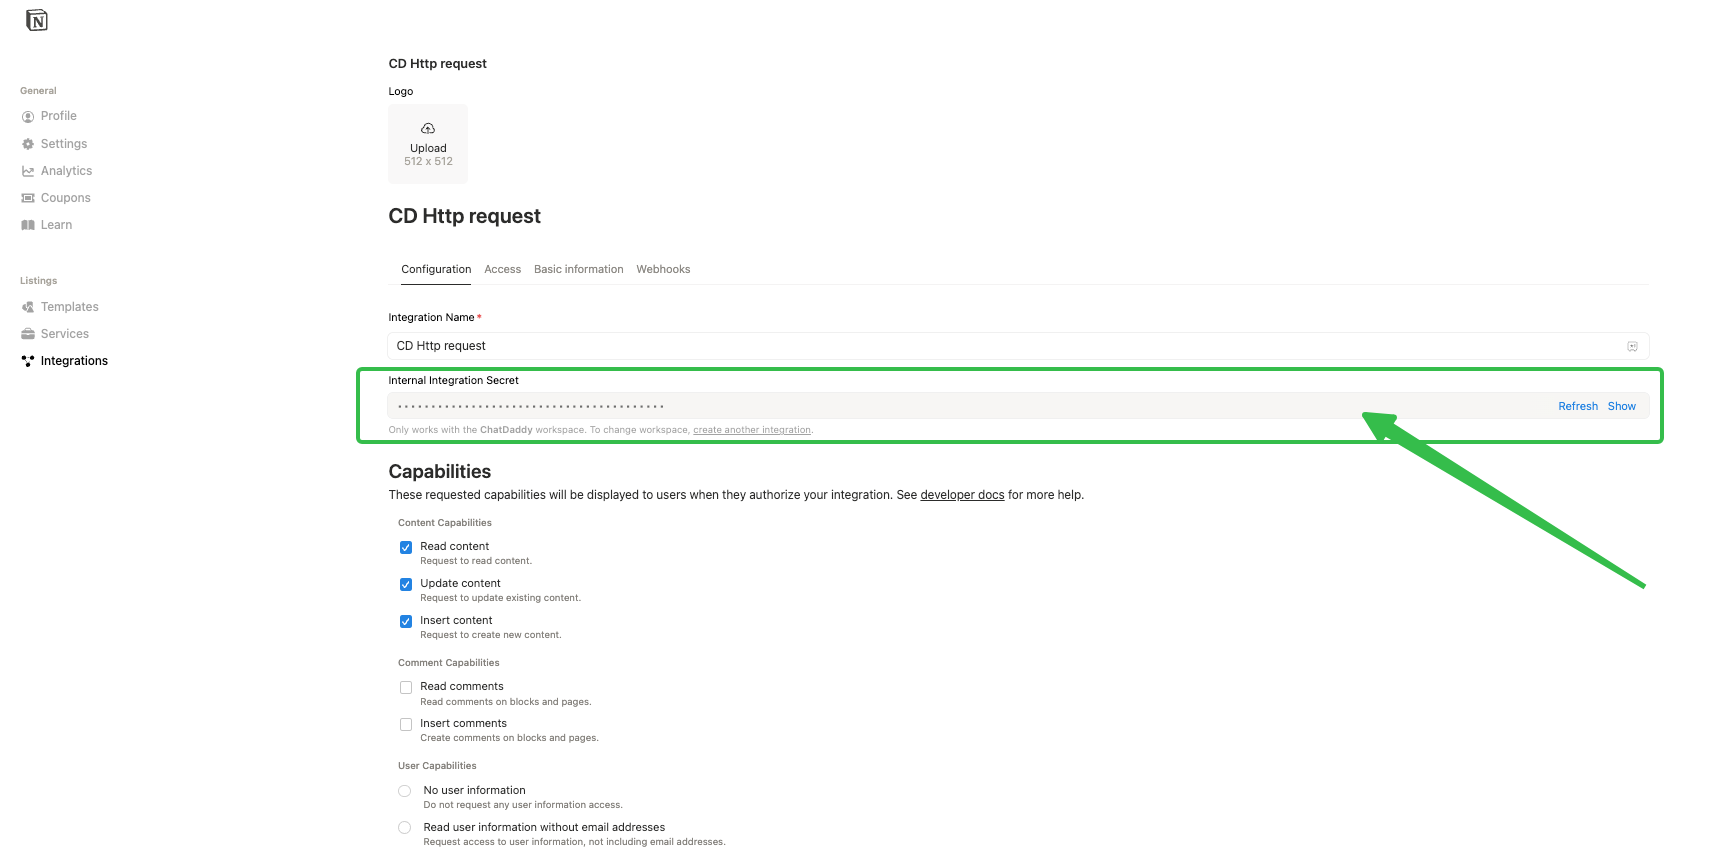
Create a new internal integration
-
copy the Internal Integration Secret
-
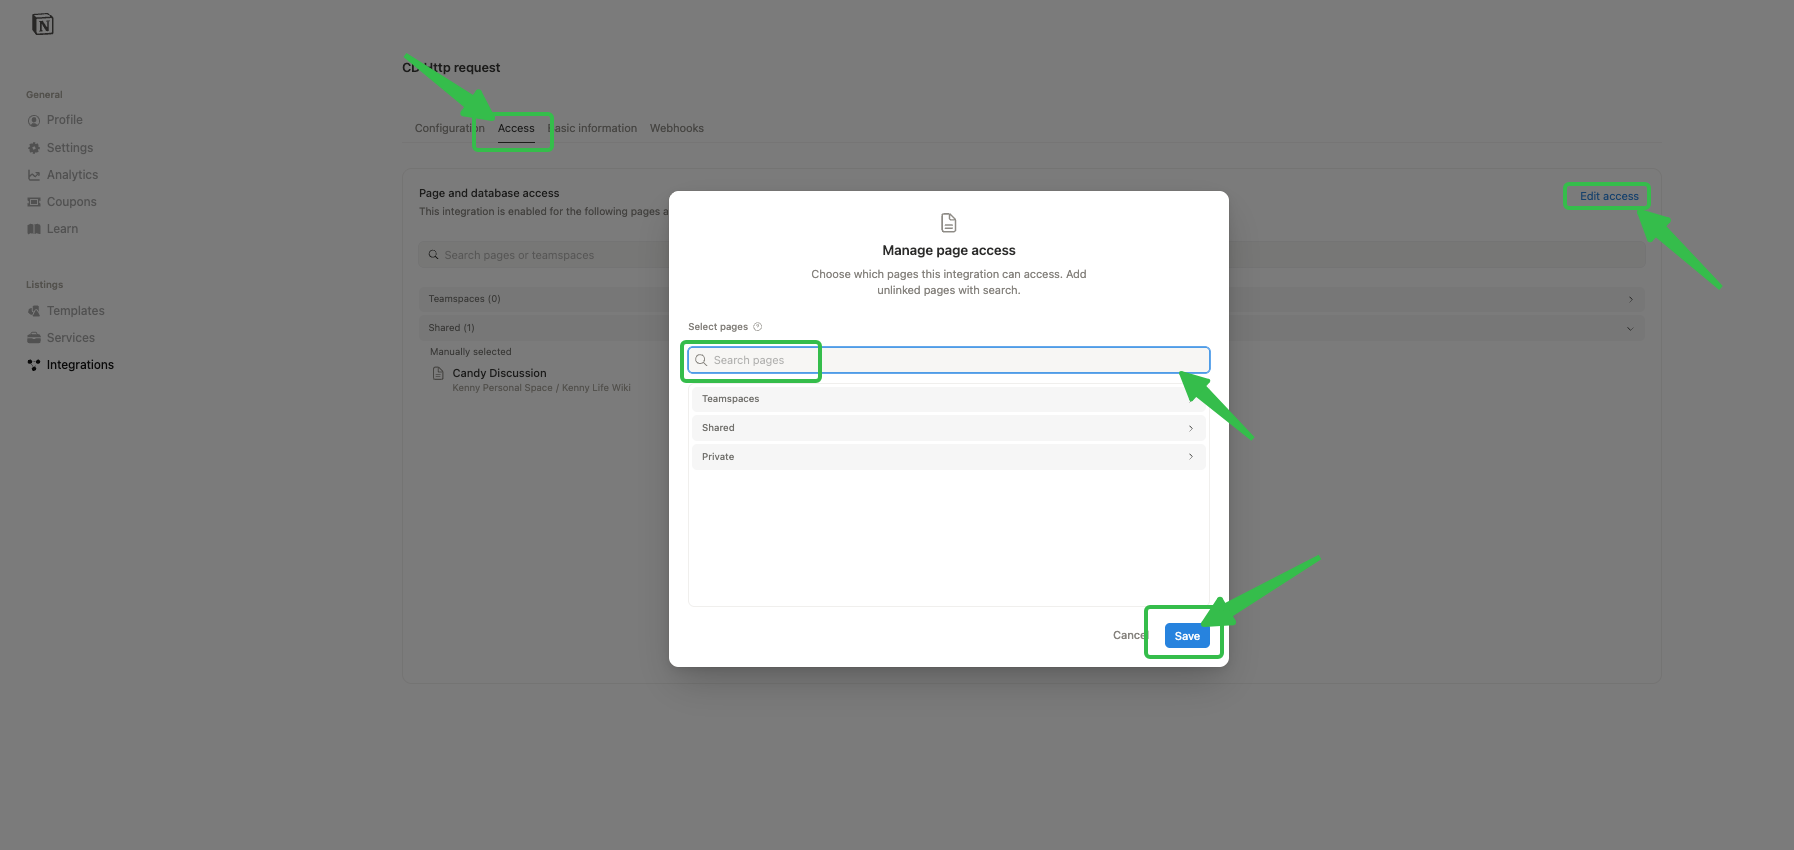
Go to “Access” →Grant the database access to this integration and click “save”
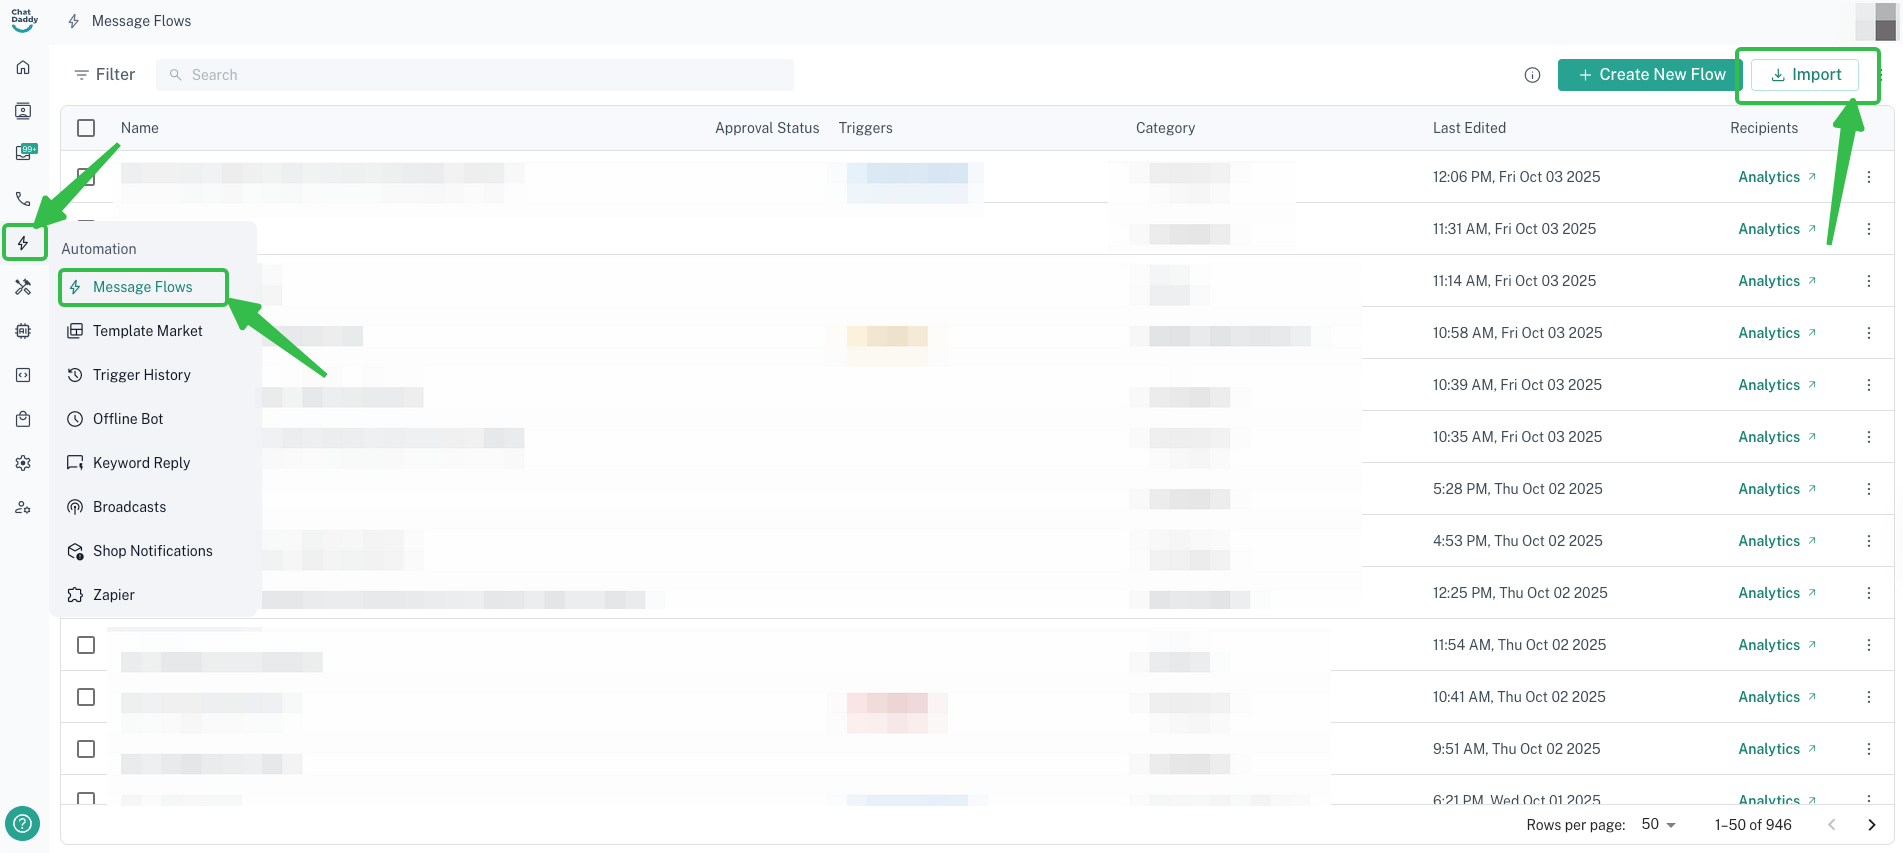
📥 Step 2: Download & Import the ChatDaddy Template

Download the pre-built flow template file 👉
How to import template to ChatDaddy:
✏️ Step 3: Edit the Flow to Match Your Setup
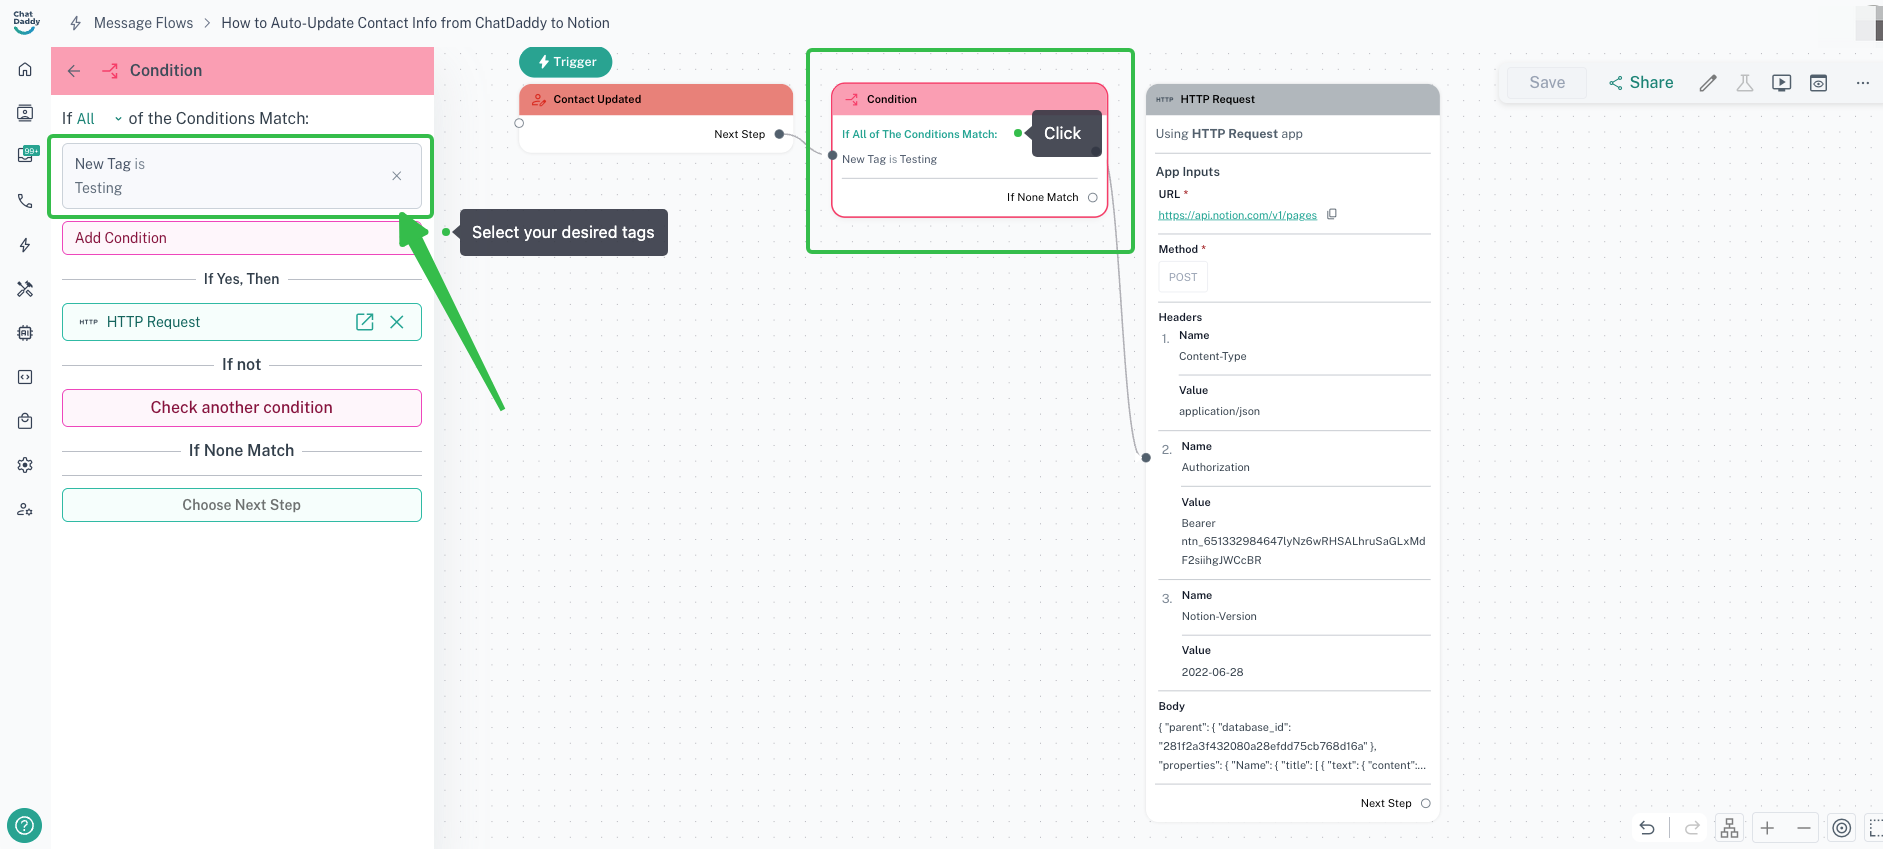
3.1. Set the tag condition
Update the tag under the Condition block
→ Change New Tag is Testing to your desired tag
3.2. Edit the HTTP Headers
In the HTTP Request block, update the following:
3.3. Edit the HTTP Body
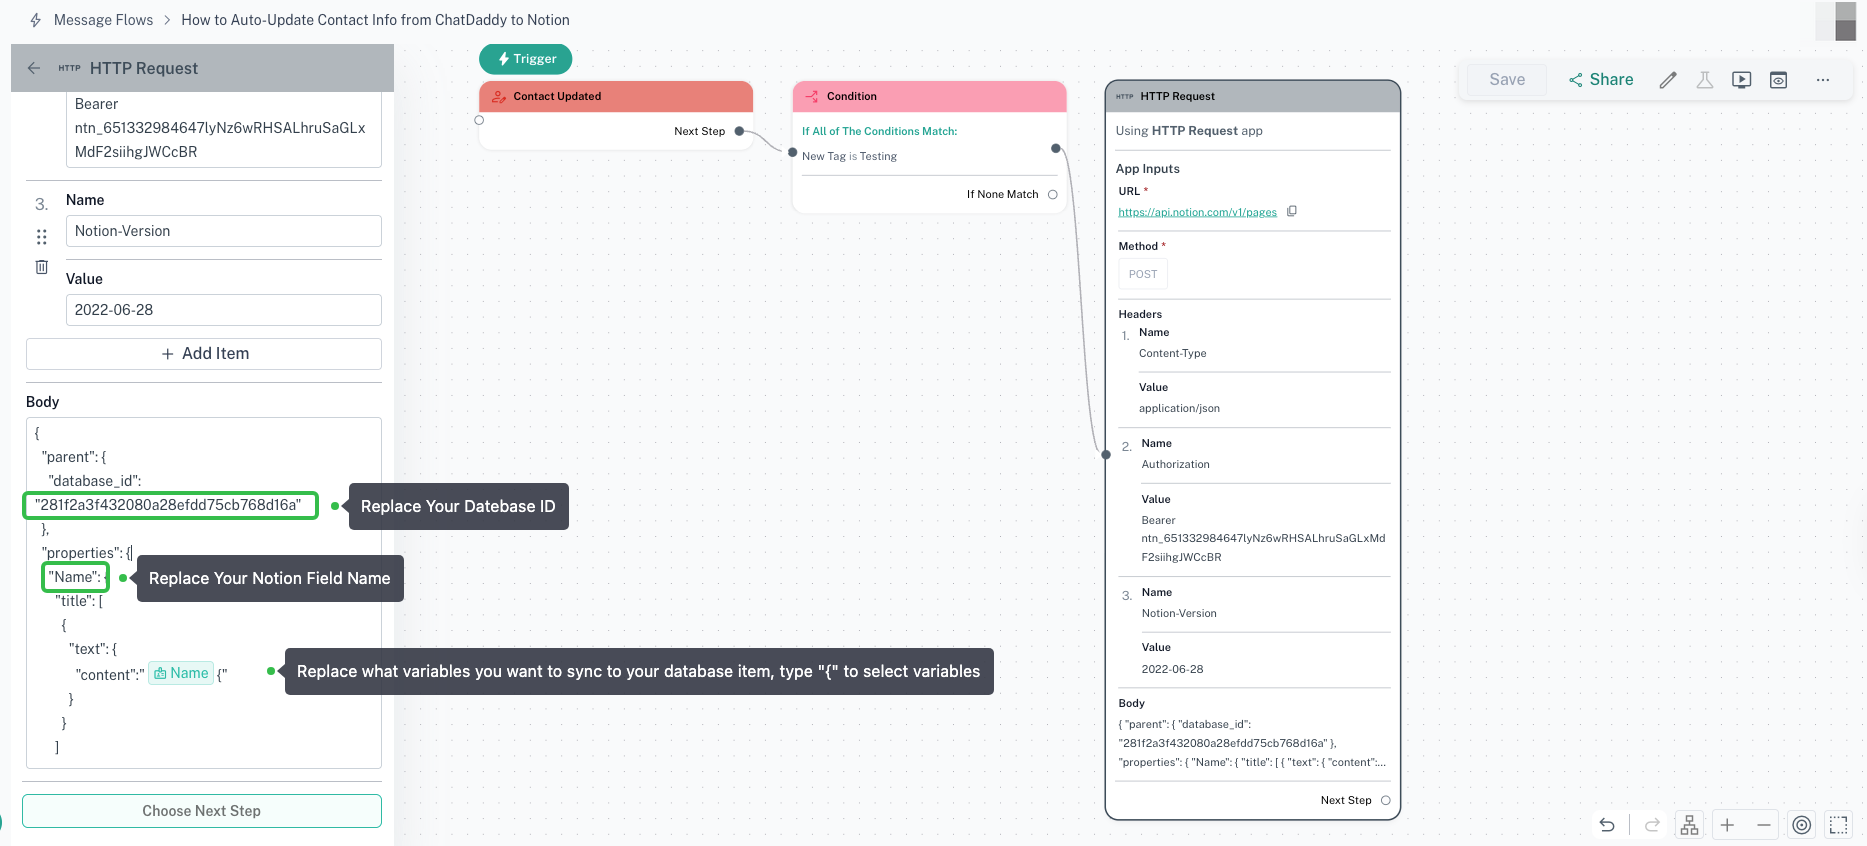
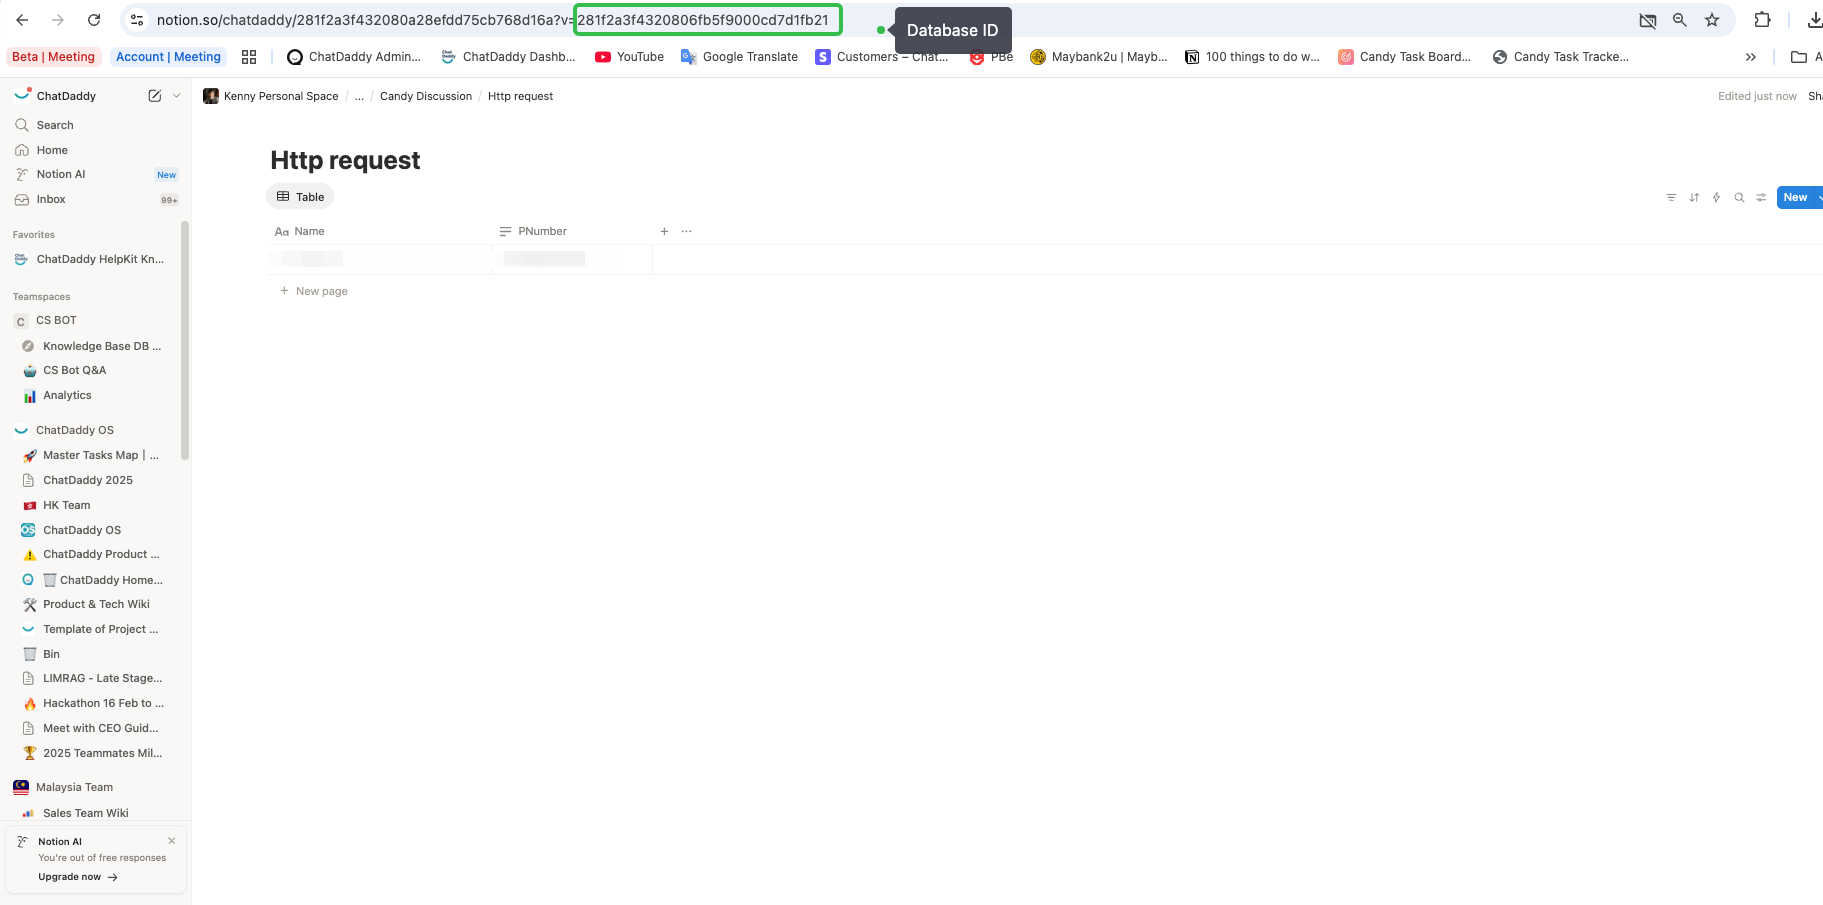
Replace YOUR_DATABASE_ID with your actual one.
Make sure the field names (Exp: Name, PNumber) in Body match your Notion column headers exactly.
🎉 Step 4: Test the Flow
- Tag any test contact with the trigger tag (e.g. Testing)
- Go to your Notion database
- Confirm a new row is created with the name, phone number or other fields.