
How to Broadcast to Your Messenger & Instagram Audiences
Send bulk broadcasts to your Facebook Messenger and Instagram contacts directly from ChatDaddy Broadcasts — choose your channel, audience, message flow, and schedule in a few steps.
Also searched as: broadcast Messenger, broadcast Instagram, Facebook Messenger broadcast, Instagram broadcast, send broadcast to Facebook, ChatDaddy Facebook broadcast, Meta broadcast, broadcast non-WhatsApp, Messenger bulk message
ChatDaddy Broadcasts now reach your Facebook Messenger and Instagram audiences — not just WhatsApp. Follow the steps below to set up and send a broadcast to your Messenger or Instagram contacts.
Before you begin: Connect at least one Messenger or Instagram channel under Manage Channels before creating this broadcast type.
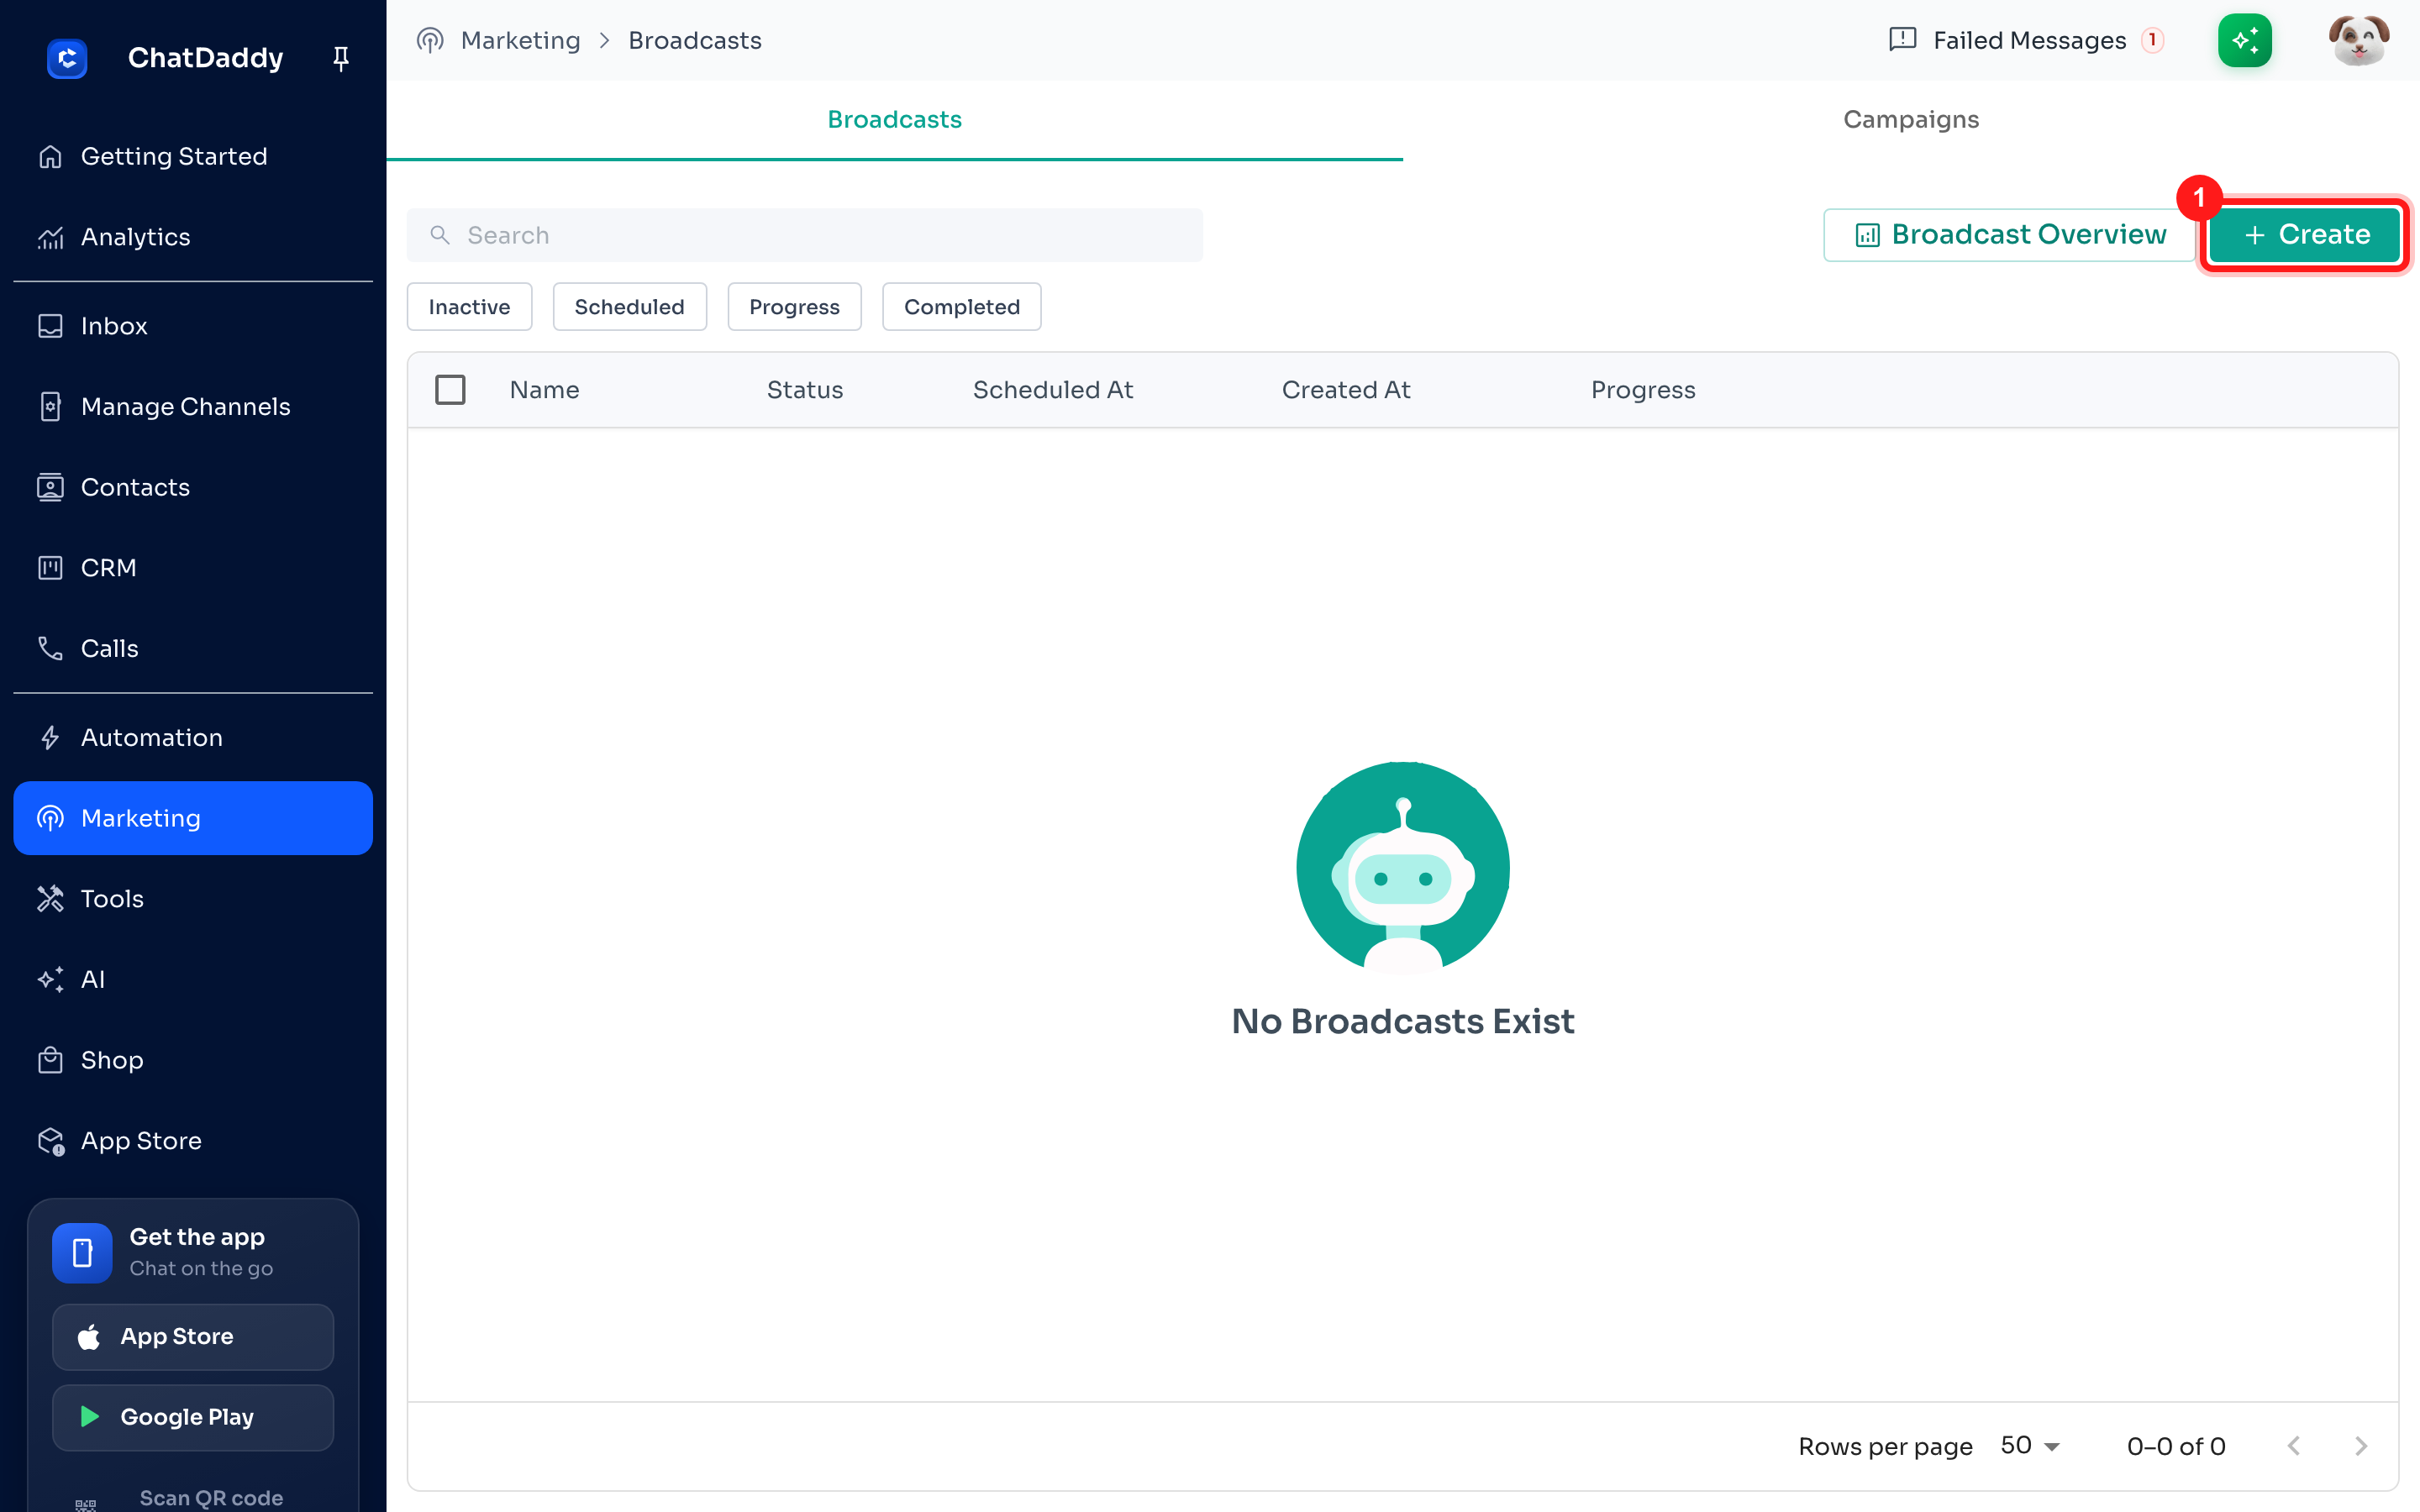
Step 1 — Open Broadcasts and click Create
Go to Marketing → Broadcasts. Click the green + Create button in the top-right corner to start a new broadcast.
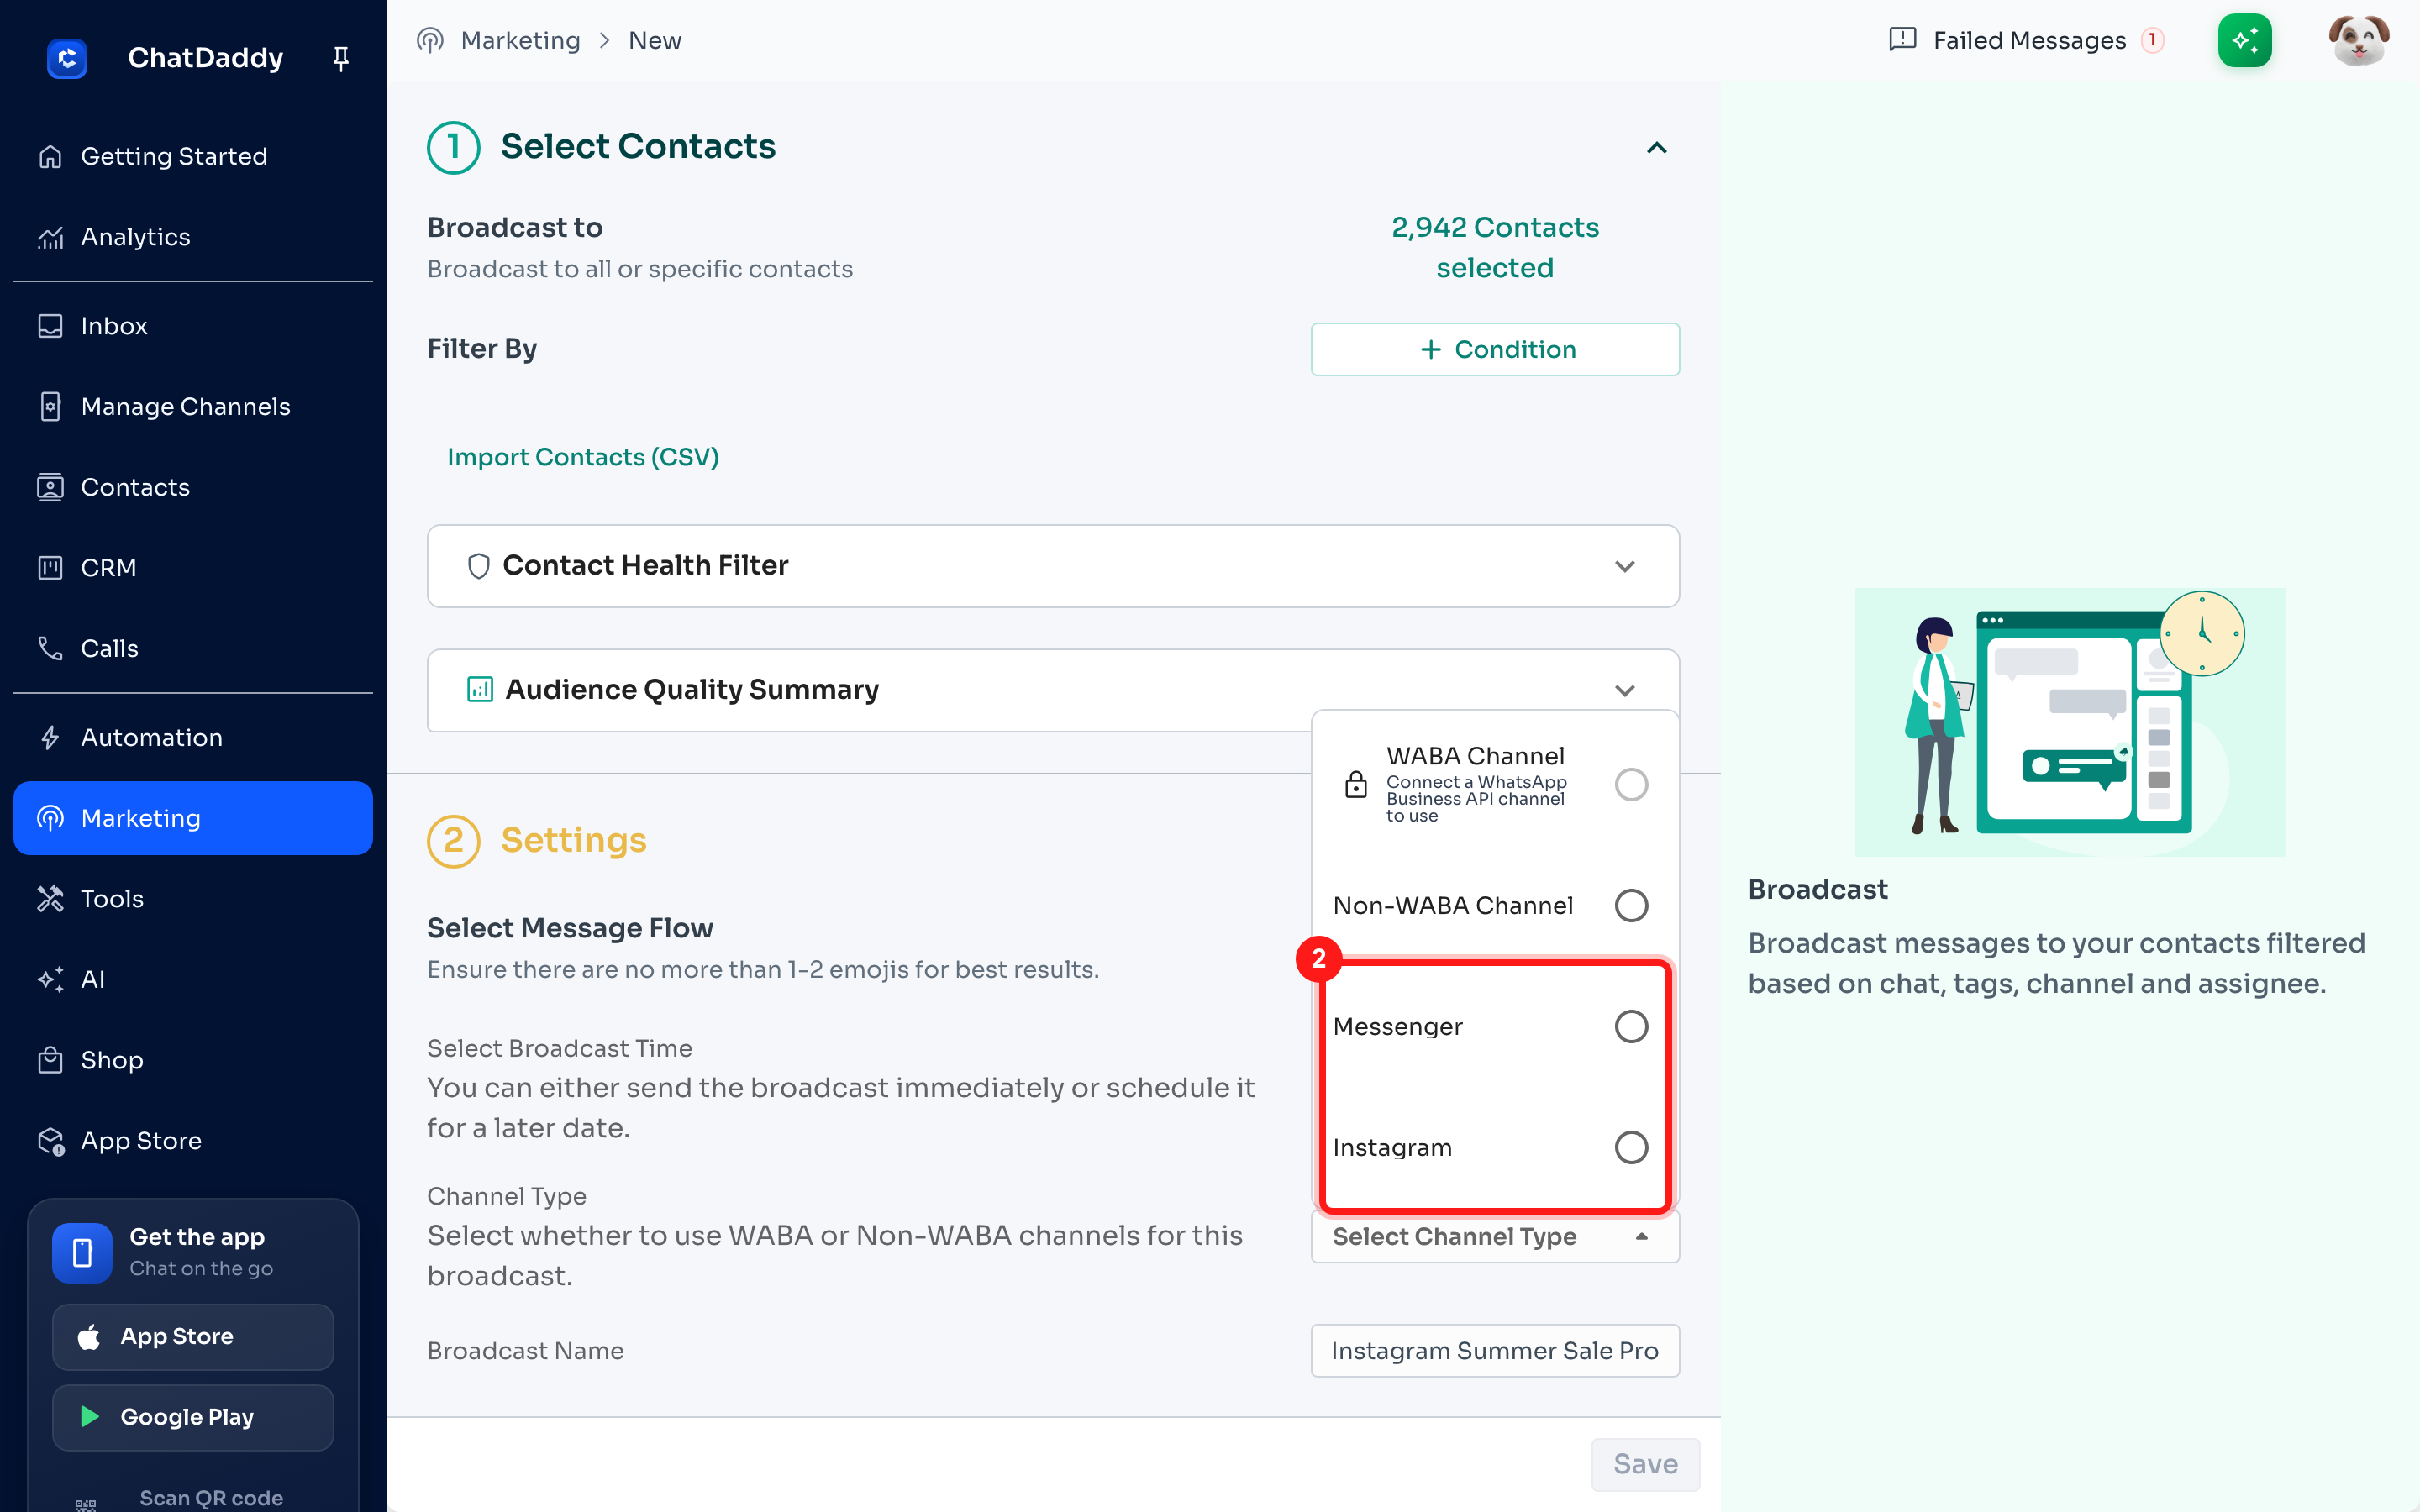
Step 2 — Choose Messenger or Instagram as the Channel Type
Scroll to the Settings section and open the Channel Type dropdown. Alongside WABA and Non-WABA options, you'll now see Messenger and Instagram. Select the one you want to send from.
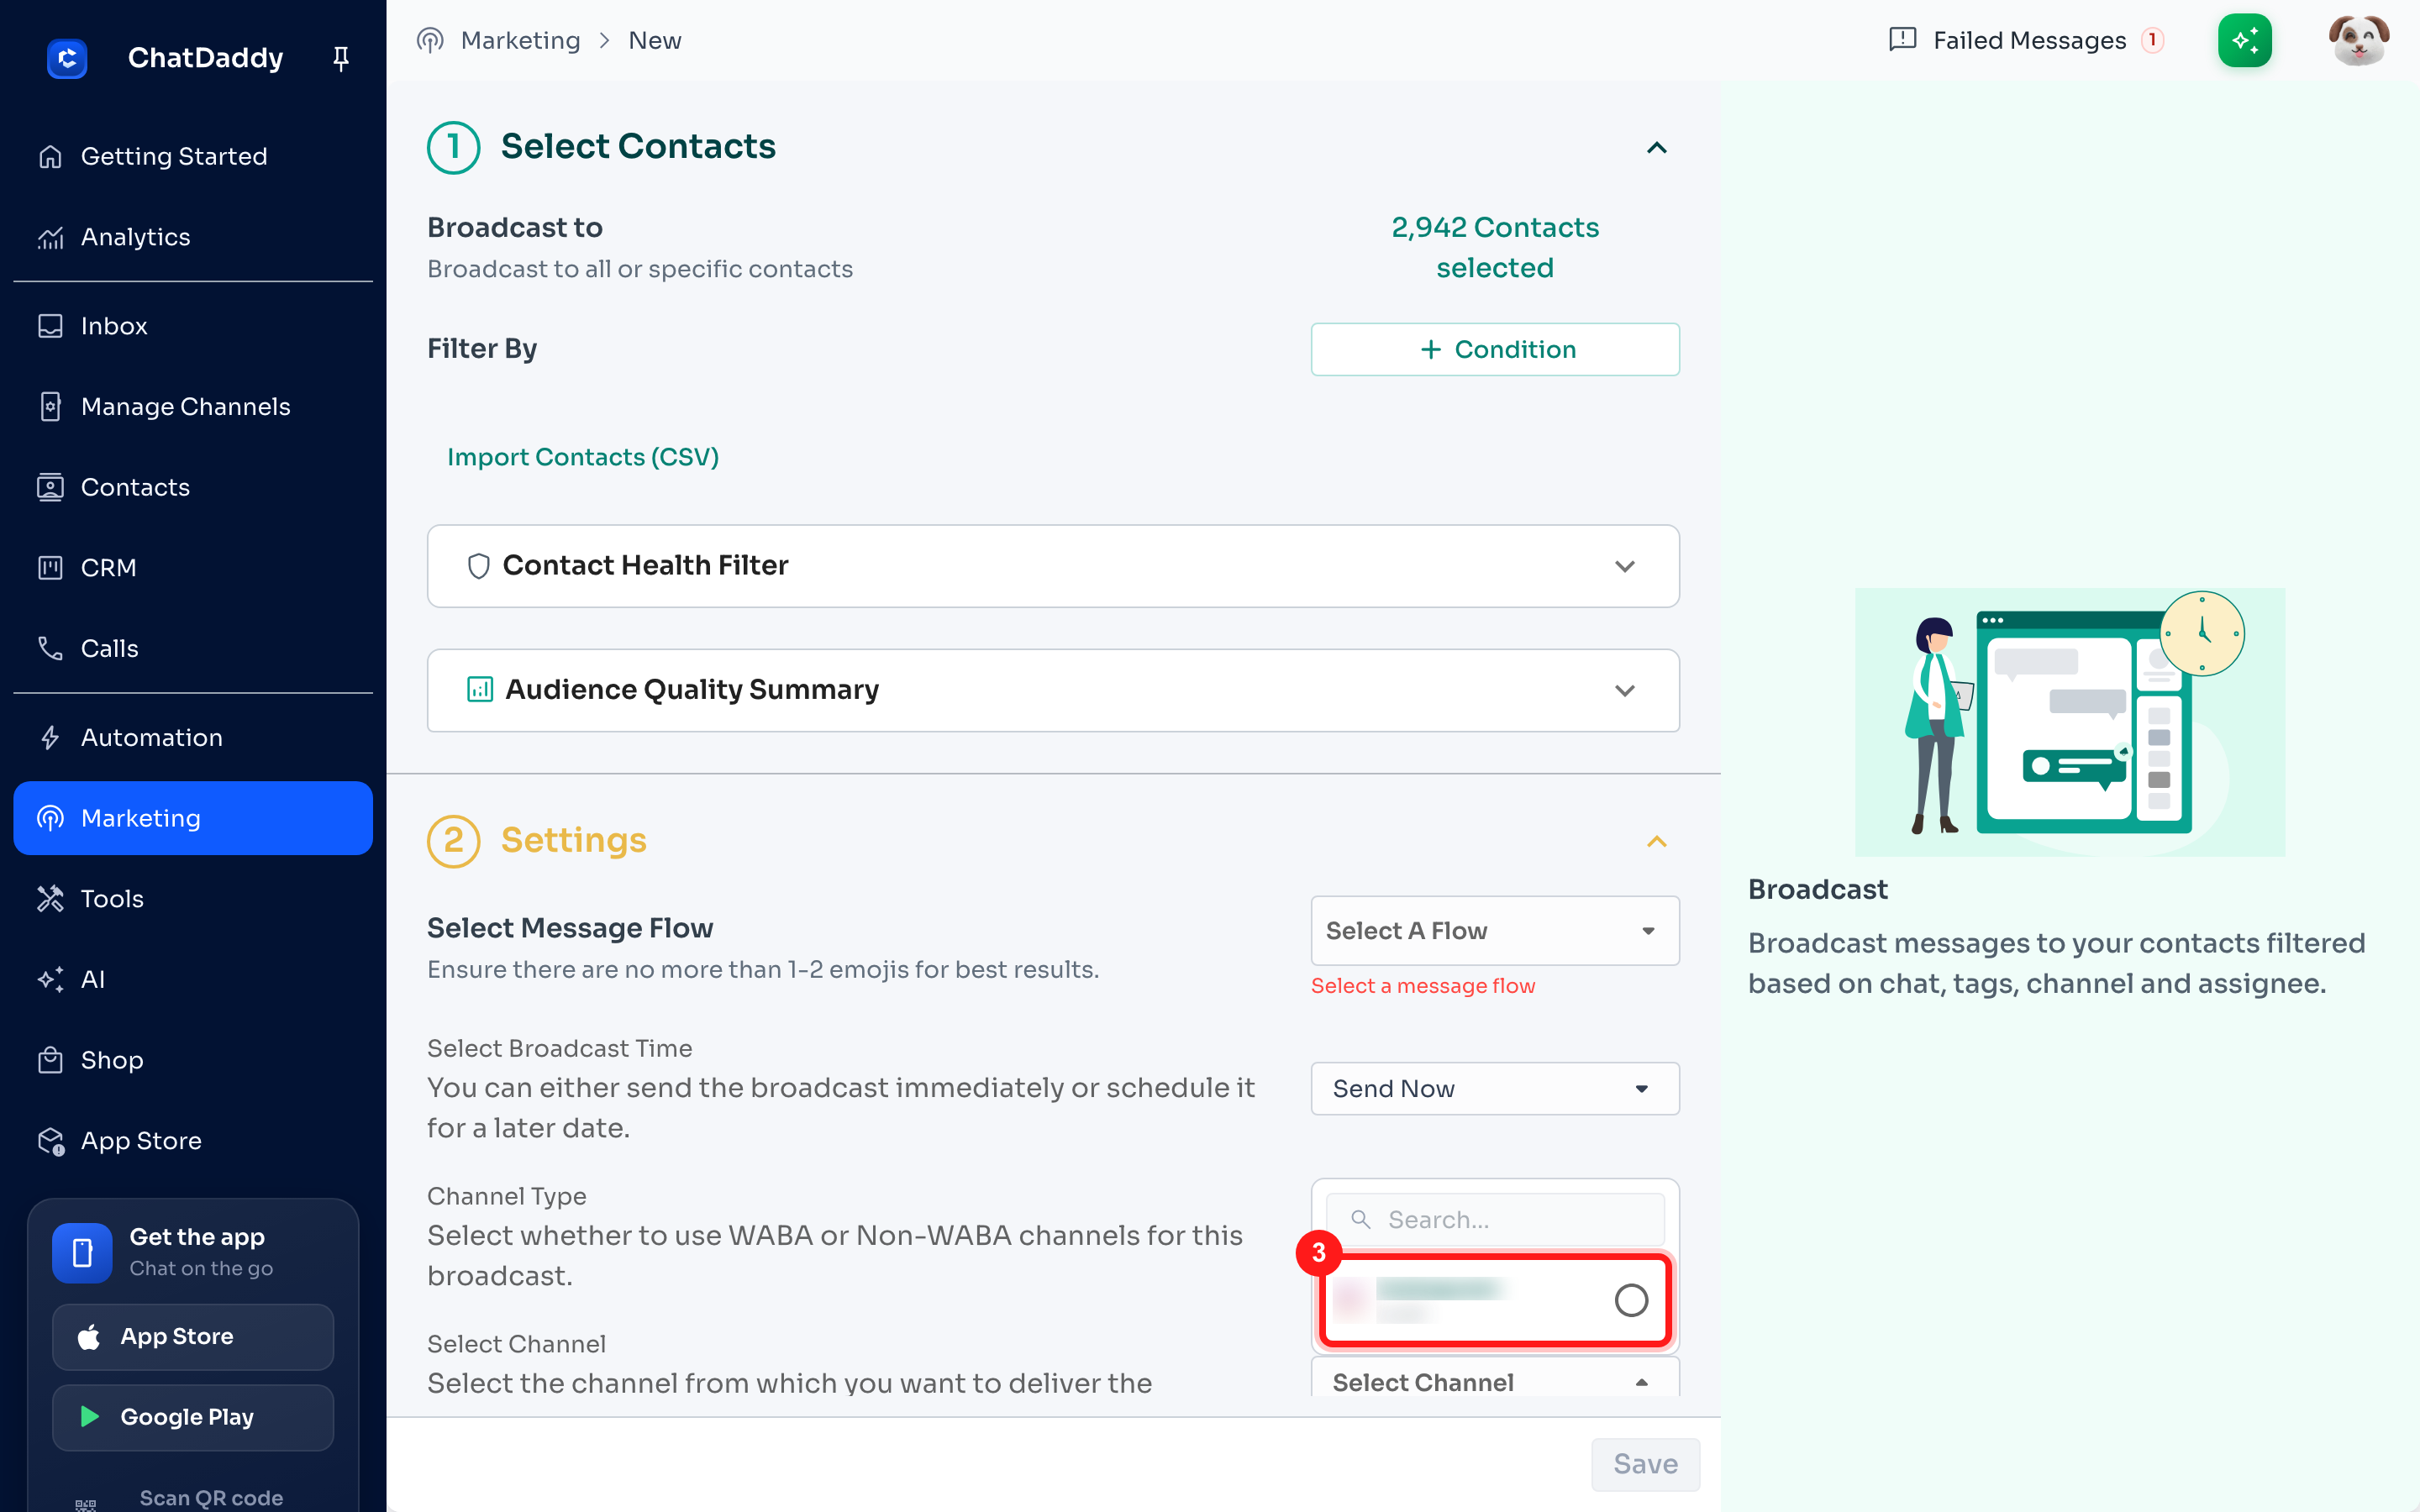
Step 3 — Select the channel to send from
Once you pick Messenger or Instagram, a Select Channel field appears. Open it and choose the specific Page or account you want to send from.
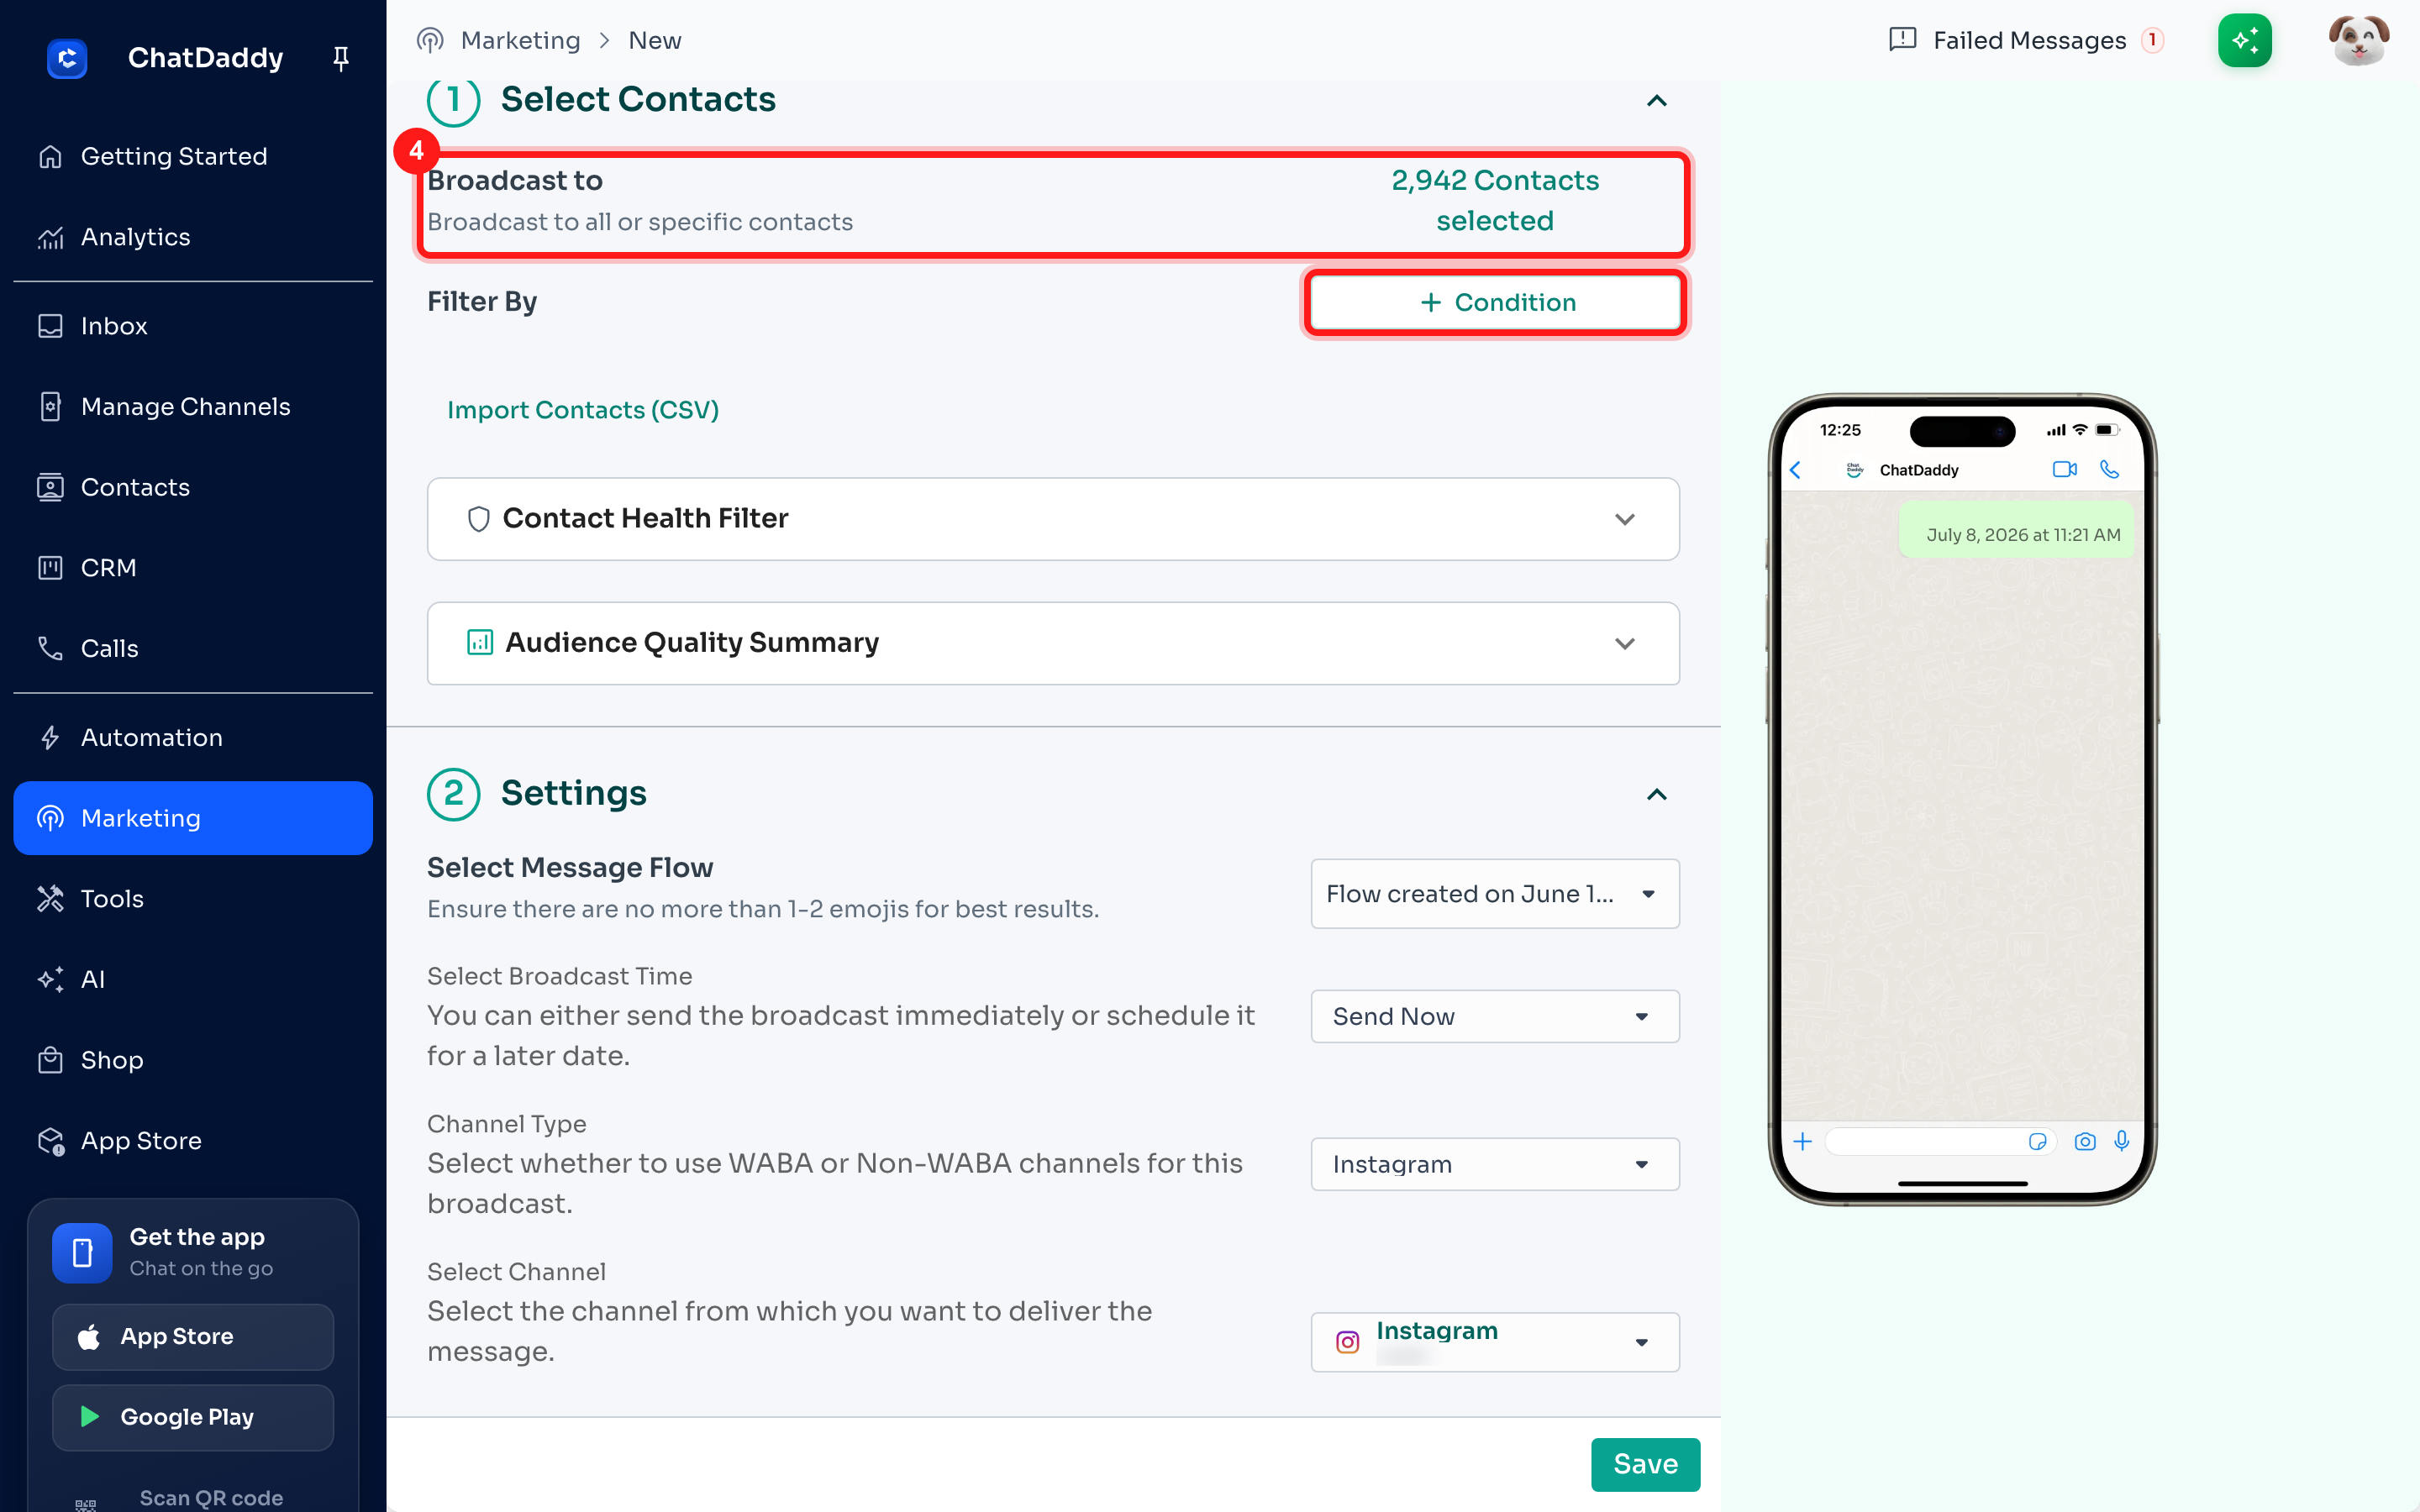
Step 4 — Choose your audience
In the Select Contacts section at the top, you'll see how many contacts are currently available for this channel type. Use the filters to narrow your audience by tags, labels, or other criteria if needed.
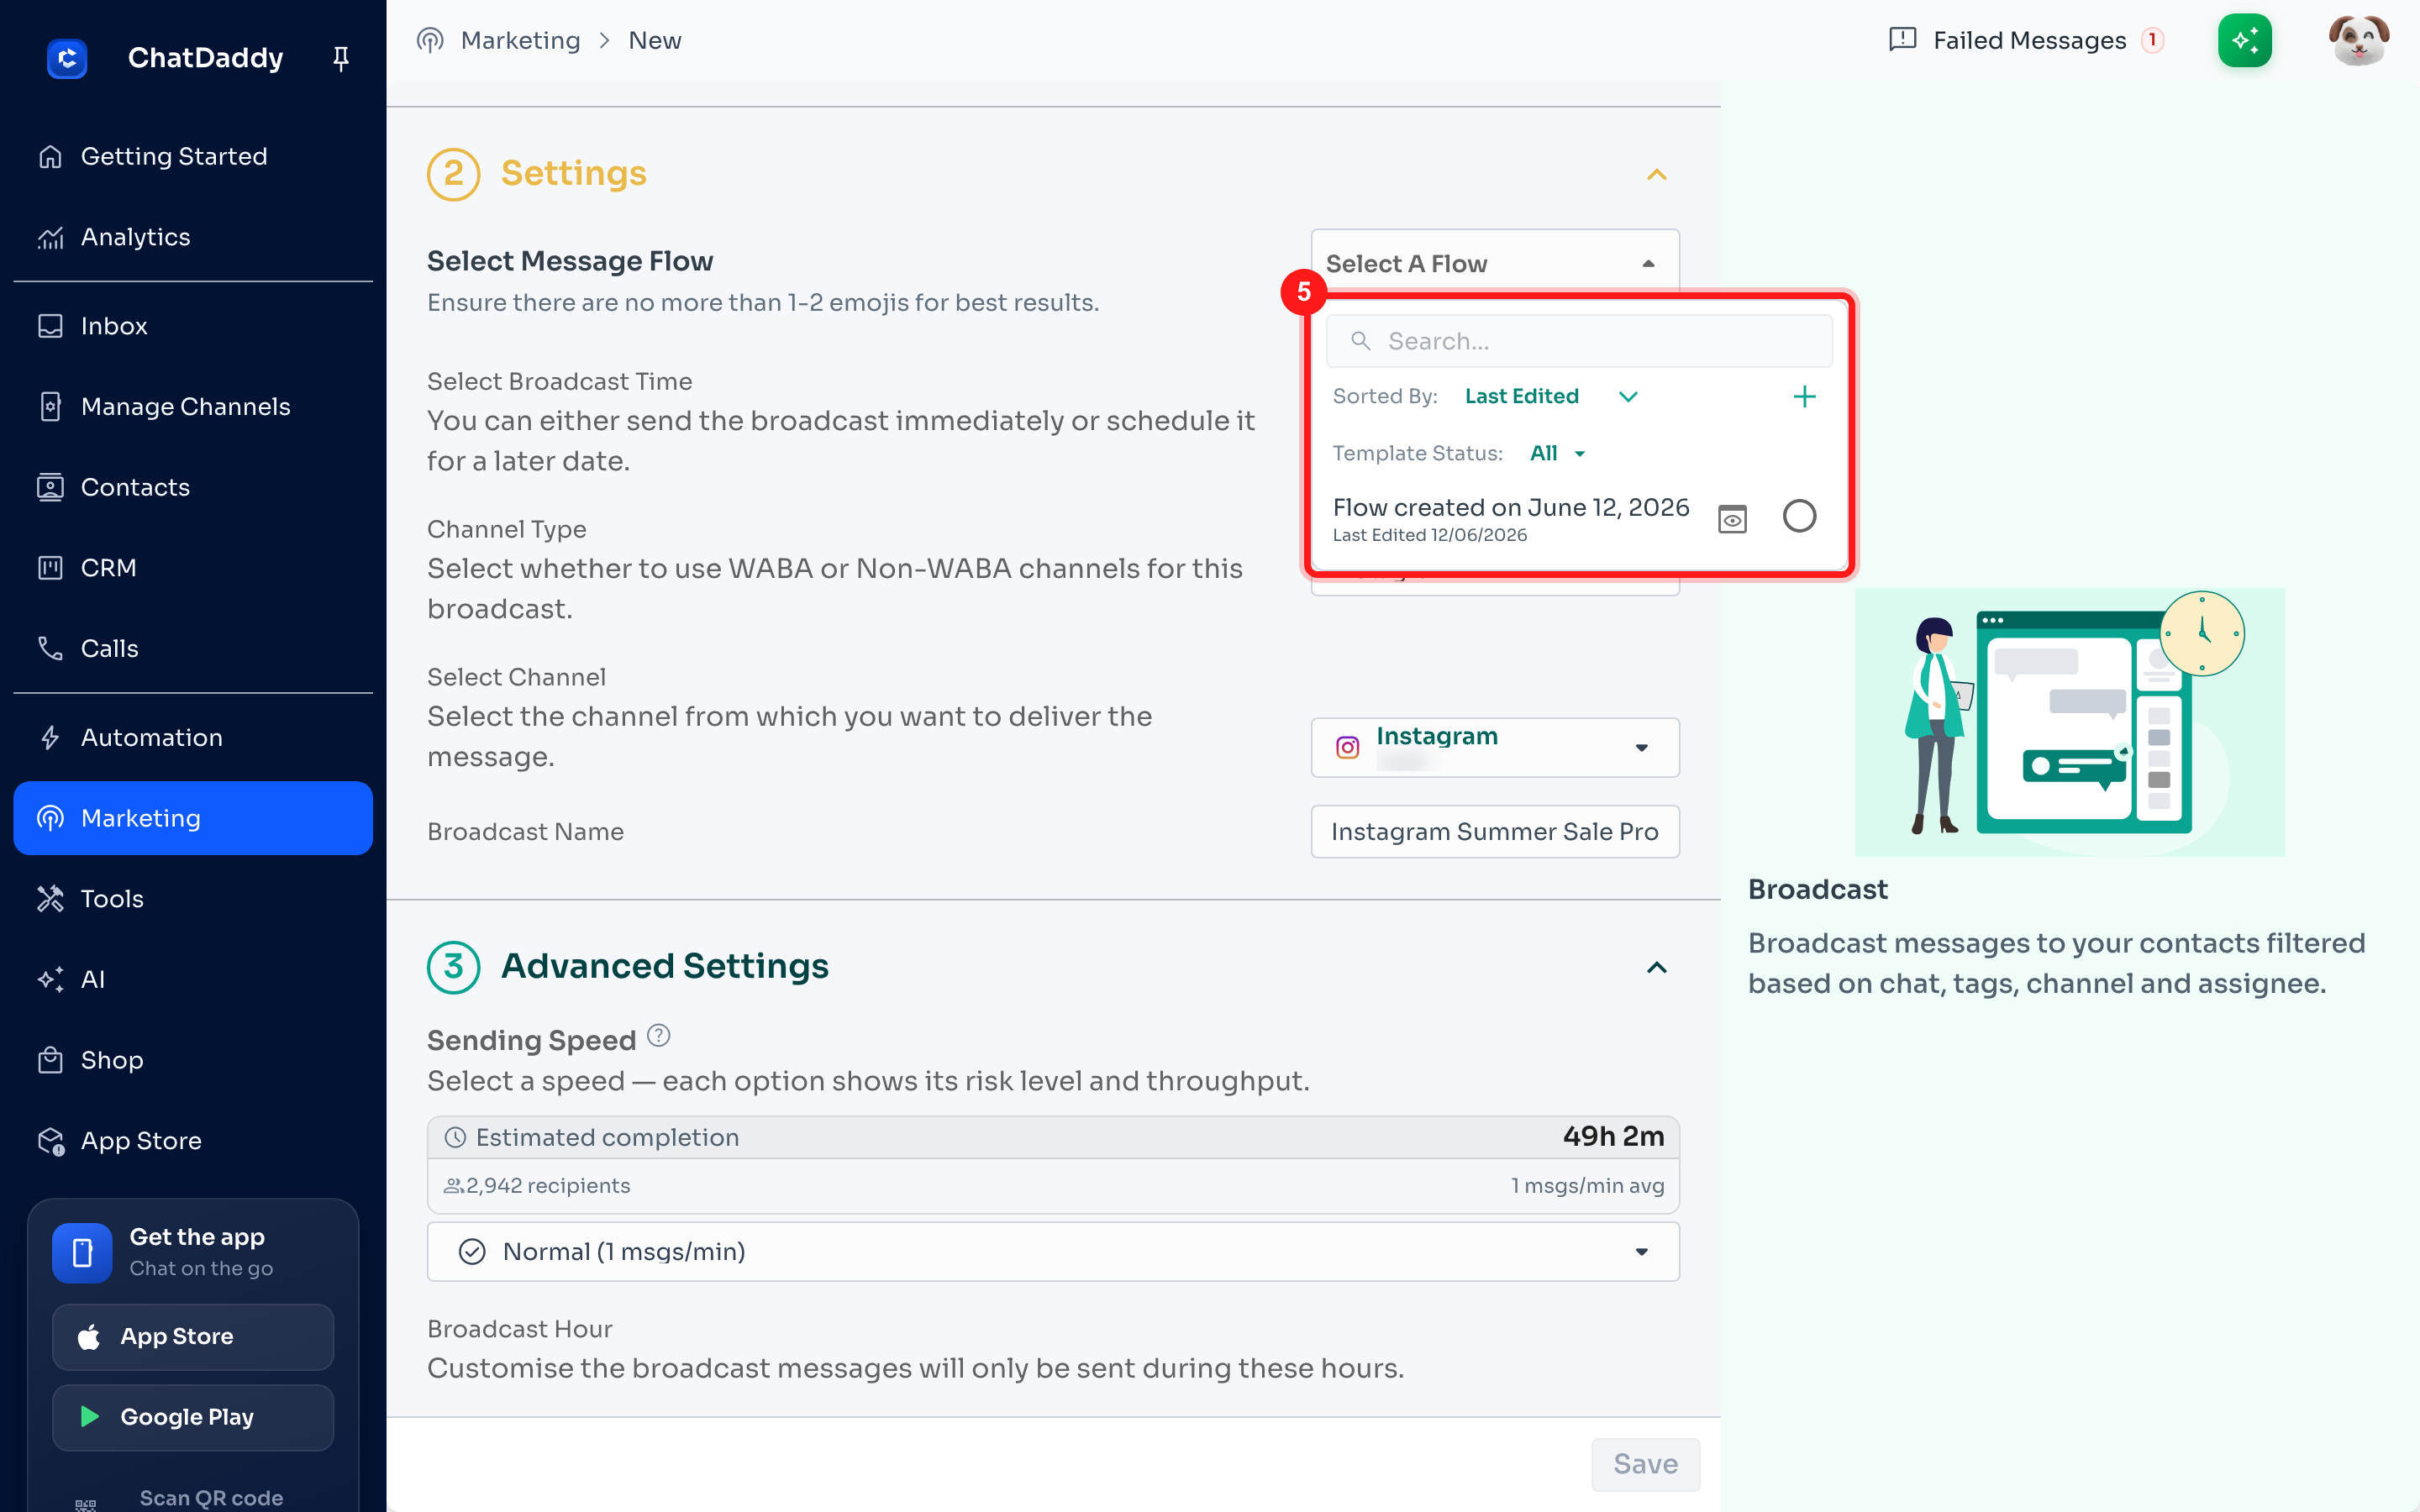
Step 5 — Select the Message Flow to send
Under Settings → Select Message Flow, open the dropdown and pick the Flow that contains the message you want to send. Make sure the Flow is designed for Messenger or Instagram (text, images, and buttons are supported; WhatsApp-specific templates are not).
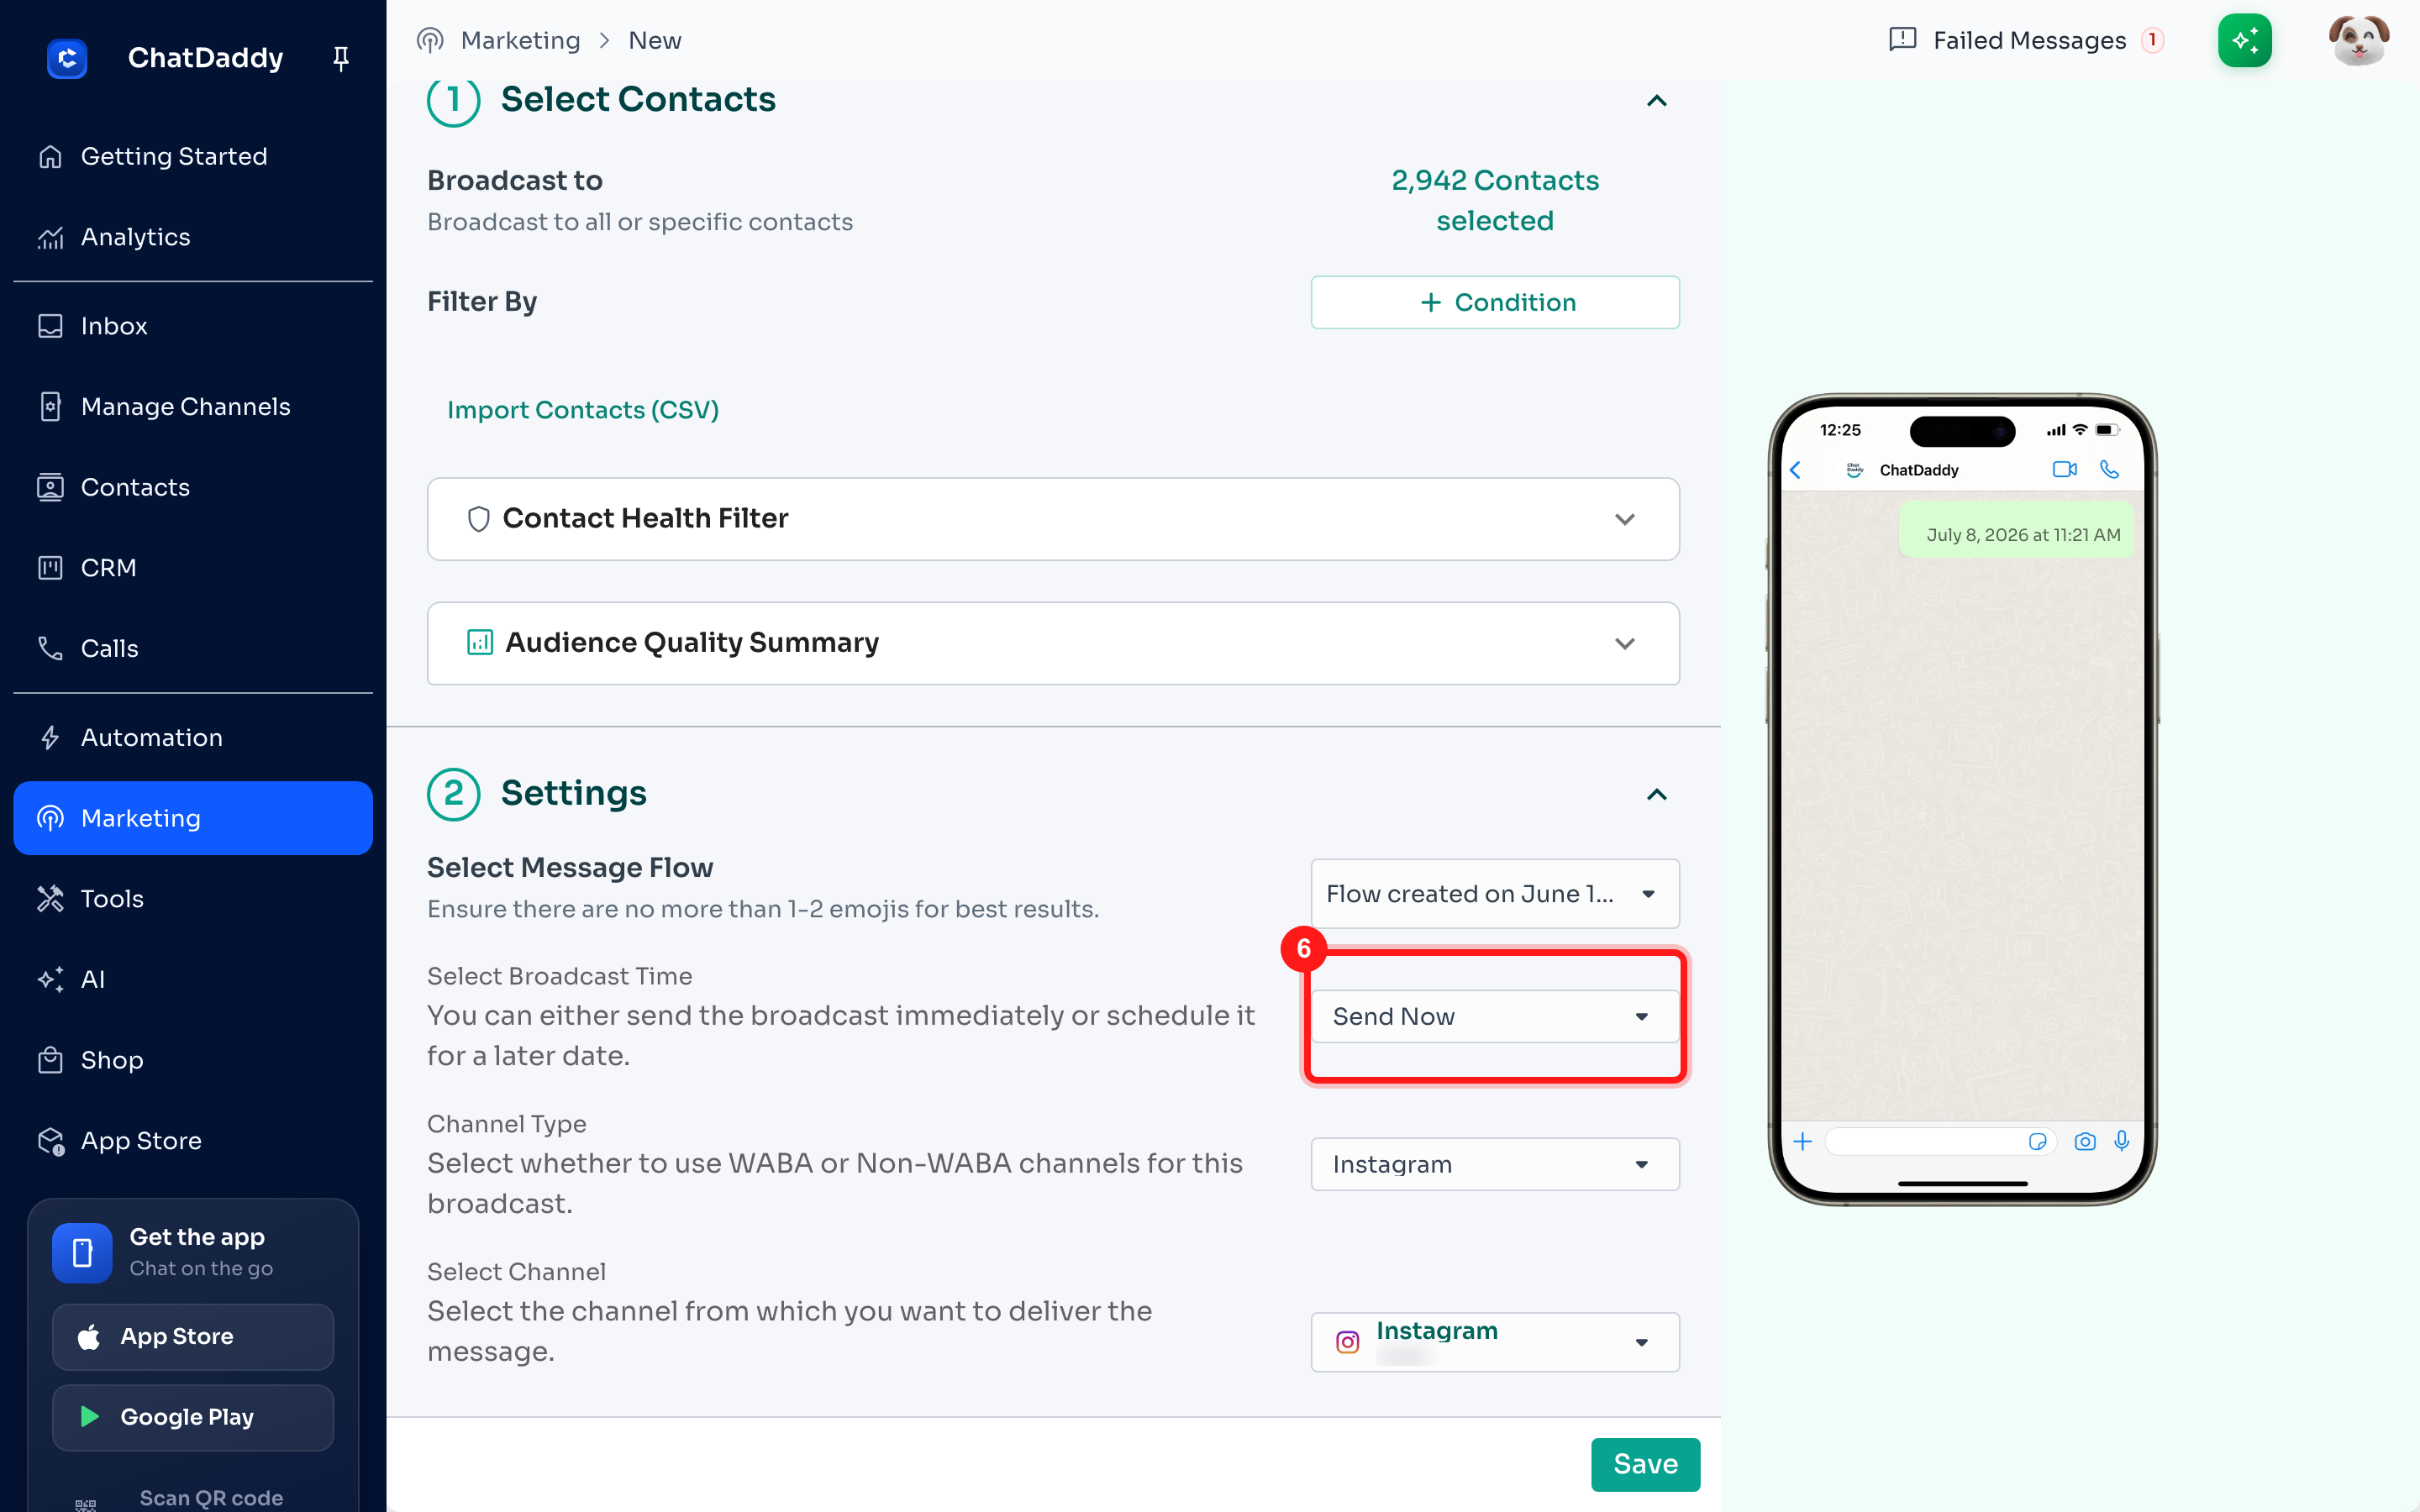
Step 6 — Choose when to send
In Select Broadcast Time, choose Send Now to send immediately, or Schedule for Later to pick a specific date and time.
Step 7 — Name your broadcast and review sending speed
Give your broadcast a clear name in the Broadcast Name field so you can find it in your history later. The sending speed is set automatically based on your plan.
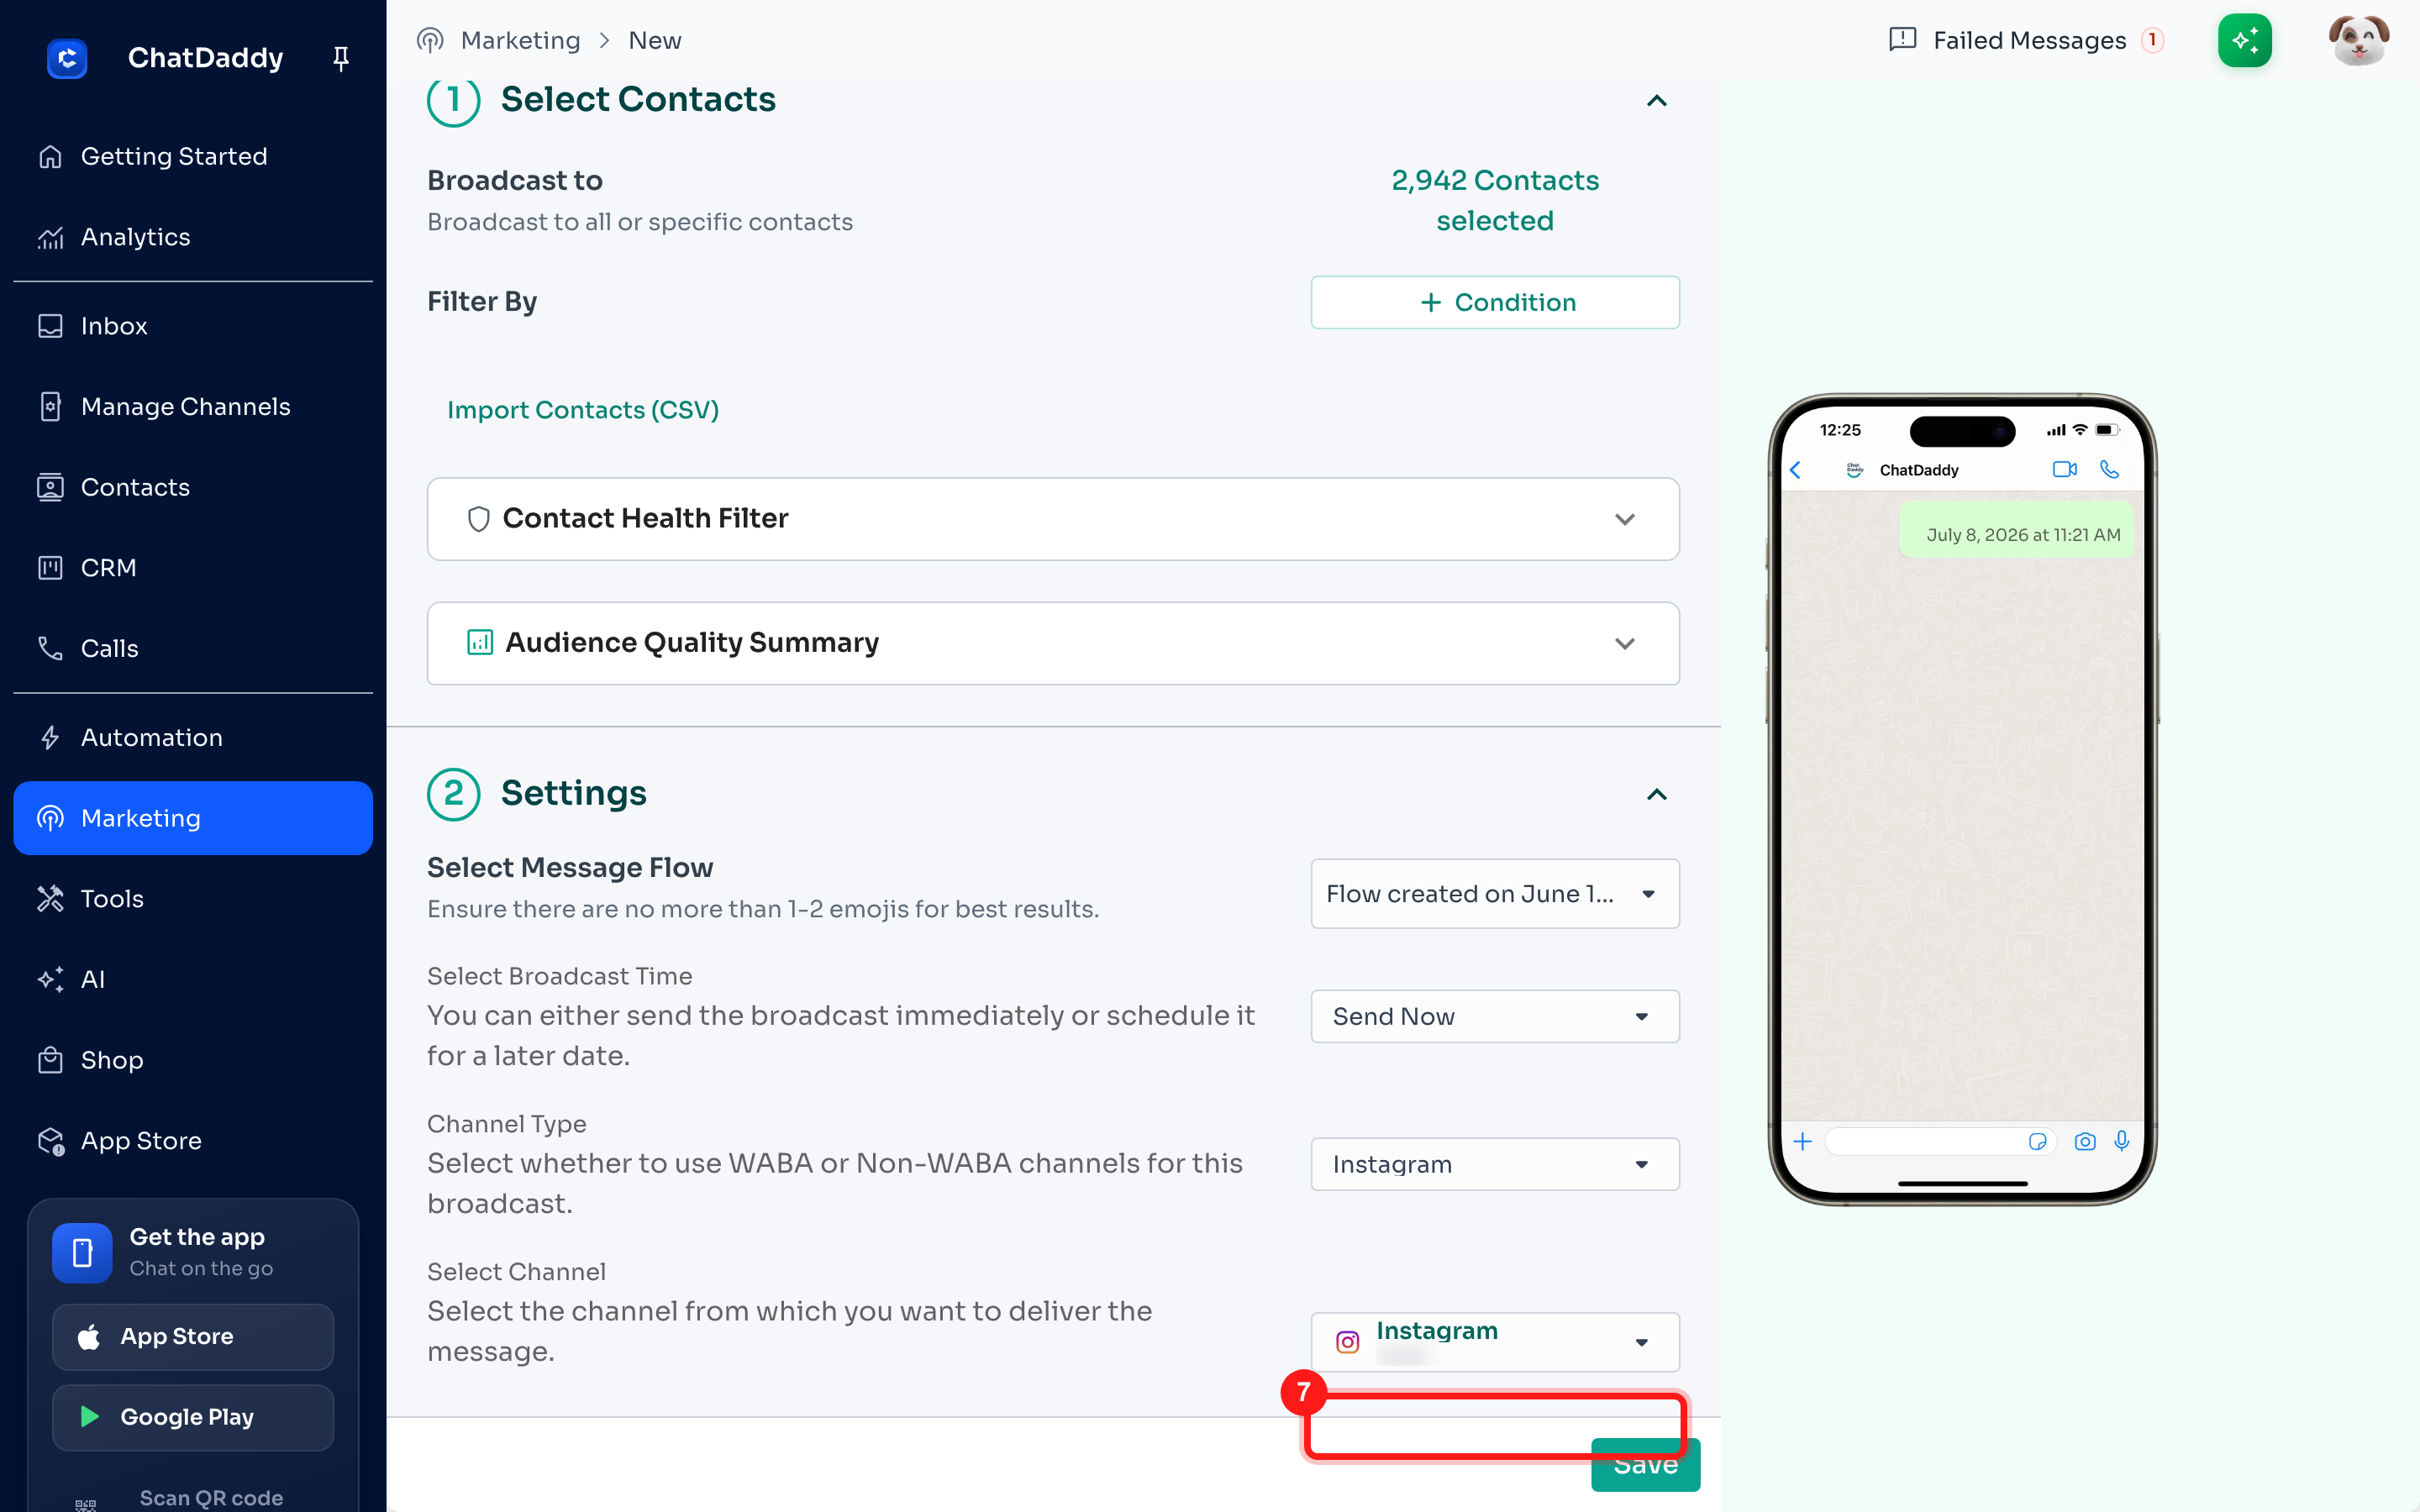
Step 8 — Review the notice and save
Click Save (it may read Save & Send Now or Save & Schedule depending on your timing choice). A notice will appear—review it and confirm to launch the broadcast.
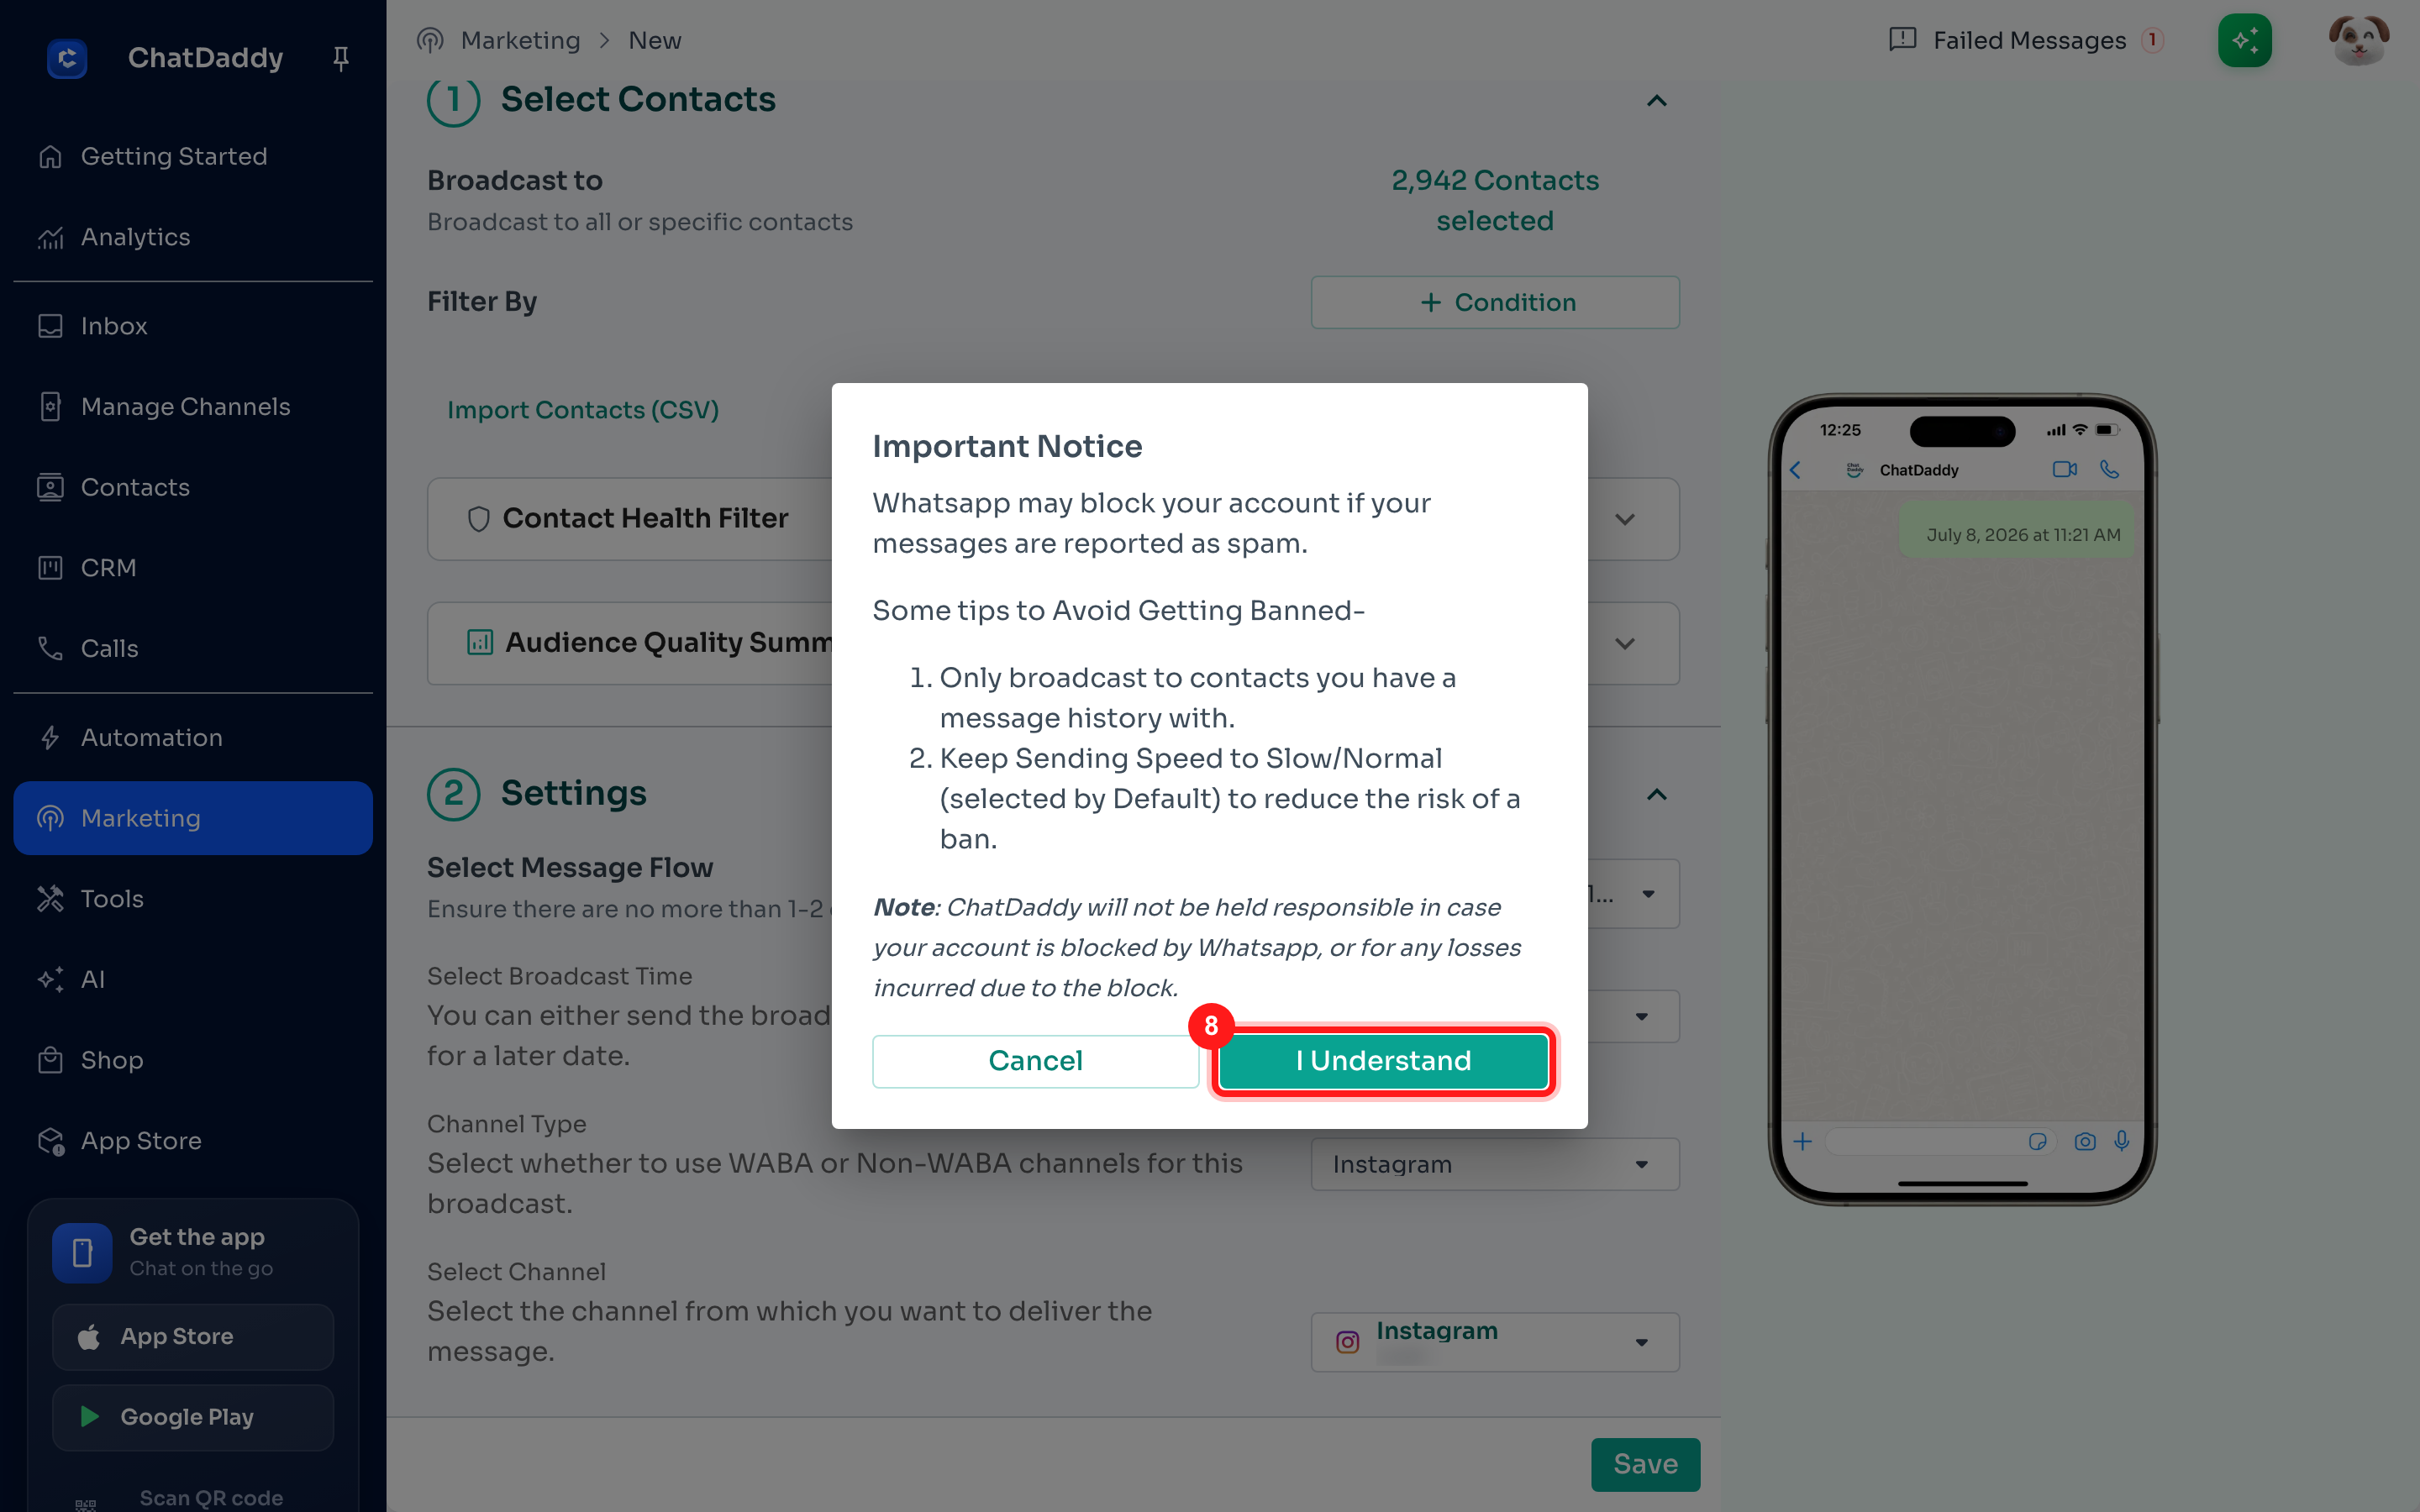
Note: The reminder mentions WhatsApp because it is shared across all channels. The broadcast will go out through your selected Messenger or Instagram channel only.
Good to know
- Messenger and Instagram broadcasts send from a single page or account each.
- Delivery follows Meta's messaging rules — only reachable contacts will receive the message (e.g., contacts who have messaged your page within the 24-hour window for standard messaging).
- Prefer WhatsApp? Choose WABA Channel or Non-WABA Channel back in Step 2.