How To Clear Pending Message
Follow the steps below to remove any pending or scheduled messages from your channel:
Updated Jan 26, 2026
Follow the steps below to remove any pending or scheduled messages from your channel:
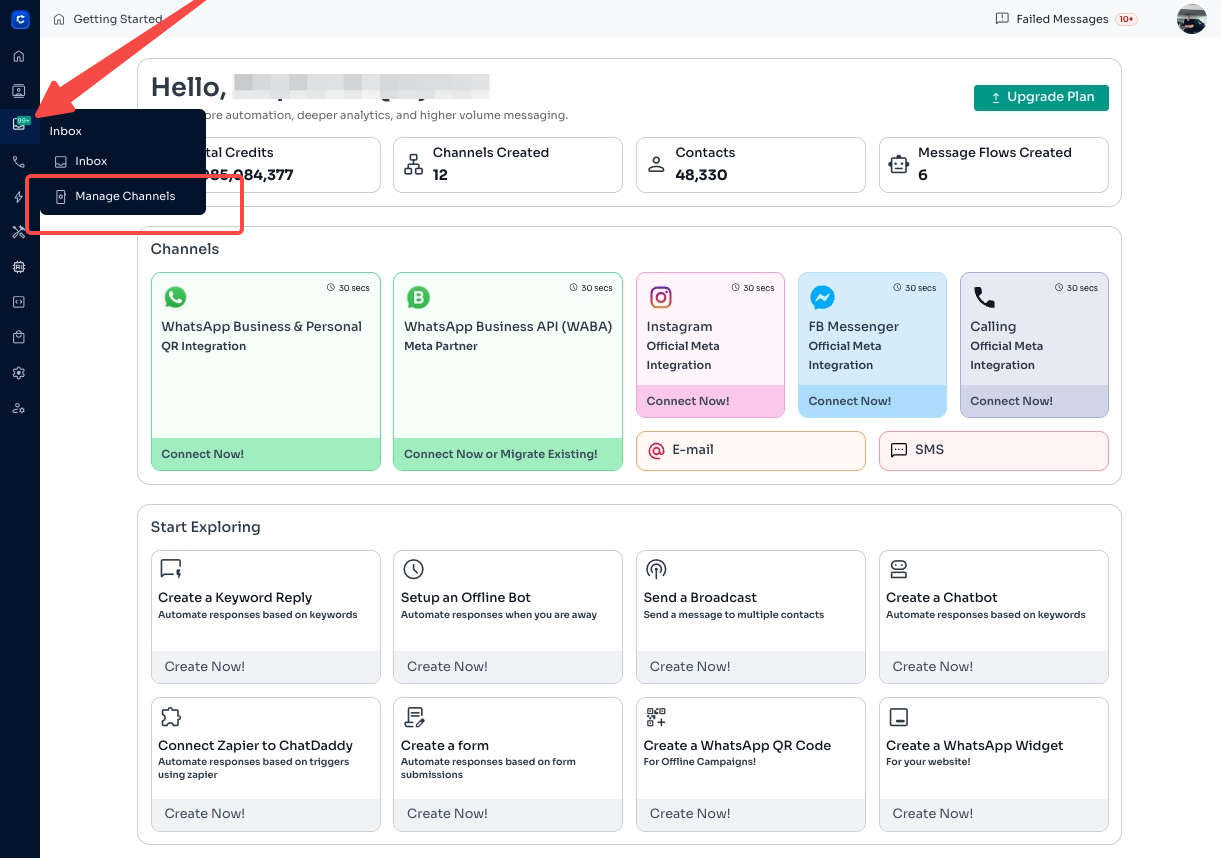
1️⃣ Go to Manage Channels
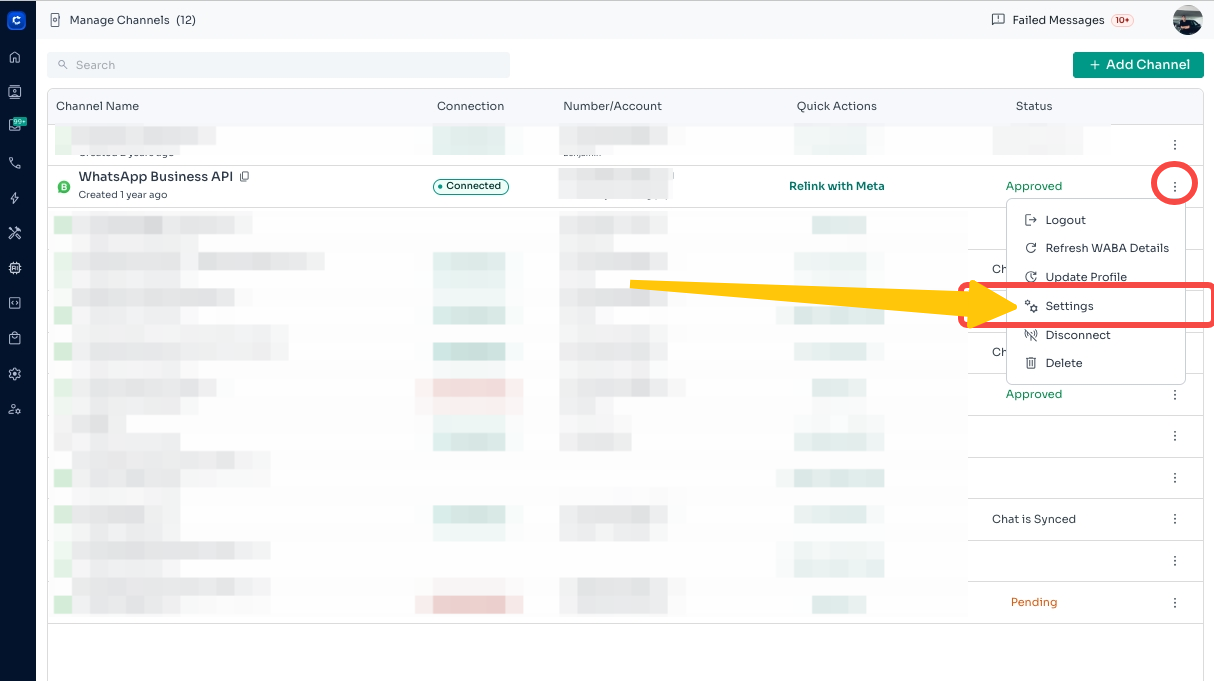
Navigate to the channel where the messages are pending and open Settings.
2️⃣ Select “Clear Message Queue” Look for the Clear Message Queue option and click on it.
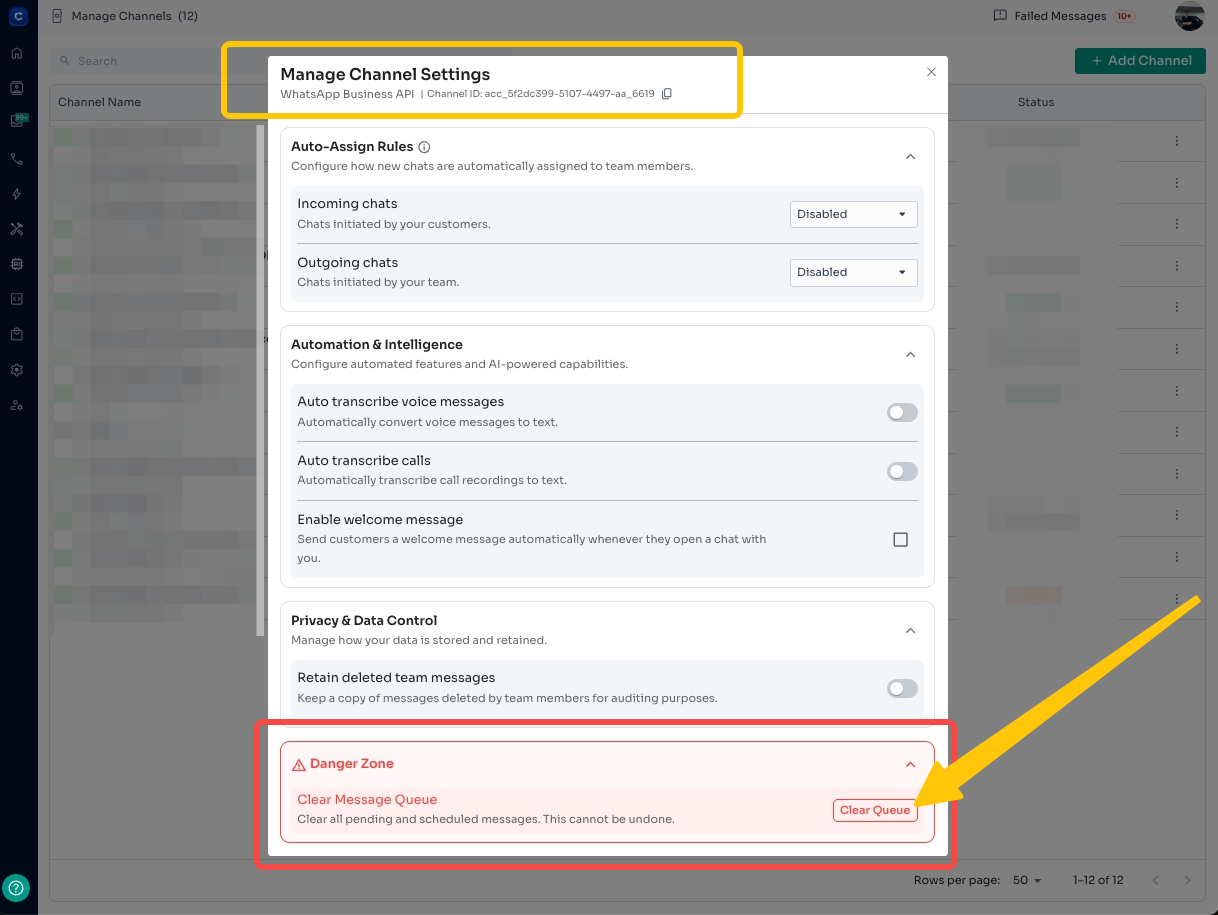
3️⃣ Confirm the Action 🧹
Confirm when prompted to remove all pending or scheduled messages from the queue.
Clearing the message queue helps prevent delayed or unintended messages from being sent.
Was this article helpful?