
What to Do When Your ChatDaddy Inbox Is Empty
A brand-new inbox shows a short setup panel instead of a chat list. Learn what each version of that panel is asking you to do — connect a channel, import your contacts, start your first chat and finish the setup checklist — and how to try a demo inbox before you connect anything real.
Also searched as: What to Do When Your ChatDaddy Inbox Is Empty, Which version you will see, Connect a channel from the welcome screen, Pick the channel you want to connect, Read the setup panel once your channel is connected, Import your contacts, Start your first chat, Fill in the contact and let ChatDaddy open the chat, Finish the setup checklist, Just want to look around first?, ChatDaddy, Inbox, Empty
When your team has no conversations yet, ChatDaddy replaces the empty reading pane in the Inbox with a short setup panel. It is not an error and there is nothing to fix — it is a checklist of the few things that get your first customer message flowing.
This guide is for anyone opening a new ChatDaddy workspace, or opening the Inbox for the first time after a teammate set the account up.
📭 The panel looks after itself. As soon as your first conversation arrives, it disappears and the normal inbox takes its place — there is nothing to dismiss and no setting to turn off.
Which version you will see
There are two, and which one you get depends on whether a channel is connected to your workspace:
- No channel connected yet — a full-screen welcome reading “Bring all your conversations into one inbox”, with five channel shortcuts and a Connect a Channel button.
- A channel is connected, but no messages have arrived — a green Channel connected pill above “Now, let’s start your first conversation”, followed by three setup cards.
ℹ️ An empty search or filter result is not the same thing. The setup panel only appears when your team genuinely has no conversations at all — if you are looking at an empty list instead, clear the search box and any filters and your chats will come back.
Step-by-step
Step 1 — Connect a channel from the welcome screen
Open Inbox from the left sidebar. With no channel connected you will see a row of five channel shortcuts — WhatsApp, Instagram, WhatsApp Business API, phone calls and Messenger — above the heading “Bring all your conversations into one inbox”. Clicking any shortcut opens the same window as the Connect a Channel button, so use whichever is closer to hand. A small Getting Started link underneath takes you to the full setup guide instead.
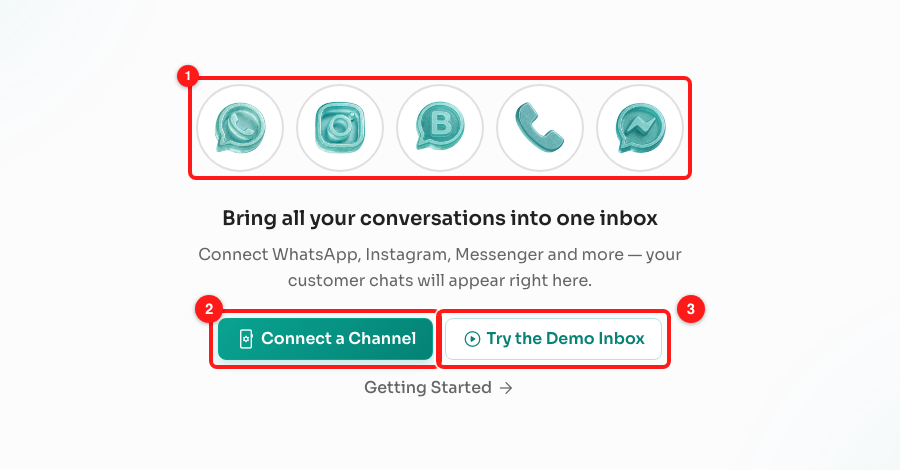
Step 1 — the five channel shortcuts (1), the Connect a Channel button (2) and Try the Demo Inbox (3).
Step 2 — Pick the channel you want to connect
The Connect Channel window lists everything you can connect, with the monthly credit cost on each card and a 30 secs badge on the ones that connect straight away. If you are starting with an ordinary WhatsApp number, choose WhatsApp Business & Personal QR Integration and scan the code. At the bottom sits the WhatsApp Business testing channel — a practice channel that creates nothing and costs nothing.
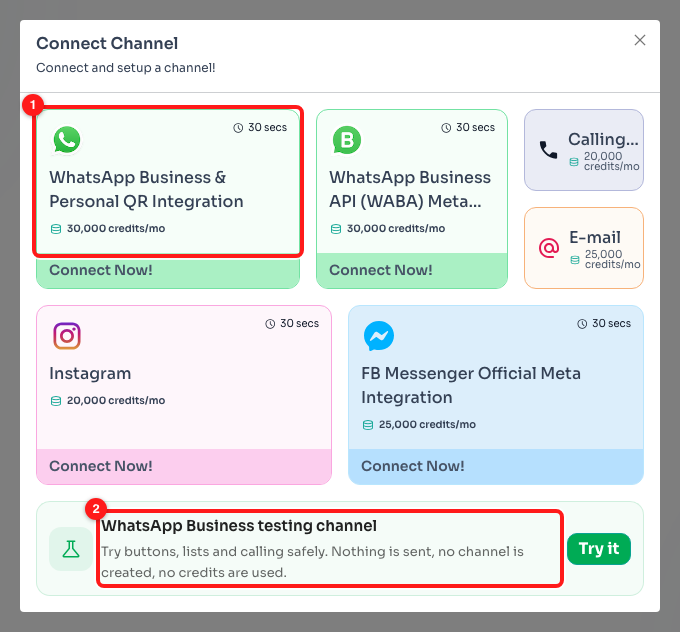
Step 2 — the QR integration is the quickest way in (1); the testing channel at the bottom is free to try (2).
Step 3 — Read the setup panel once your channel is connected
With a channel connected and no messages in yet, the Inbox shows a green Channel connected pill and the heading “Now, let’s start your first conversation”. Underneath are the three cards that make up the rest of this guide. Your chat list is still on the left; only the reading pane is given over to the panel.
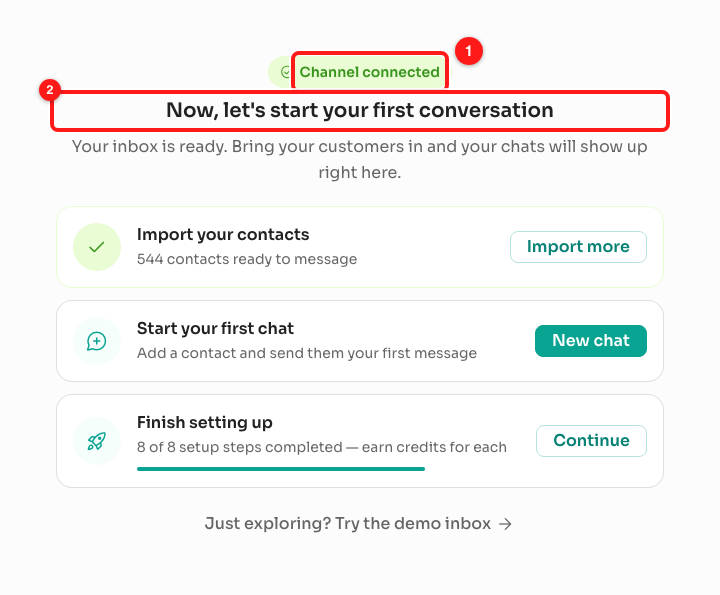
Step 3 — the Channel connected pill (1) confirms the channel is live, above the panel heading (2).
Step 4 — Import your contacts
The first card, Import your contacts, is the fastest way to fill an empty inbox. On a fresh workspace it reads “Upload a CSV and reach your customers in minutes” with an Import CSV button, and takes you to the Contacts page with the import window already open. Once you have contacts the card turns green, counts them for you, and the button becomes Import more.
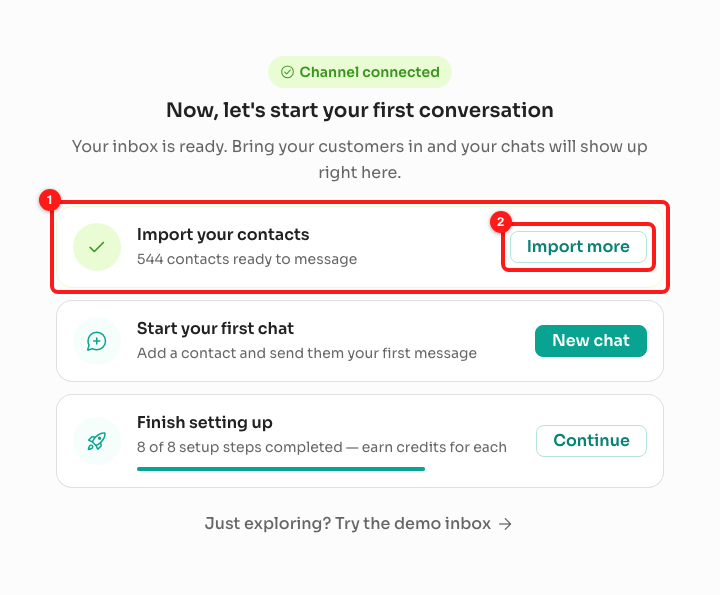
Step 4 — the contacts card (1) and its button (2). This workspace already has contacts, so the card shows a tick and offers Import more.
Step 5 — Start your first chat
The second card, Start your first chat, is for messaging one person without importing a list first. Click New chat to open the Add Contact window.
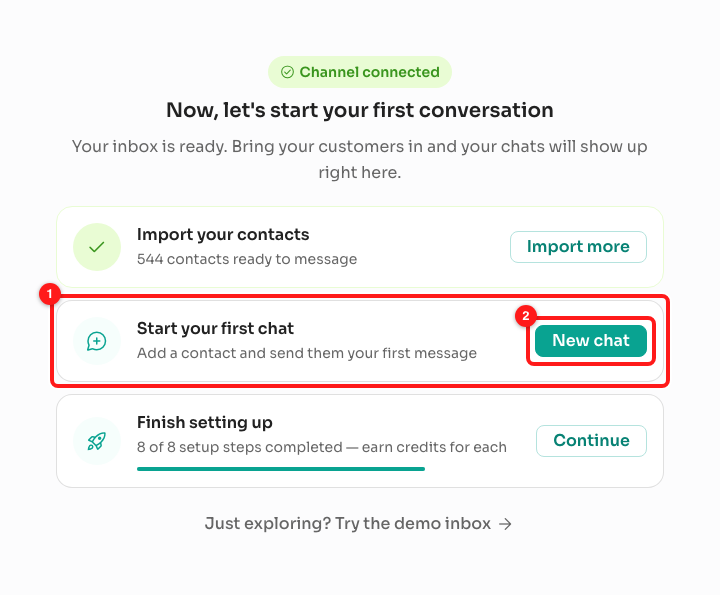
Step 5 — the first-chat card (1) and the New chat button (2).
Step 6 — Fill in the contact and let ChatDaddy open the chat
Three fields are required, and they are marked with a red asterisk: Name, Phone Number and Select Channel — the channel decides which of your connected numbers the message will be sent from. Tags and an assignee are optional. Save stays greyed out until the three required fields are filled; hover over it and a tooltip lists exactly which ones are still missing.
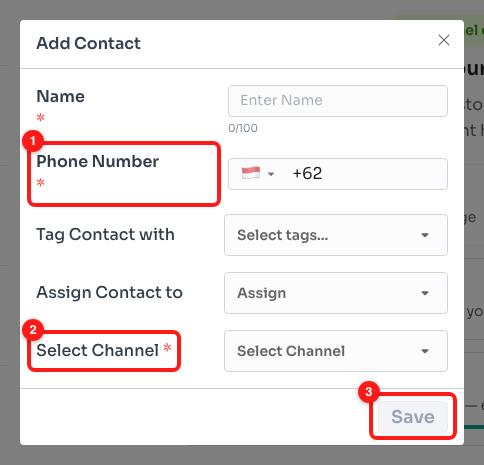
Step 6 — the phone number (1) and the channel (2) are both required before Save (3) becomes available.
After you save, the button changes to “Opening chat…” while ChatDaddy finds the new contact, then drops you straight into their conversation ready to type. If your contact list is still catching up you will see “Contact saved — their chat will appear in your list in a moment.” instead; the contact is safely saved either way.
Step 7 — Finish the setup checklist
The third card, Finish setting up, tracks the wider onboarding checklist — connecting a channel, importing contacts, inviting a teammate, building a message flow, scheduling a broadcast and so on. It shows how many steps you have completed and a progress bar, and each completed step earns credits. Continue opens the full Getting Started page.
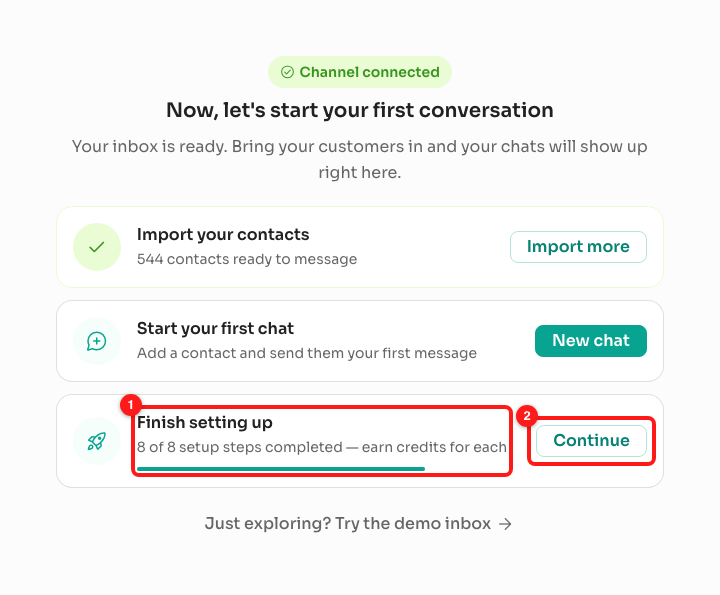
Step 7 — the progress line and the step count (1), with Continue (2) leading to the Getting Started page.
Just want to look around first?
At the bottom of the panel is “Just exploring? Try the demo inbox” — the same thing as Try the Demo Inbox on the no-channel welcome screen. It opens a simulated Testing channel that looks and behaves like the real Inbox: a sample customer, a conversation pane, a compose bar, buttons, list messages and calls.
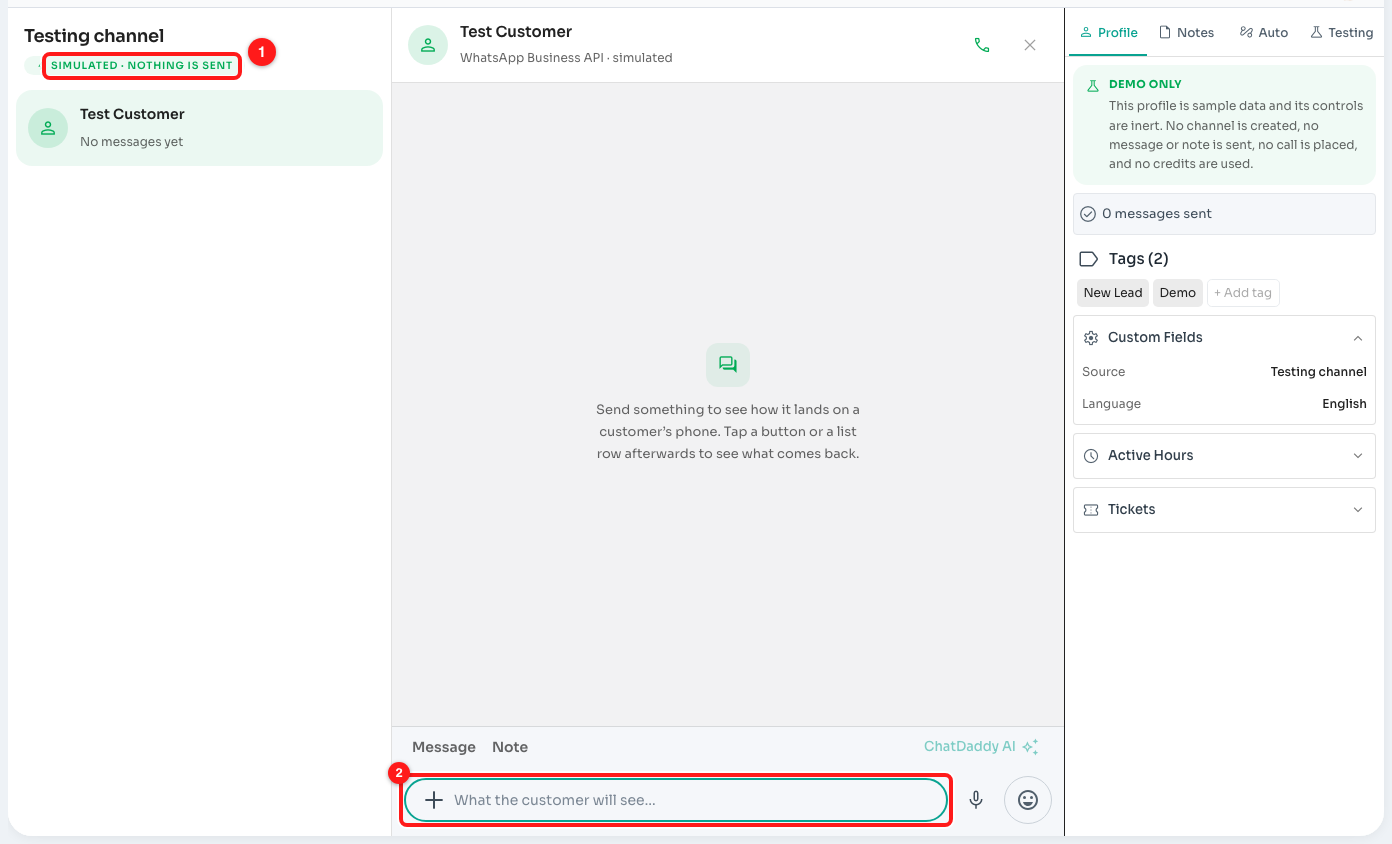
The demo inbox is labelled SIMULATED · NOTHING IS SENT (1); type in the compose bar (2) to see how a message would land on a customer’s phone.
🧪 Nothing in the demo inbox reaches anyone. No channel is created, no message or note is sent, no call is placed and no credits are used — it is the safe place to learn what WhatsApp will and will not allow before you connect a real number.
Troubleshooting
My inbox is empty but I do not see this panel at all.
You almost certainly have conversations that are being hidden. The panel is deliberately narrow: it appears only when your team has no conversations whatsoever, so a search term, an unread/assigned filter or a channel filter that returns nothing will show you an empty list instead. Clear the search box and reset your filters. It also stays hidden while the chat list is still loading, or if loading failed — in that case refresh the page.
The panel says my contacts are already imported, but my inbox is still empty.
That is normal. Having contacts is not the same as having conversations — a conversation only starts once you message someone or a customer messages you. Use New chat on the second card to send your first message, and the panel will disappear as soon as it goes out.
I connected WhatsApp but my old chats have not appeared.
If your channel is still importing its history you will see a notice reading “We’re syncing your WhatsApp chat history — this can take up to 24 hours. You can send messages right away.” Nothing is wrong; older conversations will fill in as the sync progresses, and you can start new chats in the meantime. Note that Instagram and Messenger never import past conversations at all — those channels only show messages received after you connected them.
Save is greyed out on the Add Contact window.
One of the three required fields is empty. Name, Phone Number and Select Channel must all be filled in — the channel is the one most often missed, because it is the last field on the form. Hover over the greyed-out Save button and ChatDaddy lists exactly what is still missing.
Can I get the panel back after my first conversation arrives?
No, and you should not need to. Everything on it lives elsewhere in the app: contact import is on the Contacts page, new contacts and chats start from there too, and the setup checklist with its credit rewards is on the Getting Started page.