
Automation — Setting Up Keyword Auto-Reply
Automation — Setting Up Keyword Auto-Reply
Keyword auto-replies send an instant response whenever an incoming message matches a keyword you set — perfect for FAQs, opening hours, pricing, or "menu" style menus.
Step 1: Open Keyword Reply
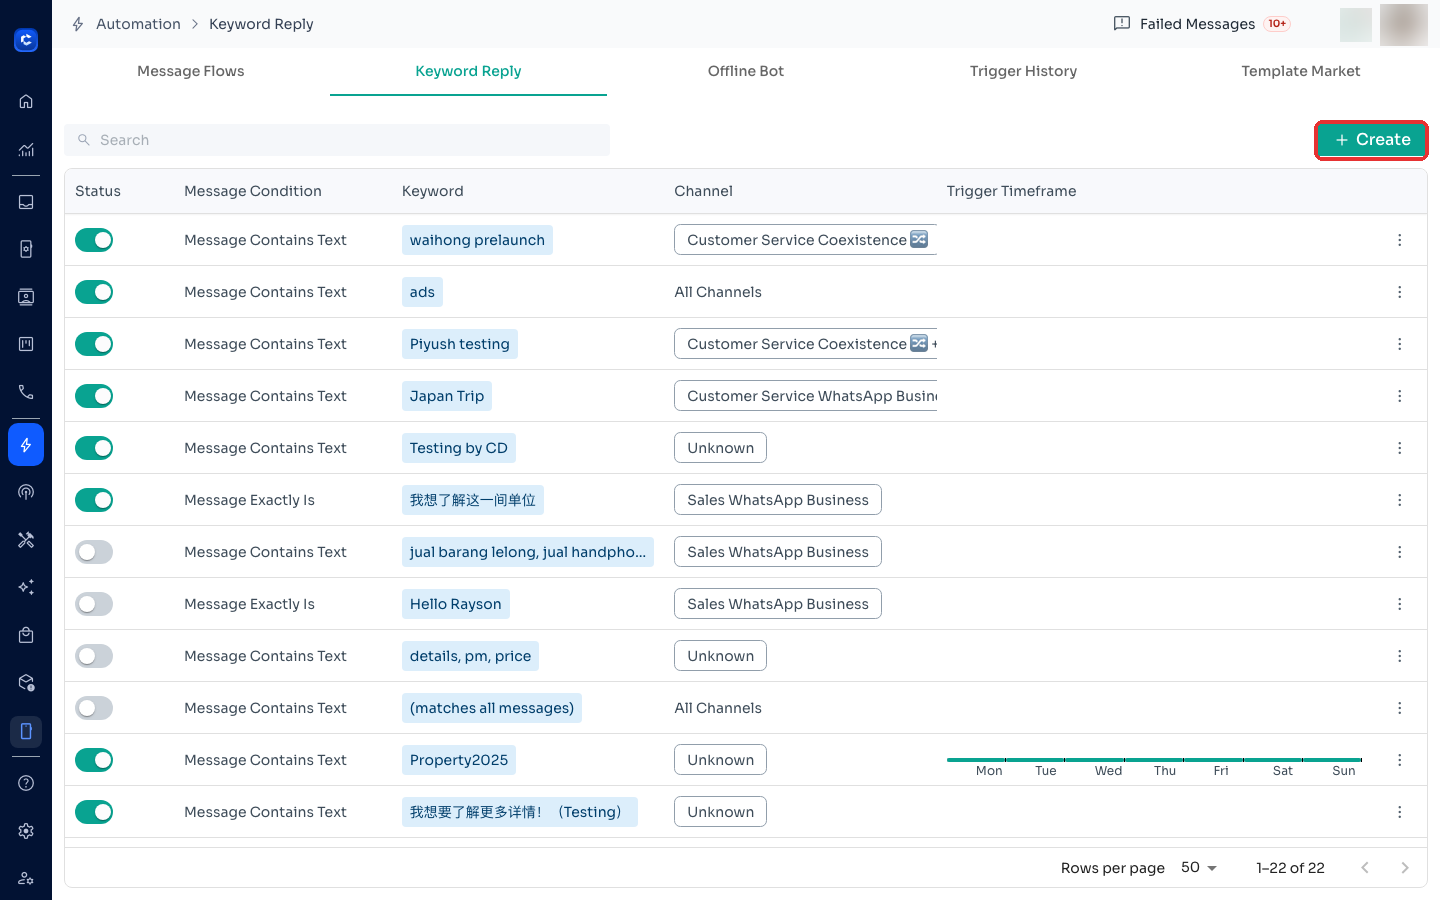
Go to Automation in the left sidebar, then open the Keyword Reply tab. Click + Create.
Step 2: Set the trigger condition
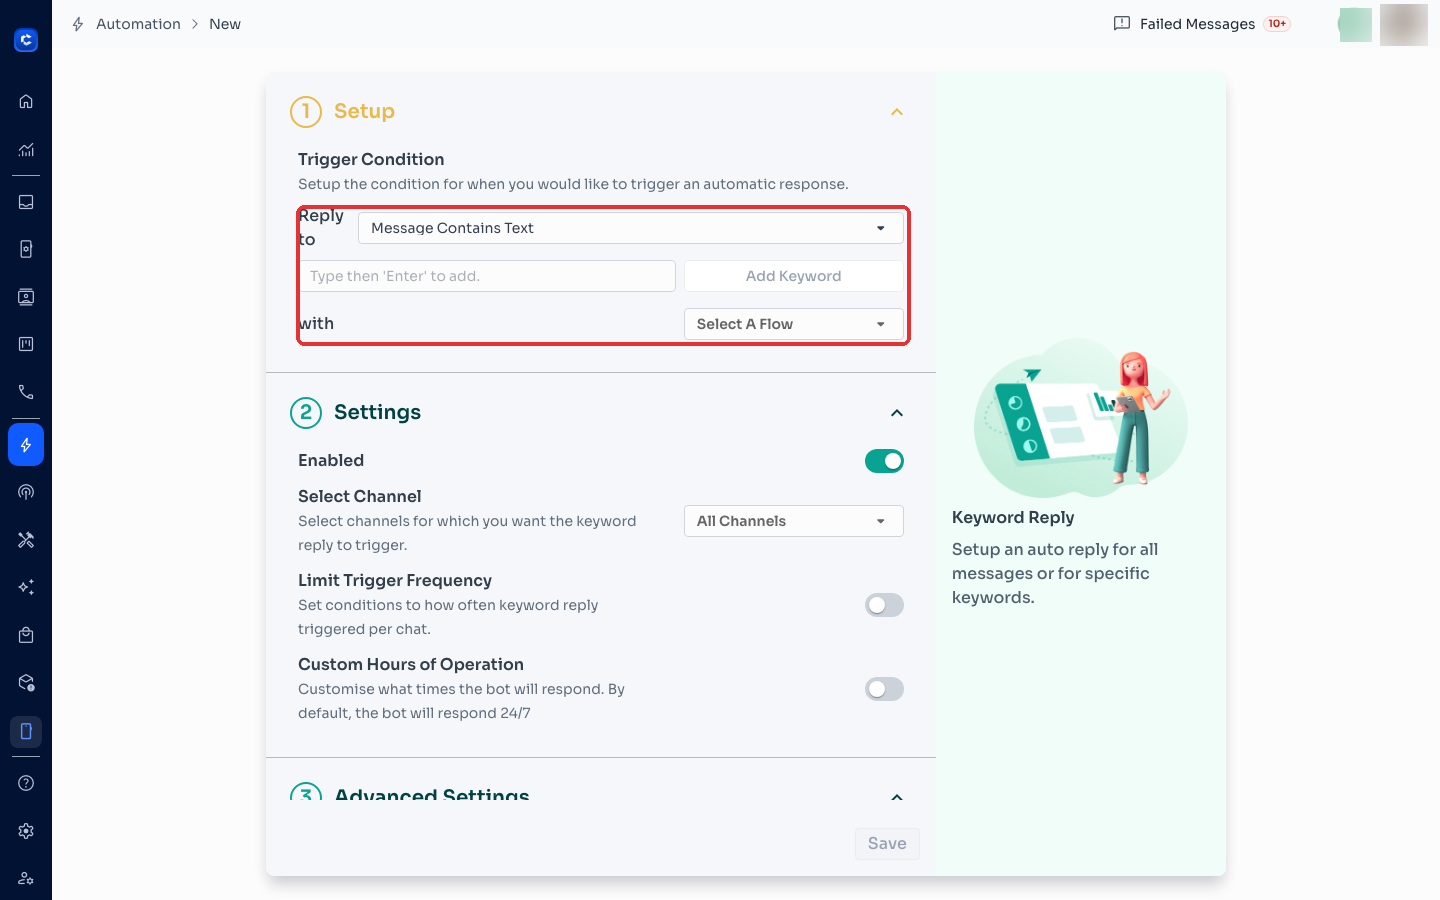
Under Setup, choose how to match the message (e.g. Message Contains Text), type your keyword into the box and press Enter to add it. Add as many keywords as you want.
Step 3: Choose what to reply with
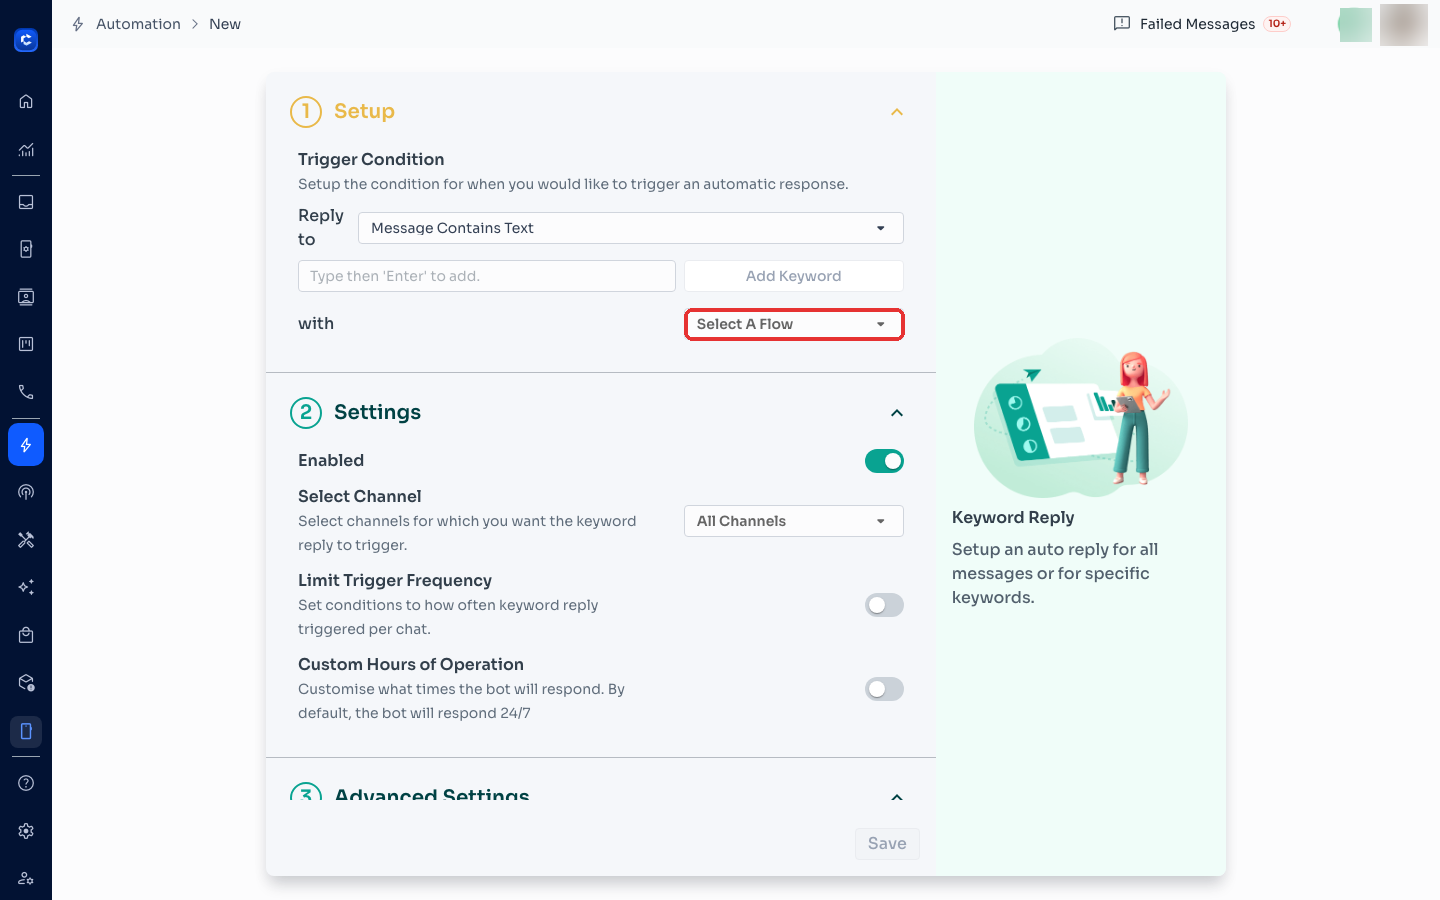
In the with field, pick the message flow to send as the reply (Select A Flow).
Step 4: Configure settings
Under Settings:
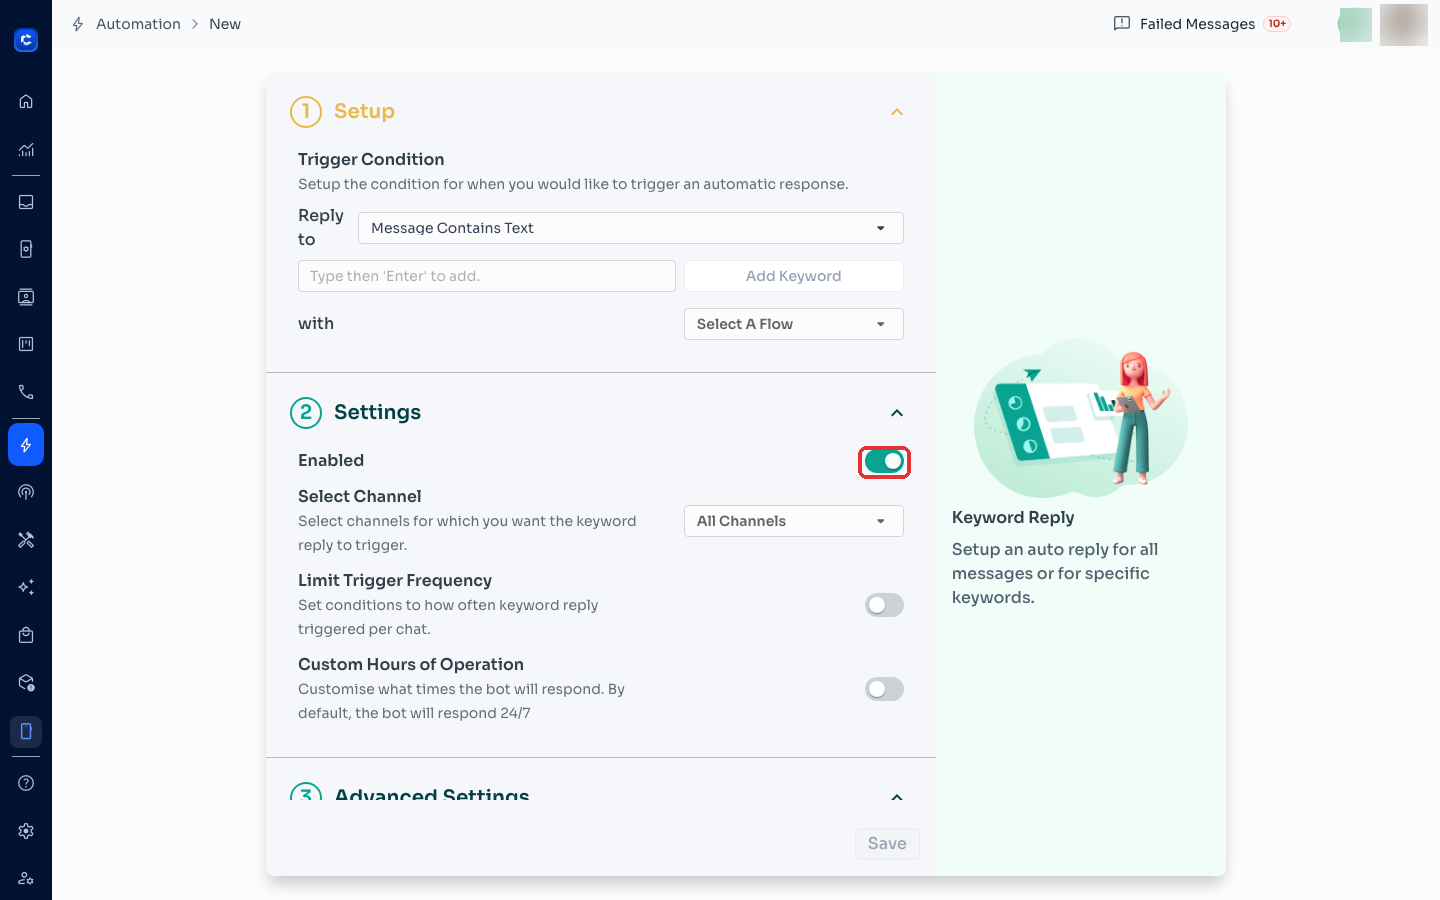
- Enabled — switch on so the reply goes live
- Select Channel — all channels or specific ones
- Limit Trigger Frequency — cap how often it fires per chat
- Custom Hours of Operation — restrict to business hours (off = 24/7)
Step 5: Save and test
Click Save, then send yourself a test message containing the keyword to confirm the auto-reply fires.
Tip: for messages outside business hours, pair this with the Offline Bot so customers always get a response.