
How to Fix a Start Flow Node That Needs Relinking
When a Start Flow node warns that "the start node of this flow was changed or removed", the link between your two flows has come loose and the second flow may never run. Here is what the warning means and how to relink it in a few clicks.
Also searched as: How to Fix a Start Flow Node That Needs Relinking, Why it happens, Open the flow that shows the warning, Find the Start Flow node on the canvas, Open the node and check the other flow, Reselect the flow to relink it, Save the flow, Start, Flow, Node, Needs, Relinking
A Start Flow node lets one message flow hand over to another one, so you can reuse a flow you have already built instead of rebuilding it. The node points at two things: the flow you want to run, and the start node inside that flow — the exact step the handover should begin at.
If someone later changes or deletes that start node in the other flow, the pointer no longer matches anything and ChatDaddy shows an amber warning on the Start Flow node. This article is for anyone who builds message flows and has seen that warning appear.
⚠️ The warning reads: “The start node of this flow was changed or removed. This flow may not work as expected. Please reselect the flow to relink it.” It is not cosmetic — the handover is pointing at a step that no longer exists, so the second flow can fail to run for your customers. Fixing it takes about ten seconds.
Why it happens
- Someone edited the other flow and made a different step the first one.
- The step the handover pointed at was deleted.
- The other flow was rebuilt or re-imported, so its steps have new internal IDs.
None of these are mistakes on your part — editing a flow is normal. ChatDaddy simply cannot guess which step you now want the handover to land on, so it asks you to point at the flow again.
Step-by-step
Step 1 — Open the flow that shows the warning
Go to Automation → Message Flows and open the flow containing the Start Flow node. If you are not sure which flow it is, the warning only appears inside the builder, so open the flow you were last working on — or use the Search box above the list to find it by name.
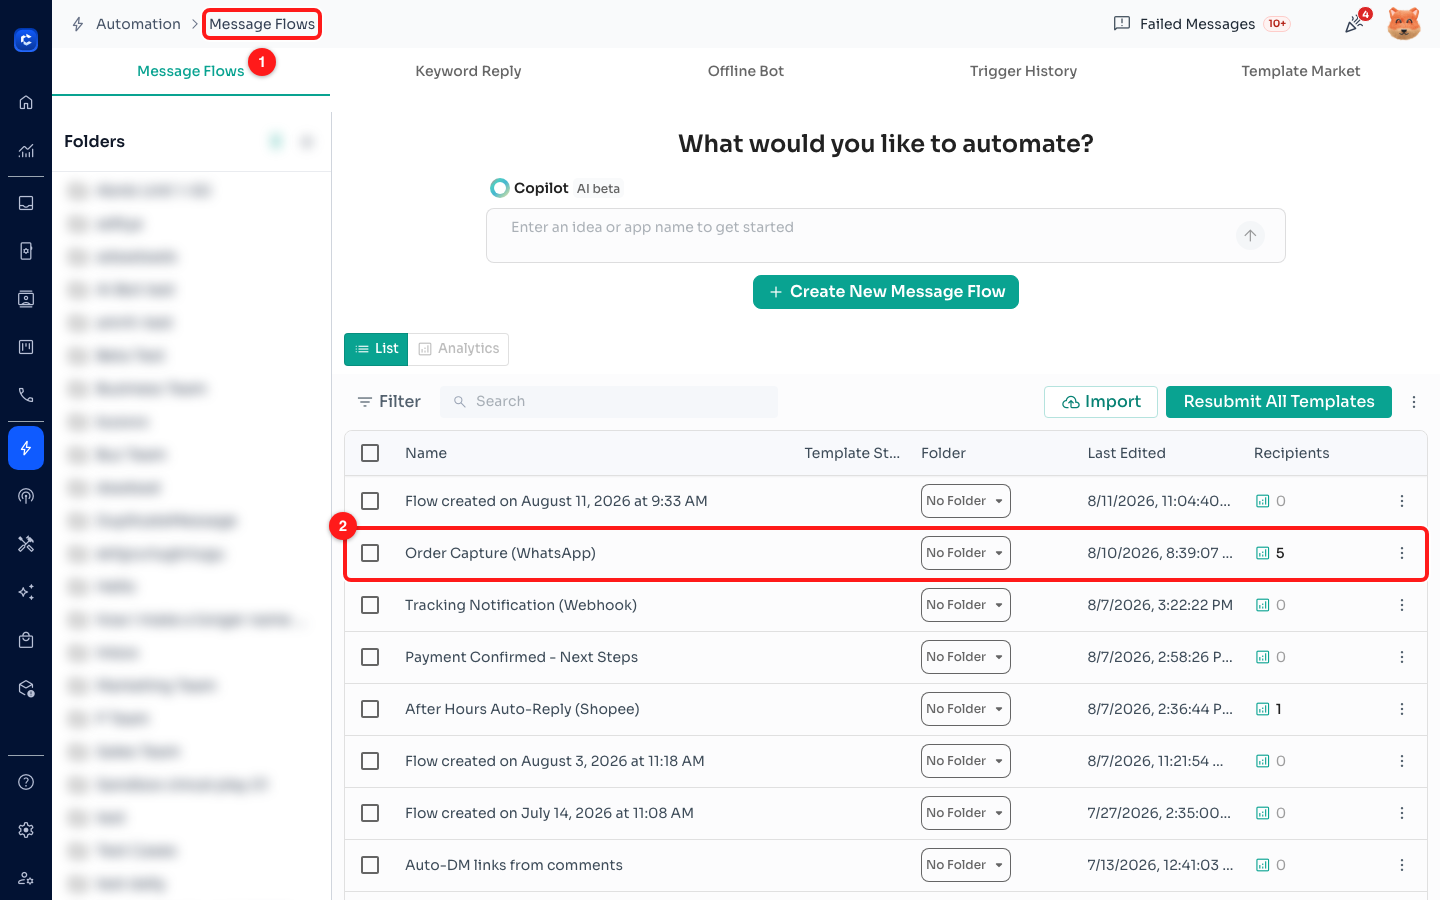
Step 1 — the Automation → Message Flows breadcrumb (1) and the flow you want to open (2). Click the flow name to open it in the builder.
Step 2 — Find the Start Flow node on the canvas
On the canvas, a Start Flow node shows the name of the flow it hands over to. When the link is broken, the amber warning sits directly underneath that name, so you can spot the problem without opening anything.
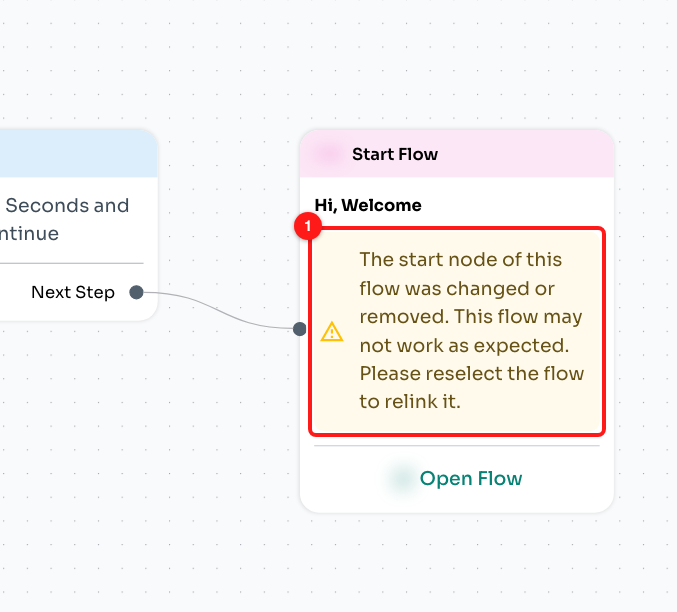
Step 2 — the warning on the Start Flow node (1). The flow name above it is the flow this node is meant to start.
Step 3 — Open the node and check the other flow
Click the Start Flow node to open its settings panel on the left. The same warning appears here, under the flow picker. Before you relink, it is worth checking that the other flow still starts where you expect it to — the Open Flow button opens it in a new browser tab, leaving your work here untouched.
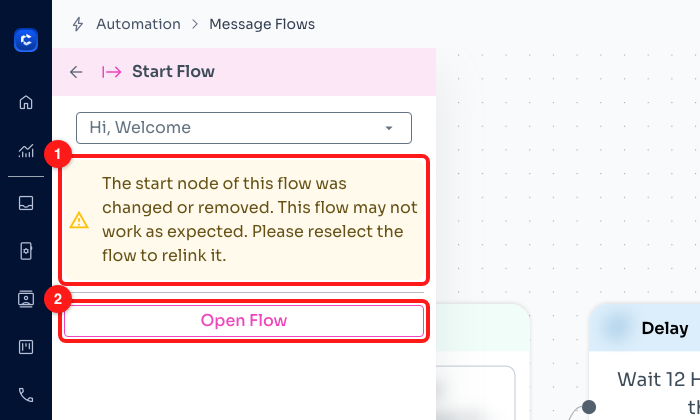
Step 3 — the warning inside the node panel (1) and the Open Flow button (2), which opens the linked flow in a new tab.
Step 4 — Reselect the flow to relink it
Click the flow picker at the top of the panel — the box showing the current flow name. Find the same flow in the list (type its name in the search box to narrow it down) and click it. Selecting it re-reads that flow’s current start node and points the handover at it, which is all "relinking" means.
You are not limited to the flow that was there before. If you want the handover to go somewhere else entirely, pick a different flow from the same list.
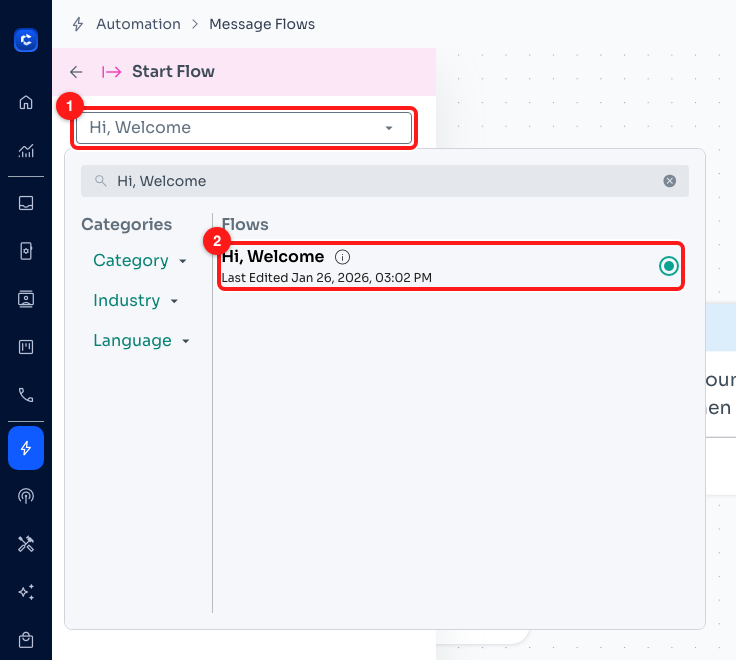
Step 4 — the flow picker (1) and the flow to click (2). The green ring on the right marks the flow currently selected.
As soon as you make a valid selection, the amber warning disappears from both the panel and the node on the canvas.
Step 5 — Save the flow
Close the panel and use Save in the builder’s top bar. The button stays greyed out until there is a change to save, so it turning solid is a useful confirmation that your relink registered. ChatDaddy also auto-saves the builder roughly every 15 seconds, but pressing Save is the safe habit.
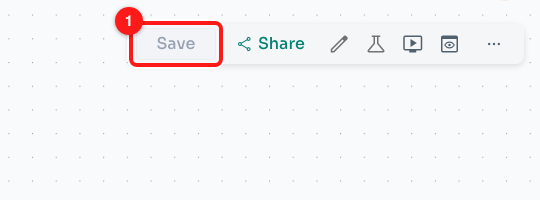
Step 5 — the Save button (1) in the flow builder’s top bar, shown greyed out here because there is nothing waiting to be saved.
Frequently asked questions
Will the flow still run while the warning is showing?
It may, but do not rely on it. The node is pointing at a step that no longer exists in the other flow, so the handover can silently fail and your customer never receives the second flow’s messages. Treat the warning as something to clear the same day you see it.
The flow I want is greyed out and I cannot click it.
Hover it and you will see: “This flow has no starting message yet, so it can’t be linked.” A flow can only be started by another flow once it has a first step of its own. Open that flow, add its first message or action, save it, then come back and reselect it here.
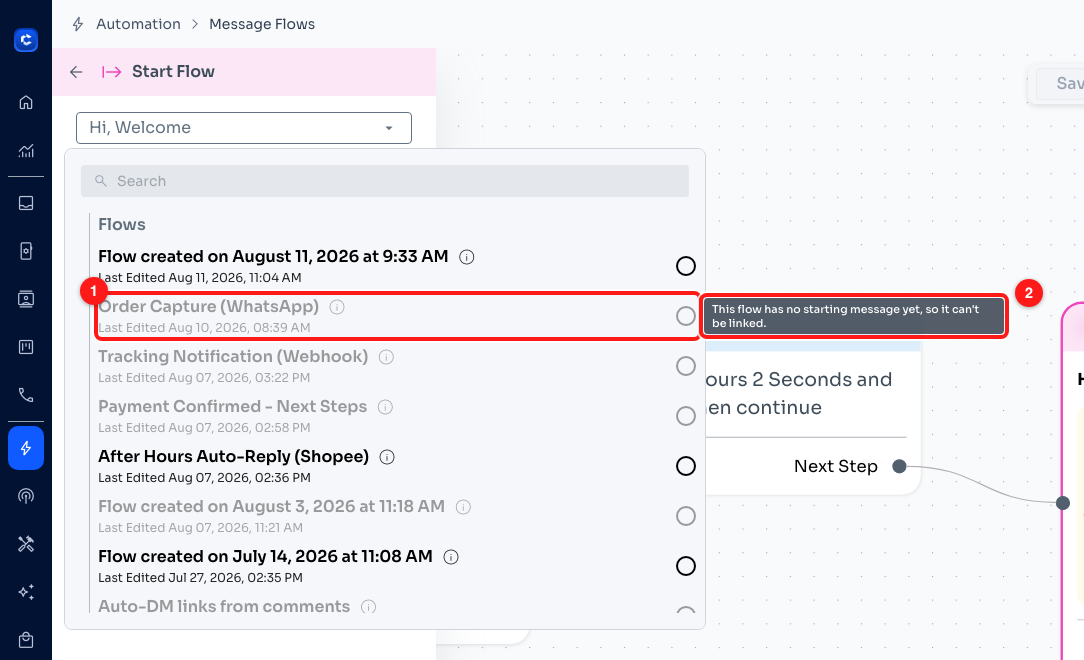
A flow that cannot be linked yet (1) and the tooltip explaining why (2).
The node says “Flow not found”.
The flow it pointed at has been deleted, or it belongs to a team you no longer have access to. Open the node and pick a flow that still exists — or delete the Start Flow node if the handover is no longer wanted.
The node says “No flow selected”.
The node was added but never pointed at anything. Click it and choose a flow from the picker, exactly as in Step 4.
I reselected the same flow. Did anything actually change?
Yes. The name you see stays the same, but underneath it the node stores which step inside that flow to begin at. Reselecting refreshes that stored step to the flow’s current first one, which is what clears the warning.
Can I stop this happening again?
Whenever you change which step comes first in a flow, check whether any other flow starts it. If your team edits flows together, agree on who owns the shared flows — reordering the first step of a flow that three others hand over to will put this warning on all three.
Where does the warning appear?
In two places, and they are the same warning: on the Start Flow node on the canvas, and inside that node’s settings panel when you open it. Clearing it in one clears it in both.