
How to Rename, Duplicate, Delete and Download a Flow
Everyday housekeeping on the Message Flows list: rename a flow in place, copy one before you change it, delete the ones you no longer use, and save a flow as a .yaml file or a picture you can share.
Also searched as: How to Rename, Duplicate, Delete and Download a Flow, Rename a flow straight from the list, Type the new name and press Enter, Or rename it while the flow is open, Duplicate a flow before you experiment, Delete a flow you no longer use, Export or delete several flows at once, Download a single flow as a file or a picture, Rename, Duplicate, Delete, Download, Flow
A team that has been automating for a while ends up with a long list of message flows, and a fair few of them are called “Flow created on 11 August 2026”. This article covers the four housekeeping jobs you will do most often on that list — renaming, duplicating, deleting and downloading a flow — and where each one lives.
You will find all of them on Automation → Message Flows, either on the row itself or in the … menu once a flow is open.
⚠️ Deleting a flow is permanent — there is no bin to restore it from. If you only want a flow out of the way, export it first (Step 6) or duplicate it before you make big changes.
Step-by-step
Step 1 — Rename a flow straight from the list
Open Automation → Message Flows and hover over the flow you want to rename. A small pencil appears at the right-hand end of the Name column.

Step 1 — hover the row (1) and the rename pencil appears next to the name (2).
Step 2 — Type the new name and press Enter
Click the pencil and the name turns into a text box. Type the new name, then press Enter to save it. Press Esc to cancel, or clear the box and click away — an empty name is ignored and the old one comes back.

Step 2 — the name becomes an editable field (1). Enter saves, Esc cancels.
✏️ Renaming only changes the label your team sees. Triggers, keywords, links and analytics all stay attached to the same flow.
Step 3 — Or rename it while the flow is open
If you are already inside a flow, click the pencil in the toolbar at the top right (Edit Flow Details). The Update Message Flow Details window lets you change the Name, and while you are there you can add a description for your team, a category, an industry, a language and a thumbnail. Click Save when you are done.
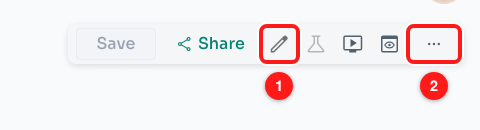
Step 3 — inside a flow: the pencil opens the flow details (1), the ⋯ button holds download, export and delete (2).
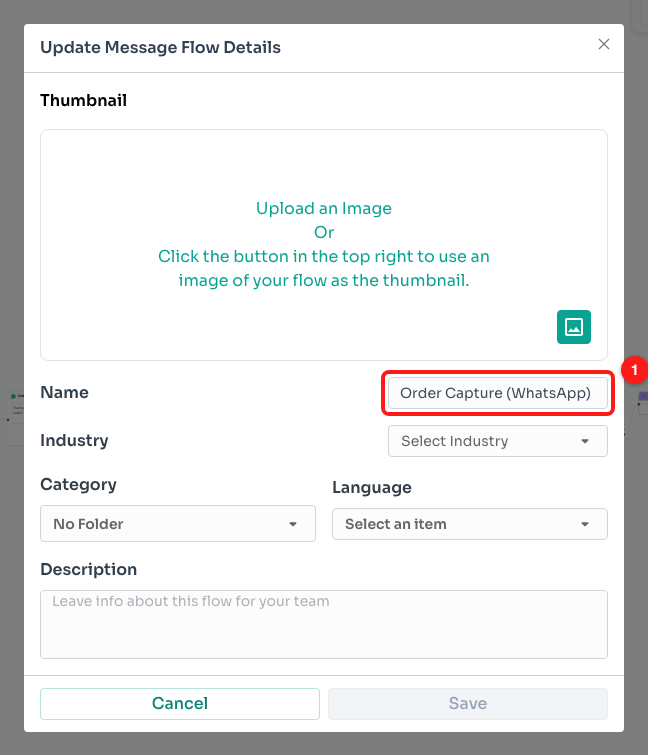
Step 3 — the Name field in Update Message Flow Details (1).
Step 4 — Duplicate a flow before you experiment
Copying a flow is the safe way to try a different version of a working automation. Click the ⋮ button at the end of the row and choose Duplicate. ChatDaddy rebuilds every step, note and trigger in a brand-new flow and confirms with “Successfully duplicated …”.
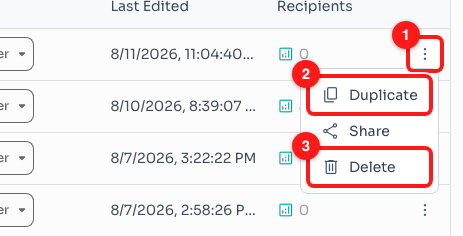
Step 4 — the row menu (1) holds Duplicate (2) and Delete (3).
📋 The copy keeps the same name as the original, so you end up with two identical-looking rows. Rename the copy right away (Step 1) — it is the one at the top of the list, which is ordered by Last Edited.
Step 5 — Delete a flow you no longer use
From the same ⋮ menu, choose Delete. ChatDaddy asks you to confirm first, and tells you exactly how many flows are about to go.
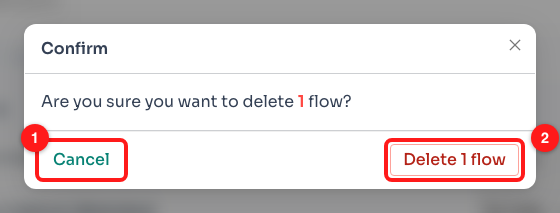
Step 5 — Cancel backs out (1); Delete 1 flow removes it for good (2).
Deleting is not reversible, so it is worth checking two things before you confirm: whether the flow still has a live trigger (a keyword, a schedule or a link your customers use), and whether anyone reports on its numbers — the recipients count and its analytics go with it.
Step 6 — Export or delete several flows at once
Tick the checkbox on each flow you want, and a bar appears above the list showing N Selected with Export, Change Category and Delete next to it. The same actions apply to everything you have ticked.
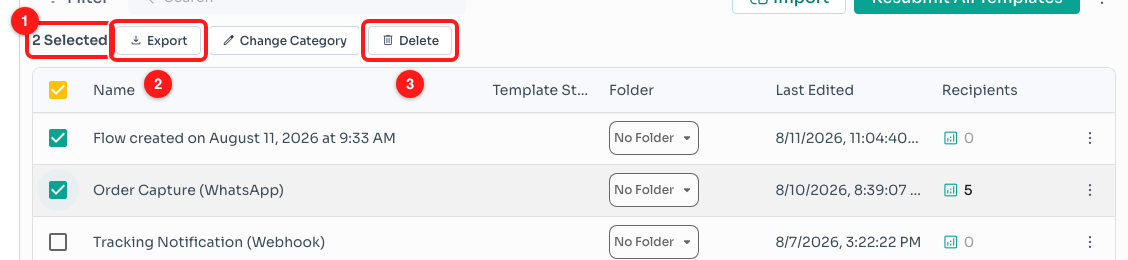
Step 6 — the selection count (1), Export (2) and Delete (3).
Click Export and ChatDaddy asks whether to include the values of your flow variables in the file. Leave it unticked to export the structure only — tick it if you are moving a working flow to another team and want its saved values to come along. Click Export to download a single .yaml file containing all the flows you selected.
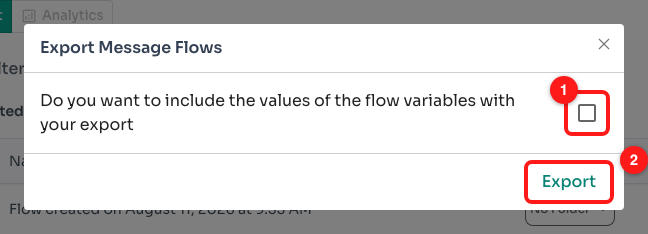
Step 6 — the variable-values checkbox (1), then Export (2).
📥 A
.yamlexport is the file you feed back into Import on the same page, so it is also the simplest backup you can take before a big edit.
Step 7 — Download a single flow as a file or a picture
Open the flow and click the ⋯ button in the toolbar. Two of the entries produce a download:
- Download (.svg) — a picture of the whole canvas. Good for sharing a flow in a document, a deck or a chat with someone who does not use ChatDaddy.
- Export (.yaml) File — the flow itself, in the format ChatDaddy can import again. This is the one to use for backups and for moving a flow between teams.
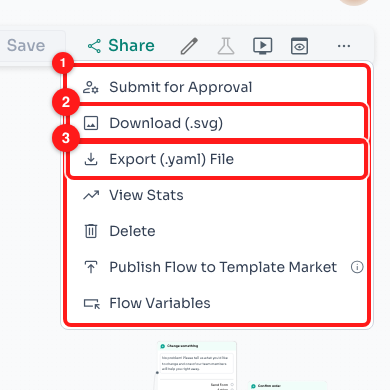
Step 7 — the ⋯ menu (1) with Download (.svg) (2) and Export (.yaml) File (3).
Choosing Download (.svg) shows you the image first. ChatDaddy fits the whole flow into view, hides the animations and renders it — click Download to save the file, or close the window if it is not what you wanted.
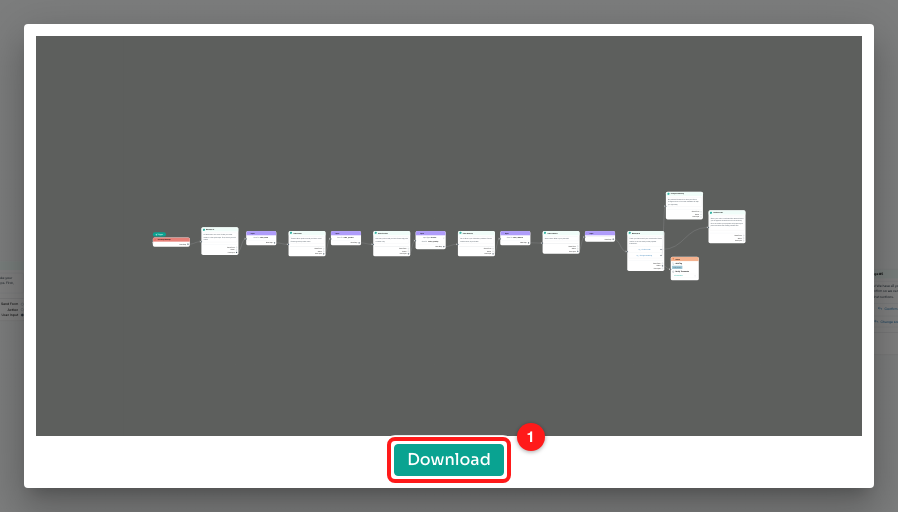
Step 7 — the preview of the finished image, with the Download button (1).
Troubleshooting
The pencil does not appear when I hover a row.
The pencil only shows while the pointer is over that row, and it sits at the right-hand edge of the Name column, just before Template Status. On a narrow window the column shrinks, so widen the browser or scroll the list sideways. You can also open the flow and rename it from the pencil in the toolbar instead.
I renamed a flow but the old name is still showing.
The name is saved when you press Enter or click away from the field. If you pressed Esc, the edit was cancelled on purpose. If it snapped back on its own, the save was refused — refresh the page and try once more, and check you are not offline.
Delete is missing or does nothing.
Deleting flows is permission-controlled. If your role does not include it, the option is unavailable — ask your team owner to grant the delete permission for message flows, or ask them to remove the flow for you.
I duplicated a flow — will the copy start messaging people?
Not by itself. The copy is a new flow with its own triggers, and it only runs when one of those triggers fires. Do check the copy before you leave it, though: if the original was started by a keyword or a schedule, the copy carries the same setup, so two flows could answer the same customer.
The .svg download looks empty or the pictures are missing.
The image is rendered from what is on the canvas, so give the preview a few seconds to finish before you judge it. Photos and files you uploaded into the flow are swapped for a plain grey placeholder in the picture — every step, button and line of text is still there.
Can I get a deleted flow back?
No. Deletion is permanent and support cannot restore it. If you exported the flow to a .yaml file at any point, import that file to rebuild it; otherwise it has to be built again.