
How to See Which Ad or Post Started a Chat
When someone messages you after tapping one of your Facebook or Instagram ads or posts, the Inbox shows that ad or post on their first message, with a copyable Ad ID, Post ID or Source ID you can match back to your campaign — and a message flow can use that same Ad ID to reply only to those chats.
Also searched as: How to See Which Ad or Post Started a Chat, Where the card appears, Open the chat in your Inbox, Read the card on the first message, Copy the ID, Check the label to see what kind of source it was, Reply automatically to chats that came from one specific ad, Create a message flow from scratch, Start the flow with the Incoming Message trigger, Add a Condition as the next step, Set the condition to Ad Source is your Ad ID, Build the rest of the flow and save it, Which, Post, Started
If you run ads on Facebook or Instagram that send people into a chat, the hard part is usually knowing which ad actually brought each person in. ChatDaddy shows it for you: when a customer starts a chat by tapping one of your ads or posts, their first message carries a small card with that ad or post on it, plus the ID Meta uses for it.
This is for anyone running paid campaigns or organic posts that point at WhatsApp, Messenger or Instagram, and for the support team who wants context before replying.
📣 There is nothing to switch on. The card appears only on chats that genuinely started from a Facebook or Instagram ad or post — Meta passes the source across with the customer's first message. Chats that started any other way simply have no card.
Where the card appears
Open the conversation in your Inbox. The card sits inside the customer's own message bubble, above their message text — normally on the very first message they sent you. It shows the ad or post thumbnail, its headline, its description, and a grey row with the ID.
Step-by-step
Step 1 — Open the chat in your Inbox
Click the Inbox icon in the left sidebar, then pick the conversation you want from the chat list. The conversation opens on the right.
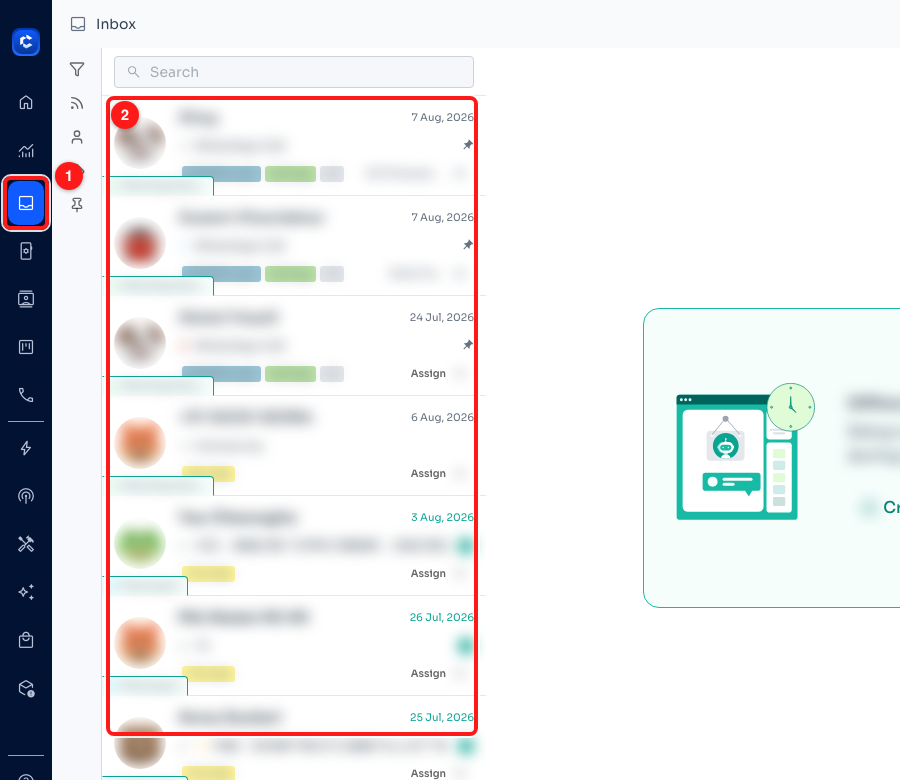
Step 1 — the Inbox icon in the left sidebar (1) and the chat list you pick the conversation from (2). Customer details are blurred here.
Step 2 — Read the card on the first message
Scroll to the start of the conversation. If the chat came from an ad, you will see the ad card above the customer's text:
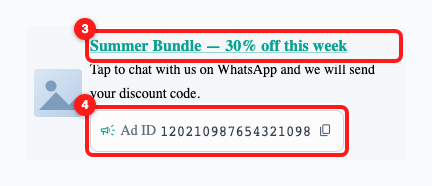
Step 2 — the headline links straight to the ad or post (3); the grey row underneath carries the label and the ID (4). Example ad shown.
- The headline is a link. Click it to open the ad or post itself in a new tab.
- The description is the ad or post copy Meta sent us, trimmed to two lines.
- The grey row names what the source was — Ad ID, Post ID or Source ID — and shows the ID next to it.
Step 3 — Copy the ID
Click the copy icon at the end of the grey row. The tooltip reads Copy Ad ID (or Post ID / Source ID), and once you click it the icon changes colour and the tooltip says Copied for a couple of seconds. Paste the ID into Meta Ads Manager, your reporting sheet or a CRM note to tie the conversation to the campaign that paid for it.
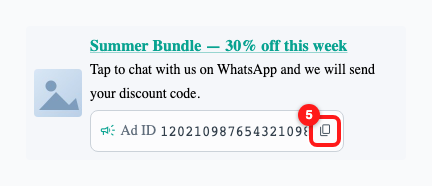
Step 3 — the copy button at the end of the ID row (5).
Step 4 — Check the label to see what kind of source it was
The label changes with the kind of source, so you can tell paid traffic from organic traffic at a glance. A chat that started from an ordinary post reads Post ID:
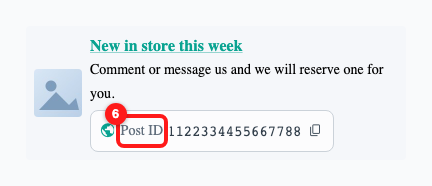
Step 4 — an organic post shows the Post ID label (6).
If Meta tells us a chat came from a referral but does not say whether it was an ad or a post, the card falls back to the neutral Source ID label. The ID is still correct and still copyable — only the wording is more general.
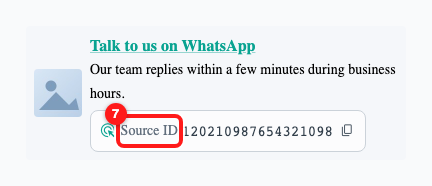
Step 4 — the neutral Source ID label used when the kind of source is not specified (7).
Reply automatically to chats that came from one specific ad
The Ad ID is not only for reporting. A message flow can read the same ad source that the card shows and act only on the chats that came from one particular ad — so a campaign can get its own welcome message, its own tag, or its own hand-off to a team, while every other chat is left alone.
You will need the Ad ID first: copy it from a chat that came from that campaign, exactly as described in Step 3 above. Then build the flow.
💡 Ad Source is a property of the incoming message, not of the contact. It is set on the message that carried the referral — normally the customer's first message after they tapped your ad — so the flow runs for chats that arrive from that ad, and never for chats that started any other way.
Step 5 — Create a message flow from scratch
Go to Automation → Message Flows and click + Create New Message Flow.
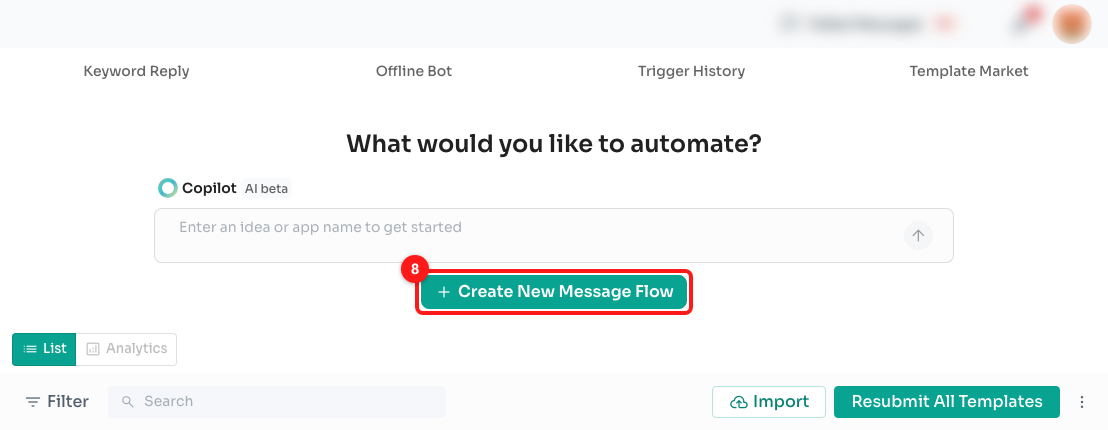
Step 5 — the Create New Message Flow button on the Message Flows page (8).
The Choose your goal window opens with templates and AI suggestions. Ignore those and click Start from scratch in the top-right corner — you want an empty canvas, not a prefilled template.
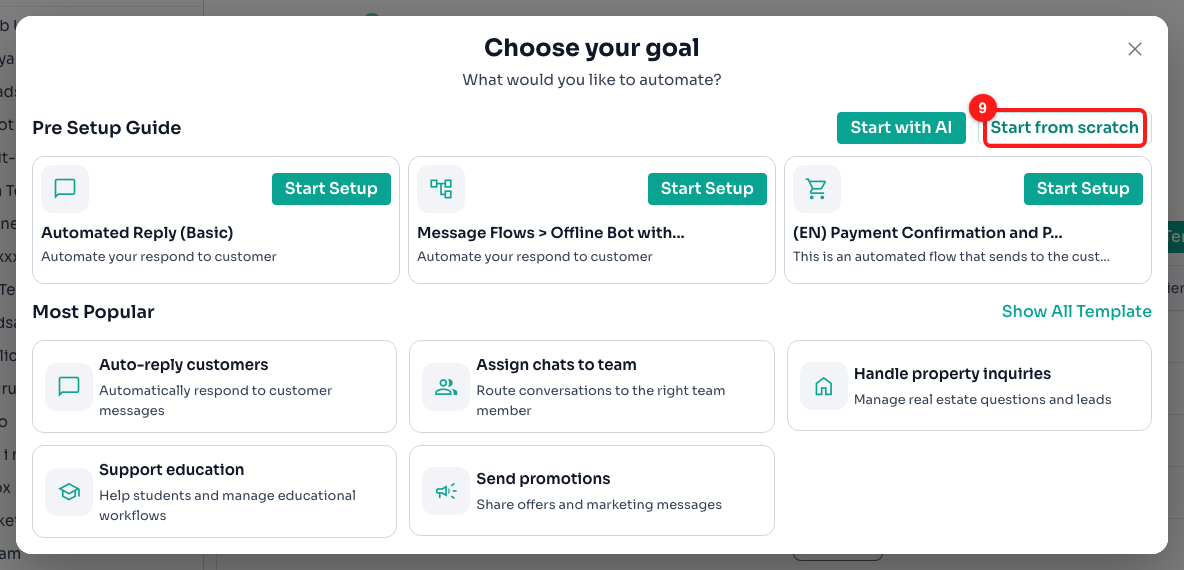
Step 5 — Start from scratch, top right of the Choose your goal window (9).
Step 6 — Start the flow with the Incoming Message trigger
The empty canvas asks you to Choose Starting Step. Pick Trigger — a trigger is what lets the flow start on its own when a customer messages you.
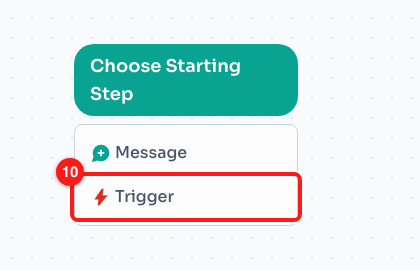
Step 6 — Trigger, in the Choose Starting Step card (10).
The Add New Node window opens on the Trigger category. Choose Incoming Message: that is the trigger event that fires whenever a customer sends you a message, which is exactly what a click on your ad produces.
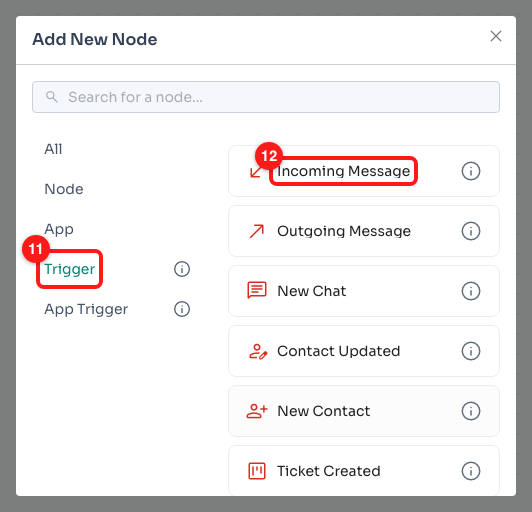
Step 6 — the Trigger category (11) and the Incoming Message trigger event (12).
Step 7 — Add a Condition as the next step
The trigger opens its settings on the left. Leave the defaults alone and click Choose Next Step at the bottom of that panel.
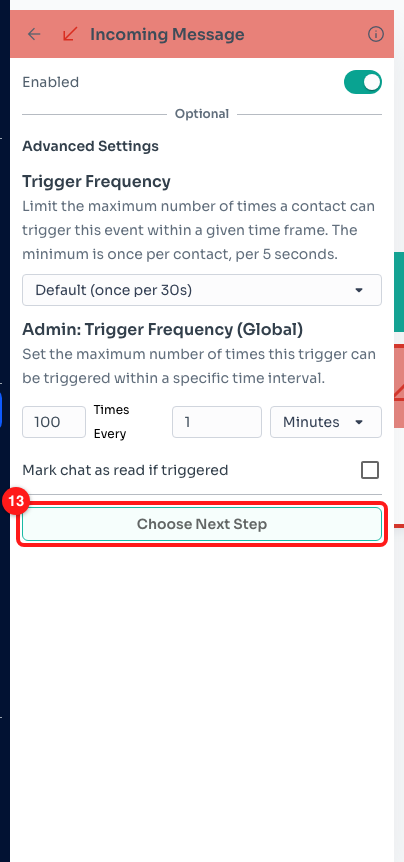
Step 7 — Choose Next Step, under the Incoming Message trigger settings (13).
Pick Condition from the list of nodes. A condition is the filter: everything you attach under it runs only for the messages that match.
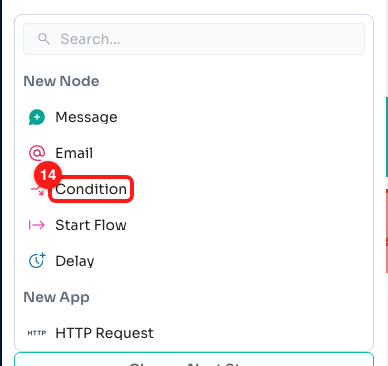
Step 7 — the Condition node in the node list (14).
Step 8 — Set the condition to Ad Source is your Ad ID
Click the new Condition node on the canvas to open its editor. A new condition node always starts with one placeholder rule, Text is not empty — remove it with the × at its right, or the flow will also demand that the message has text. Then click Add Condition.
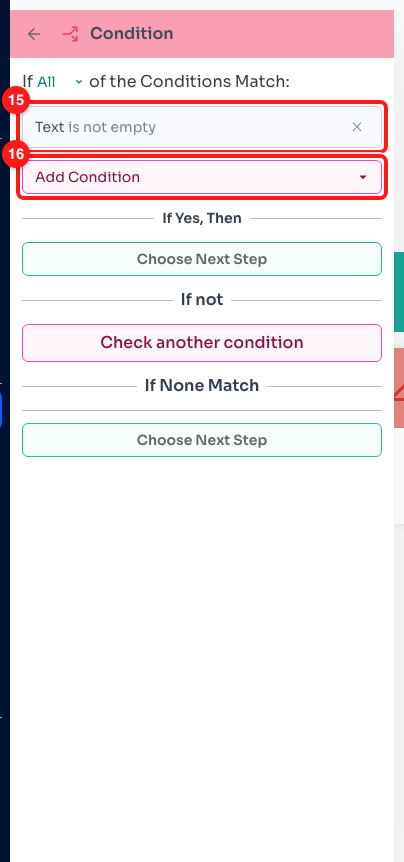
Step 8 — the placeholder rule to remove (15) and the Add Condition button (16).
The property list opens. Under Incoming Message Properties, choose Ad Source.
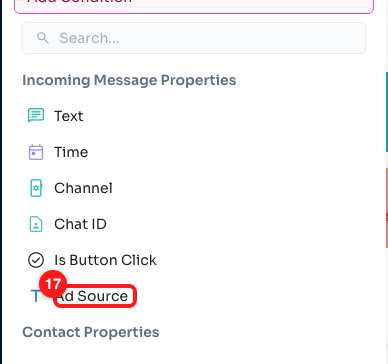
Step 8 — Ad Source, under Incoming Message Properties (17).
The rule appears with contains as its operator. Open that dropdown and select is — you want an exact match on one campaign, not a partial one.
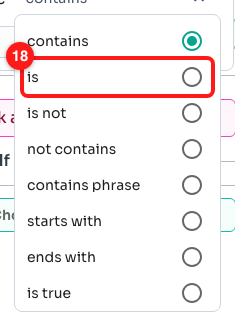
Step 8 — the “is” operator in the operator list (18).
Paste the Ad ID you copied from the chat into the value box. To cover several ads with the same flow, click + another value and paste the next Ad ID — the rule then matches any one of them.
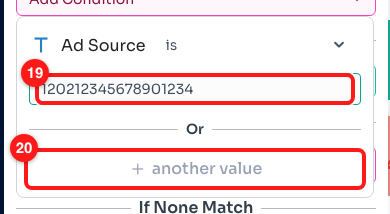
Step 8 — the Ad ID pasted into the value box (19), and + another value for a second ad (20). The ID shown here is an example.
Step 9 — Build the rest of the flow and save it
The condition now reads Ad Source is … with your ID underneath. Everything you attach under If Yes, Then runs only for chats that started from that ad: click Choose Next Step there and add the message you want those customers to receive, or a tag, or an assignment — whatever the campaign needs.
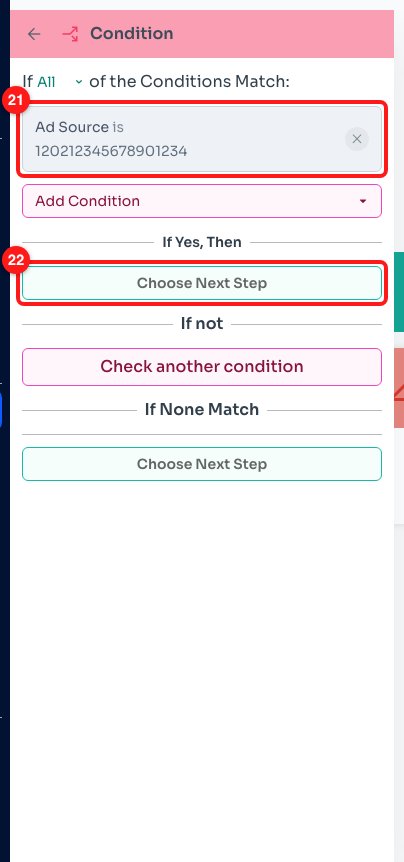
Step 9 — the finished Ad Source condition (21) and the If Yes, Then branch where the rest of the flow goes (22).
- If Yes, Then — what happens for chats that came from this ad.
- If None Match — what happens for everyone else. Leave it empty if the flow should do nothing at all for other chats.
Finish with Save at the top right. Give the flow a name that says which campaign it belongs to, so the next person can tell the two apart.
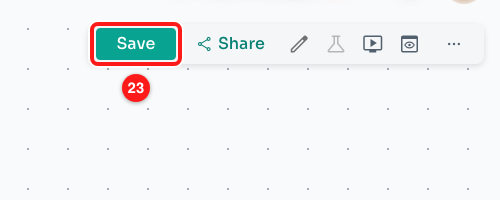
Step 9 — Save, at the top right of the flow builder (23).
⚠️ Only chats that carry the ad referral will match this condition. Customers who already had a conversation with you, or who reached you through a QR code, a wa.me link or a broadcast, do not carry an Ad ID and will fall through to If None Match.
Troubleshooting
I cannot see the card on any of my chats.
The card is only drawn when the chat actually began from a Facebook or Instagram ad or post. If your customers reach you by saving your number, scanning a QR code, clicking a wa.me link or replying to a broadcast, there is no ad or post to show and no card appears. Try a chat you know came from a live campaign.
It also only appears on the message that carried the referral — usually the customer's first one — so scroll to the top of the conversation rather than looking at the latest message.
I see a preview card but there is no ID row on it.
That is an ordinary link preview. ChatDaddy shows the same card whenever a link is shared in a chat, and the grey ID row is added only when the message came from an ad or post referral. No ID row means the message is just a shared link.
The label says “Source ID” instead of “Ad ID”.
That is expected. Meta did not tell us whether the referral was a paid ad or an organic post, so ChatDaddy uses the neutral wording rather than guessing. Paste the ID into Meta Ads Manager to see which it was.
The ID looks too long to read.
Meta IDs are long, so the card trims the ID to one line to keep the message readable. Use the copy button instead of reading it off the screen — it always copies the full ID, not the shortened version.
Clicking the headline does not open anything.
The headline opens the ad or post in a new tab, so a pop-up blocker can swallow it. Allow pop-ups for app.chatdaddy.tech and try again. If the ad has since been deleted or paused by Meta, the link can also lead to a page that is no longer available — the ID on the card still works for looking it up in Ads Manager.
I cannot find “Ad Source” in the condition list.
Ad Source lives under Incoming Message Properties, so it only appears when the condition sits under an Incoming Message trigger. If your flow starts with a message or a different trigger, that group of properties is not there — rebuild the flow with the Incoming Message trigger as its starting step.
The flow does not run for chats that came from my ad.
Check the ID first: open the chat, copy the ID off the card with the copy button rather than typing it out, and compare it with the value in the condition. A single missing digit is enough to stop it matching.
Then check the operator. is demands an exact match; if you pasted more than the ID, or the campaign reports a longer string, switch the rule to contains.
Finally, remember the placeholder rule: a condition node starts with Text is not empty, and while All of the conditions must match, a message without text will not pass even when the Ad ID is right.
The flow runs for chats that did not come from the ad.
That happens when the condition group is set to Any instead of All, or when the action was attached to If None Match rather than to If Yes, Then. Open the Condition node and check both.