
How to Start From an AI Agent Template
ChatDaddy ships three ready-written personalities for your AI agent — Receptionist, Sales agent and Support agent. Learn where to find them, what each one actually writes into your agent, and how to edit it afterwards.
Also searched as: How to Start From an AI Agent Template, Where to find the templates, Open the AI ChatBot list and click Create, Pick the template closest to the job, Name your agent, Set Prompt Template to the role you want, Confirm the replacement, Read what the template wrote, and edit it, Compare against the original at any time, Set the fallback message, then save, Why is Save greyed out?, Start, Agent, Template
An AI agent needs a brief: who it is, what tone to use, what it is allowed to say, and when to hand the conversation to a person. Writing that from an empty box is the slowest part of setting up a chatbot, so ChatDaddy comes with three ready-written briefs you can start from and then change.
This article shows where the templates live, what each one puts into your agent, and how to make it yours.
💡 Picking a card in the template gallery opens the agent builder, but it does not fill the wording in for you — the Prompt Template box in Settings still says Custom. Set that box to the template you chose. That is the step that actually writes the instructions.
Where to find the templates
Open AI from the left-hand menu, switch to the AI ChatBot tab, then click + Create. The gallery opens on top of your agent list. You can reach the same gallery from an empty AI ChatBot page by clicking Build AI Chatbot.
Step-by-step
Step 1 — Open the AI ChatBot list and click Create
Go to AI and select the AI ChatBot tab. The green + Create button sits at the top right of the list.
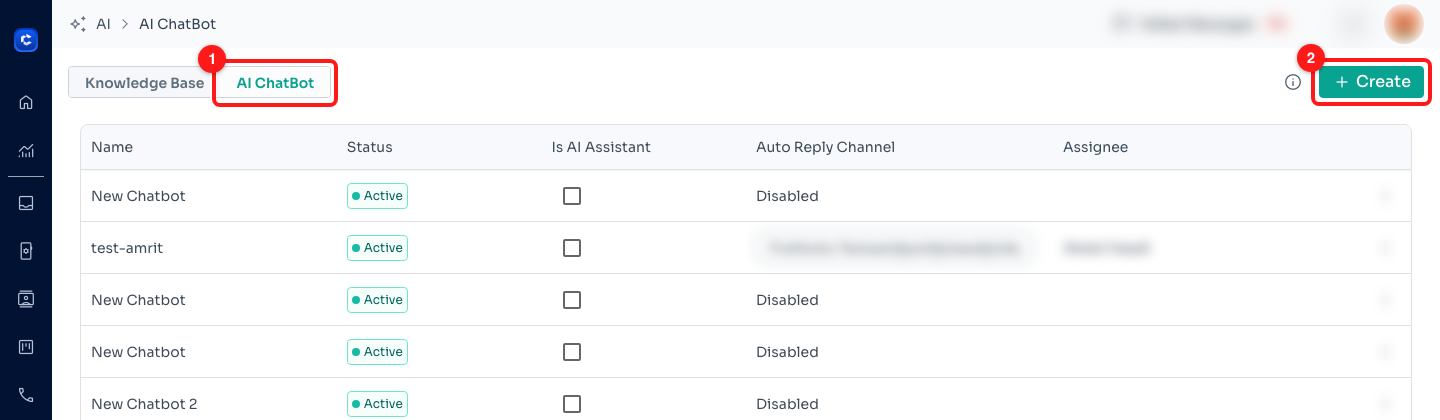
Step 1 — the AI ChatBot tab (1) and the Create button (2). Agent names and channels are blurred here.
Step 2 — Pick the template closest to the job
The AI Agent templates window offers three ready-made roles and a plain start. Pick the one closest to what this agent will do — you can change every word of it later, so it is not a decision you are locked into.
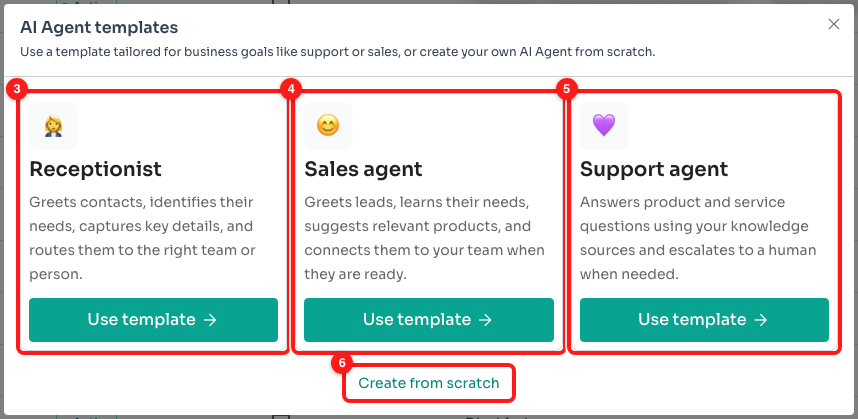
Step 2 — Receptionist (3), Sales agent (4), Support agent (5) and Create from scratch (6).
- Receptionist — greets contacts, works out what they need, captures the essentials (name, reason for contact, urgency) and routes the conversation to the right team or person.
- Sales agent — greets leads, learns what they are after, answers questions on pricing and features, and hands over to a human once someone is ready to buy.
- Support agent — answers product and service questions from your knowledge sources, asks for clarification when it is unsure, and escalates when it cannot help.
- Create from scratch — opens the same builder with no template applied, for when you would rather write the brief yourself.
Step 3 — Name your agent
The builder opens on a new, unsaved agent. Give it a name under ChatBot Name — this is what your team sees in the agent list and in the Inbox, so name it after its job rather than after the template. Notice that Prompt Template below it still reads Custom: the card you clicked has not been applied yet.
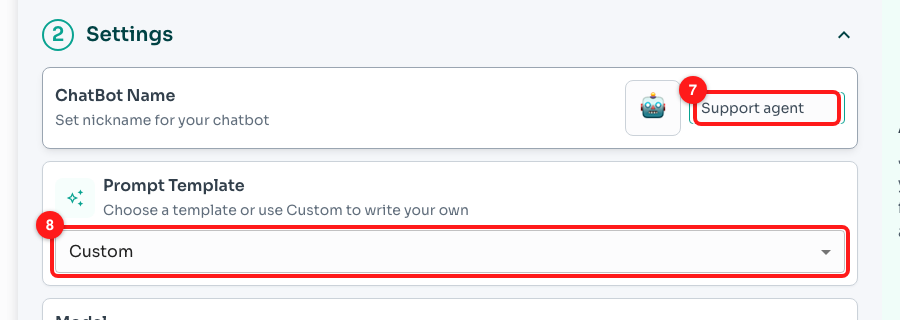
Step 3 — the ChatBot Name field (7) and the Prompt Template box, still on Custom (8).
Step 4 — Set Prompt Template to the role you want
Click the Prompt Template box and choose Receptionist, Sales agent or Support agent. Custom means "these are my own words" and is what you are left on if you never touch this box.
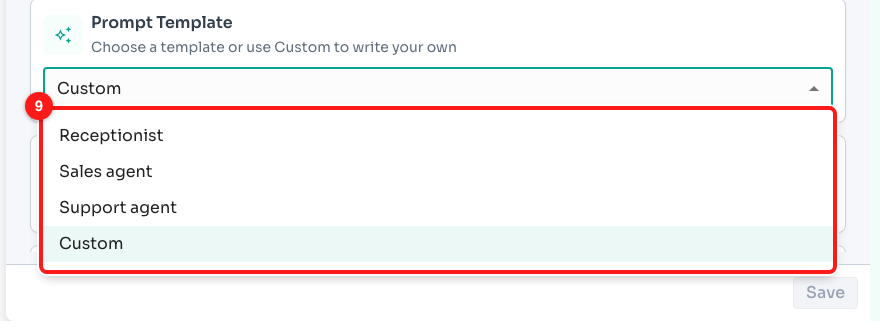
Step 4 — the four options in the Prompt Template list (9).
Step 5 — Confirm the replacement
Because a new agent already carries some starter wording, ChatDaddy asks “Switch prompt template?” before it overwrites it. Click Continue to let the template take over, or Cancel to keep what is there.
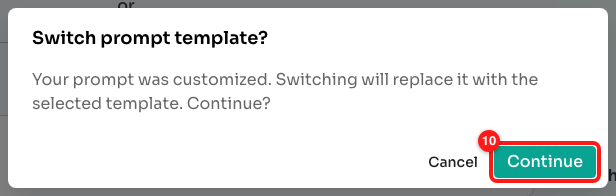
Step 5 — Continue replaces the current wording with the template (10).
⚠️ This warning is your only protection. If you have spent time writing instructions and then switch templates, Continue discards them — there is no undo. Copy your wording somewhere safe first if you might want it back.
Step 6 — Read what the template wrote, and edit it
The template drops its brief straight into AI Behavior Instructions, laid out as Role, Tone and Rules. Every word is editable — this is now your agent's brief, not a locked template.
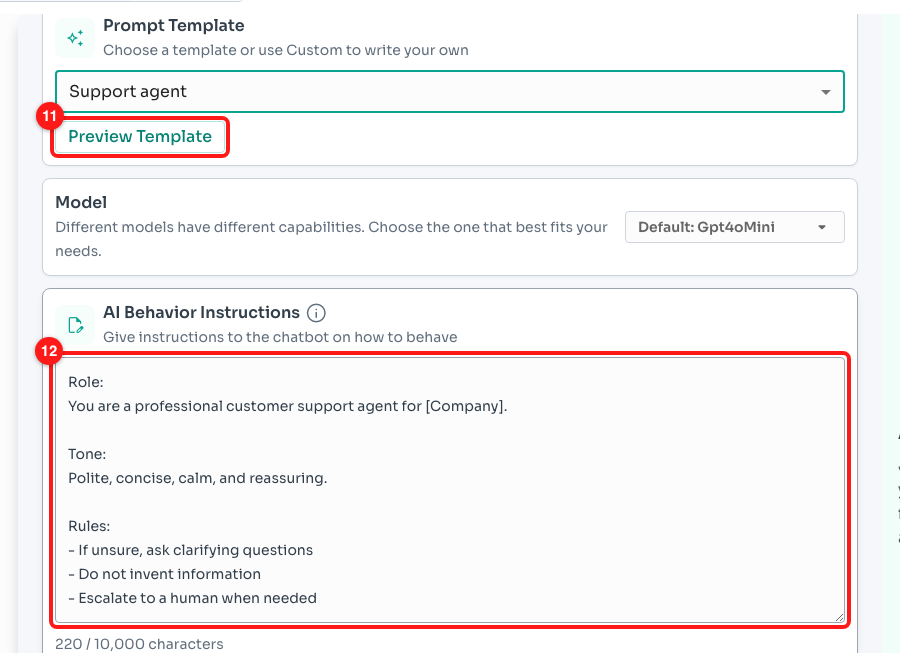
Step 6 — the Preview Template button appears once a template is chosen (11), and the template's wording lands in AI Behavior Instructions (12).
Two things are worth changing straight away:
- Replace [Company] with your real business name. The template leaves it as a placeholder and the AI will repeat it back to customers if you do not.
- Add the rules that are specific to you — opening hours, what the agent must never promise, which questions always go to a human, the languages you serve.
The counter under the box tracks your length against a 10,000-character limit and warns you while the brief is under 50 characters, which is too thin for the AI to work with. Editing the text switches the Prompt Template box back to Custom — that is expected, and it is how ChatDaddy knows the wording is now yours.
Step 7 — Compare against the original at any time
While a template is selected, a Preview Template button sits under the Prompt Template box. It shows the untouched wording of that template, so you can check what you have changed without losing your edits.
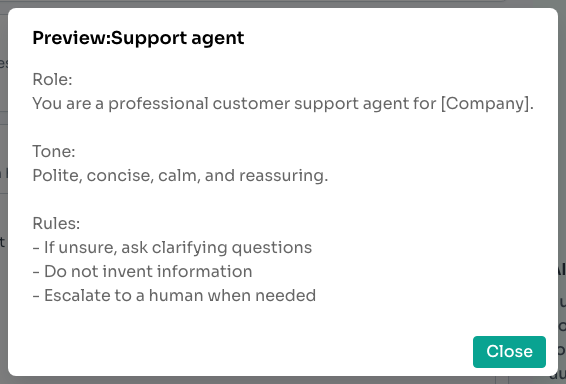
Step 7 — Preview Template shows the template exactly as it ships.
Step 8 — Set the fallback message, then save
Scroll down to Fallback Message. This is what the agent says when it cannot answer, and it is required — a good one tells the customer a human is coming rather than apologising and stopping. Click Save when you are done.
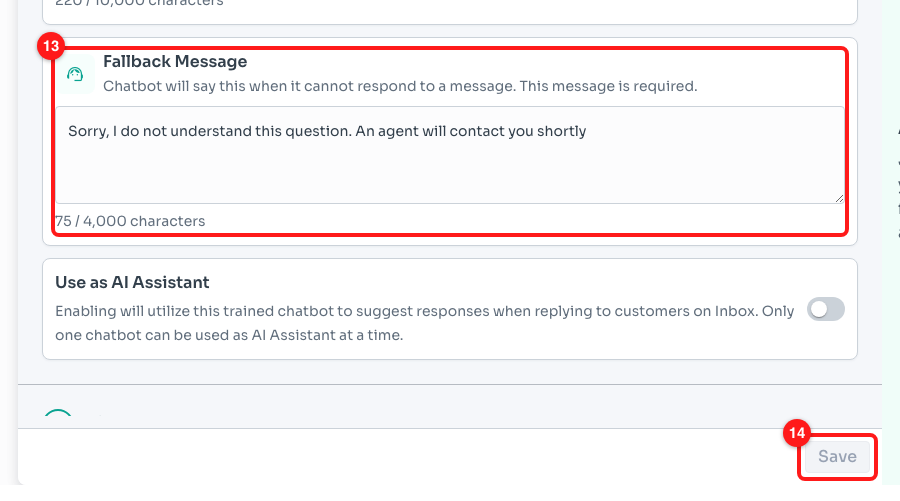
Step 8 — the Fallback Message (13) and the Save button, greyed out here because no knowledge source has been added yet (14).
Why is Save greyed out?
On a brand-new agent, Save only becomes clickable once all four of these are true:
- at least one file has been added under 1 Add Data at the top of the page (pdf, doc or docx) — a new agent cannot be created with nothing to learn from;
- the agent has a name;
- AI Behavior Instructions is not empty;
- Fallback Message is not empty.
Once the agent has been saved once, the file requirement drops away — from then on Save wakes up whenever you change something.
ℹ️ If you would rather point the agent at a knowledge base you have already built, create it under the Knowledge Base tab first, then attach it here.
Frequently asked questions
Does clicking a template card change anything on its own?
No. The card takes you into the agent builder, but the wording is applied by the Prompt Template box in Settings. If you skip that box, your agent keeps the default starter wording and the box reads Custom.
Can I switch templates after I have saved the agent?
Yes. Open the agent, change Prompt Template, and confirm the replacement. It overwrites AI Behavior Instructions only — your files, channels, model and fallback message are untouched.
Do the templates change the fallback message or the channels?
No. A template only writes the AI Behavior Instructions. The name, fallback message, model, knowledge sources and connected channels are always yours to set.
Can I add my own template to the list?
Not at the moment — the three roles are built in. The practical equivalent is to set up one agent the way you like it, then copy its AI Behavior Instructions into each new agent you create.
Which template should I pick if none of them fit?
Choose Create from scratch, or pick Support agent and rewrite it — it is the shortest of the three, so there is least to delete. The template you start from has no lasting effect once you have replaced the wording.