
How to Build a Message Flow With AI (Copilot)
Describe the automation you want in plain English and Copilot drafts the message flow for you — the trigger, the messages and the steps in between. Learn where to find it, how to write a prompt it understands, and what to check before you switch the flow on.
Also searched as: How to Build a Message Flow With AI (Copilot), Open the Copilot box on the Message Flows page, Describe the automation you want, Check your instruction in the AI Flow Builder, Pick a design style and continue, Generate the flow, Read the draft, edit it, then save, Build, Message, Flow, Copilot
Building a message flow from an empty canvas takes a while. Copilot gives you a starting point instead: you describe the automation you want in one or two sentences, and ChatDaddy drafts a flow — the trigger, the messages and the steps between them — which you then edit and save like any other flow.
It is worth using if you are new to Message Flows, or if you know roughly what you want to automate but would rather adjust a draft than build every step by hand. Copilot is marked AI beta, so treat what it produces as a first draft.
💳 Generating a flow uses credits from your team balance, and the flow it writes is a draft: read every message before you save it and switch it on. Nothing reaches your customers while you are drafting — a generated flow only runs once you save it and turn it on yourself.
Step-by-step
Step 1 — Open the Copilot box on the Message Flows page
Go to Automation → Message Flows. Above your list of flows there is a box headed “What would you like to automate?”, labelled Copilot with an AI beta tag next to it. Beside it sits the ordinary Create New Message Flow button, if you would rather start from scratch.
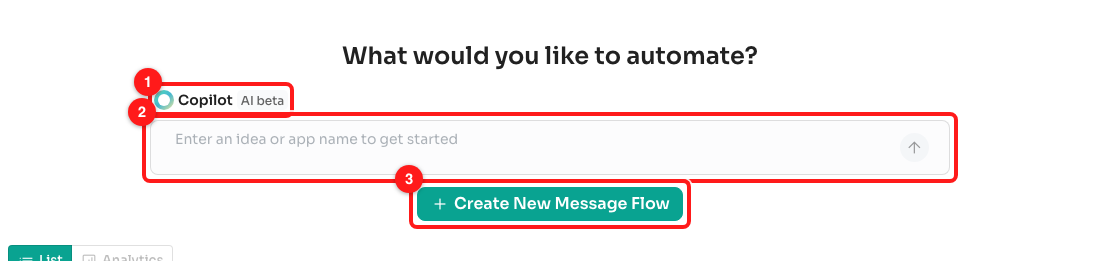
Step 1 — the Copilot label and its AI beta tag (1), the prompt box (2), and the ordinary Create New Message Flow button (3).
💡 There is a second way in: Create New Message Flow → Start with AI. It opens the same AI builder, but without your description, so the Copilot box is the one to use — the text you type there is what the flow gets built from.
Step 2 — Describe the automation you want
Type what the flow should do, in plain language: who it is for, what it should say, and what it should ask. Something like “Greet new customers, ask which product they are interested in, then send the price list” is enough to work with. You have 300 characters; a counter appears under the box as you type and tells you when you have reached the limit.
Send it with the arrow button on the right of the box, or press Ctrl + Enter (⌘ + Enter on a Mac). This opens the AI Flow Builder — it does not generate anything yet.
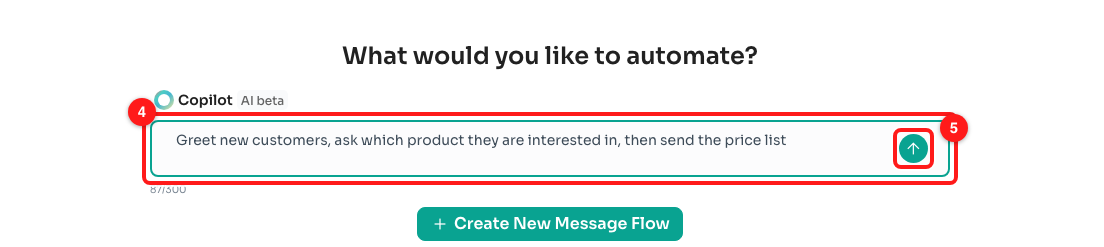
Step 2 — the prompt box with an instruction typed in (4) and the send arrow (5), which opens the AI Flow Builder.
Step 3 — Check your instruction in the AI Flow Builder
The AI Flow Builder panel opens on the left with what you typed listed under Added Instructions. Read it back — this is the description the flow will be built from. There is an Add Instructions box below it, with an Add Text button, and each instruction has an ✕ to remove it.
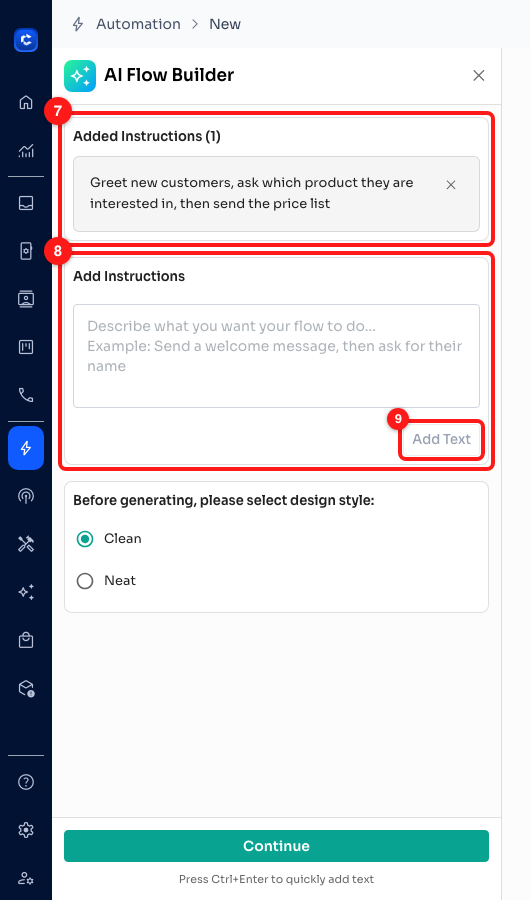
Step 3 — the instruction you arrived with (7), the box for adding more (8), and the Add Text button (9).
✂️ Two things to know about this panel while Copilot is in beta. Everything in it counts towards a 300-character limit — go over and you get “Prompt exceeds limit. Remove some text to continue.” with Add Text greyed out. And the flow is generated from the description you sent from the Copilot box, so if you want to change what the AI is told, go back to Message Flows and send a new one rather than adding to it here.
Step 4 — Pick a design style and continue
Choose a layout style for the canvas — Clean or Neat — and click Continue. The style is a beta setting and does not change the messages you get; clicking Continue is what unlocks the generate button.
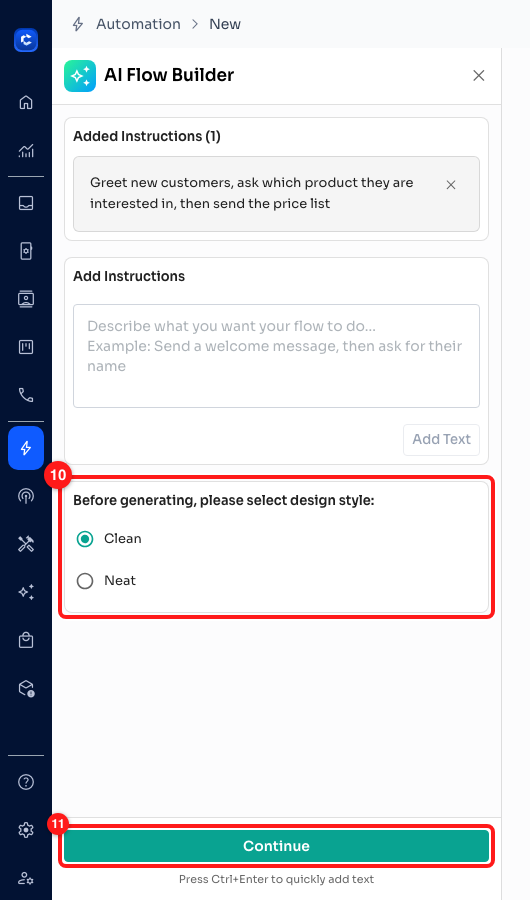
Step 4 — the design style choice (10) and the Continue button (11).
Step 5 — Generate the flow
The button now reads Generate Flow ▶. Clicking it is the point at which credits are used, so check your instructions once more first. Generation takes up to a minute: you will see a progress bar and a few reminders while it works, including “Credits will be deducted for this generation” and “Generated by AI, please review it carefully”.
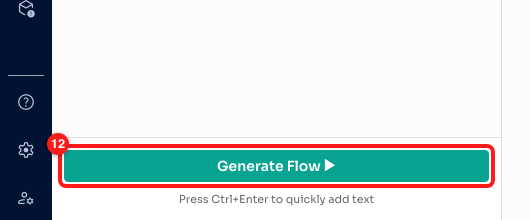
Step 5 — Generate Flow (12). Everything up to this point is free; this button is the one that spends credits.
Step 6 — Read the draft, edit it, then save
When it finishes, the AI panel closes and your new flow appears in the normal flow builder with its steps already drawn. It is still unsaved: open each step, read the wording, fix anything that is not right for your business, then click Save. If you leave the page without saving, the generated flow is gone and you would have to generate it again.
🔍 Always read every message the AI wrote before you turn the flow on. It can invent prices, opening hours, delivery times and links that do not match your business — and once the flow is live, those messages go to real customers.
Troubleshooting
I cannot see the Copilot box on the Message Flows page.
It sits above your list of flows, so scroll to the top of the page — the box scrolls away as you move down the list. If you are looking at a different view of the page, switch back to List.
I used Start with AI and got a flow that has nothing to do with my business.
Start with AI in the create-flow window opens the AI builder without a description of your own, so there is nothing specific for the AI to work from. Close it, type what you want into the Copilot box on the Message Flows page, and send it from there instead.
The arrow button next to the prompt box is greyed out.
The box is empty, or contains only spaces. Type a sentence describing what you want the flow to do and the arrow becomes active.
It says “300 character limit reached”, or “Prompt exceeds limit”.
Your instruction — or all your added instructions together — is longer than 300 characters. Shorten it to the essentials: who the flow is for, what it should say, and what it should ask. Fine detail is quicker to add by editing the steps afterwards than by writing a longer prompt.
I saw “OpenAI server is overloaded, please try later”.
The AI service behind the generator was busy and the request did not go through. Nothing was created and you can simply try again in a few minutes — your instructions are still in the panel.
I saw “Please provide a lesser prompt, token sized reached”.
The generation failed, usually because the instructions were too long or too complex to turn into a single flow. Cut them back to one clear goal and try again. If you want a long, branching automation, generate the simple version first and add the branches yourself in the builder.
The flow it built is not what I asked for.
Copilot writes a draft, not a finished automation — it is marked AI beta for that reason. You can edit any step in the builder exactly as you would on a flow you built yourself, or start again from the Copilot box with a clearer instruction. Bear in mind that generating again uses credits again.
Does the generated flow save itself?
No. What you get is a new, unsaved flow. It does not appear in your Message Flows list, and cannot run for anyone, until you click Save in the builder.
What is the difference between Continue and Generate Flow?
Continue only confirms your design style — it costs nothing. Generate Flow ▶ is the button that actually asks the AI to write the flow, and that is when credits are deducted.
I added more instructions in the panel and they made no difference.
While Copilot is in beta, the flow is generated from the description you sent from the Copilot box on the Message Flows page. To change what the AI is told, go back to Message Flows and send a new description rather than adding to the list in the panel.