
How to Use the App Node in a Message Flow
Add a ready-made capability to a message flow with the App node — create a ticket, ask the AI chatbot, update a contact or send an HTTP request. Step-by-step with the node picker explained.
Also searched as: app node, message flow, node picker, create ticket node, AI chatbot node, add new node, flow builder, built-in apps, automation node, app tab
The App node adds a ready-made capability to a message flow — creating a ticket, asking the AI chatbot a question, updating a contact, or sending an HTTP request.
Important: the App node does NOT contain third-party apps such as Shopify or Google Sheets. These are ChatDaddy's own building blocks. To connect an outside service, see the App Store or Zapier guides linked at the bottom.
Step 1: Open the node picker
Open Automation → Message Flows and open a flow (or create a new one). On the canvas, click the green + button on the left toolbar, or choose Trigger / Choose next step. The Add New Node window opens.
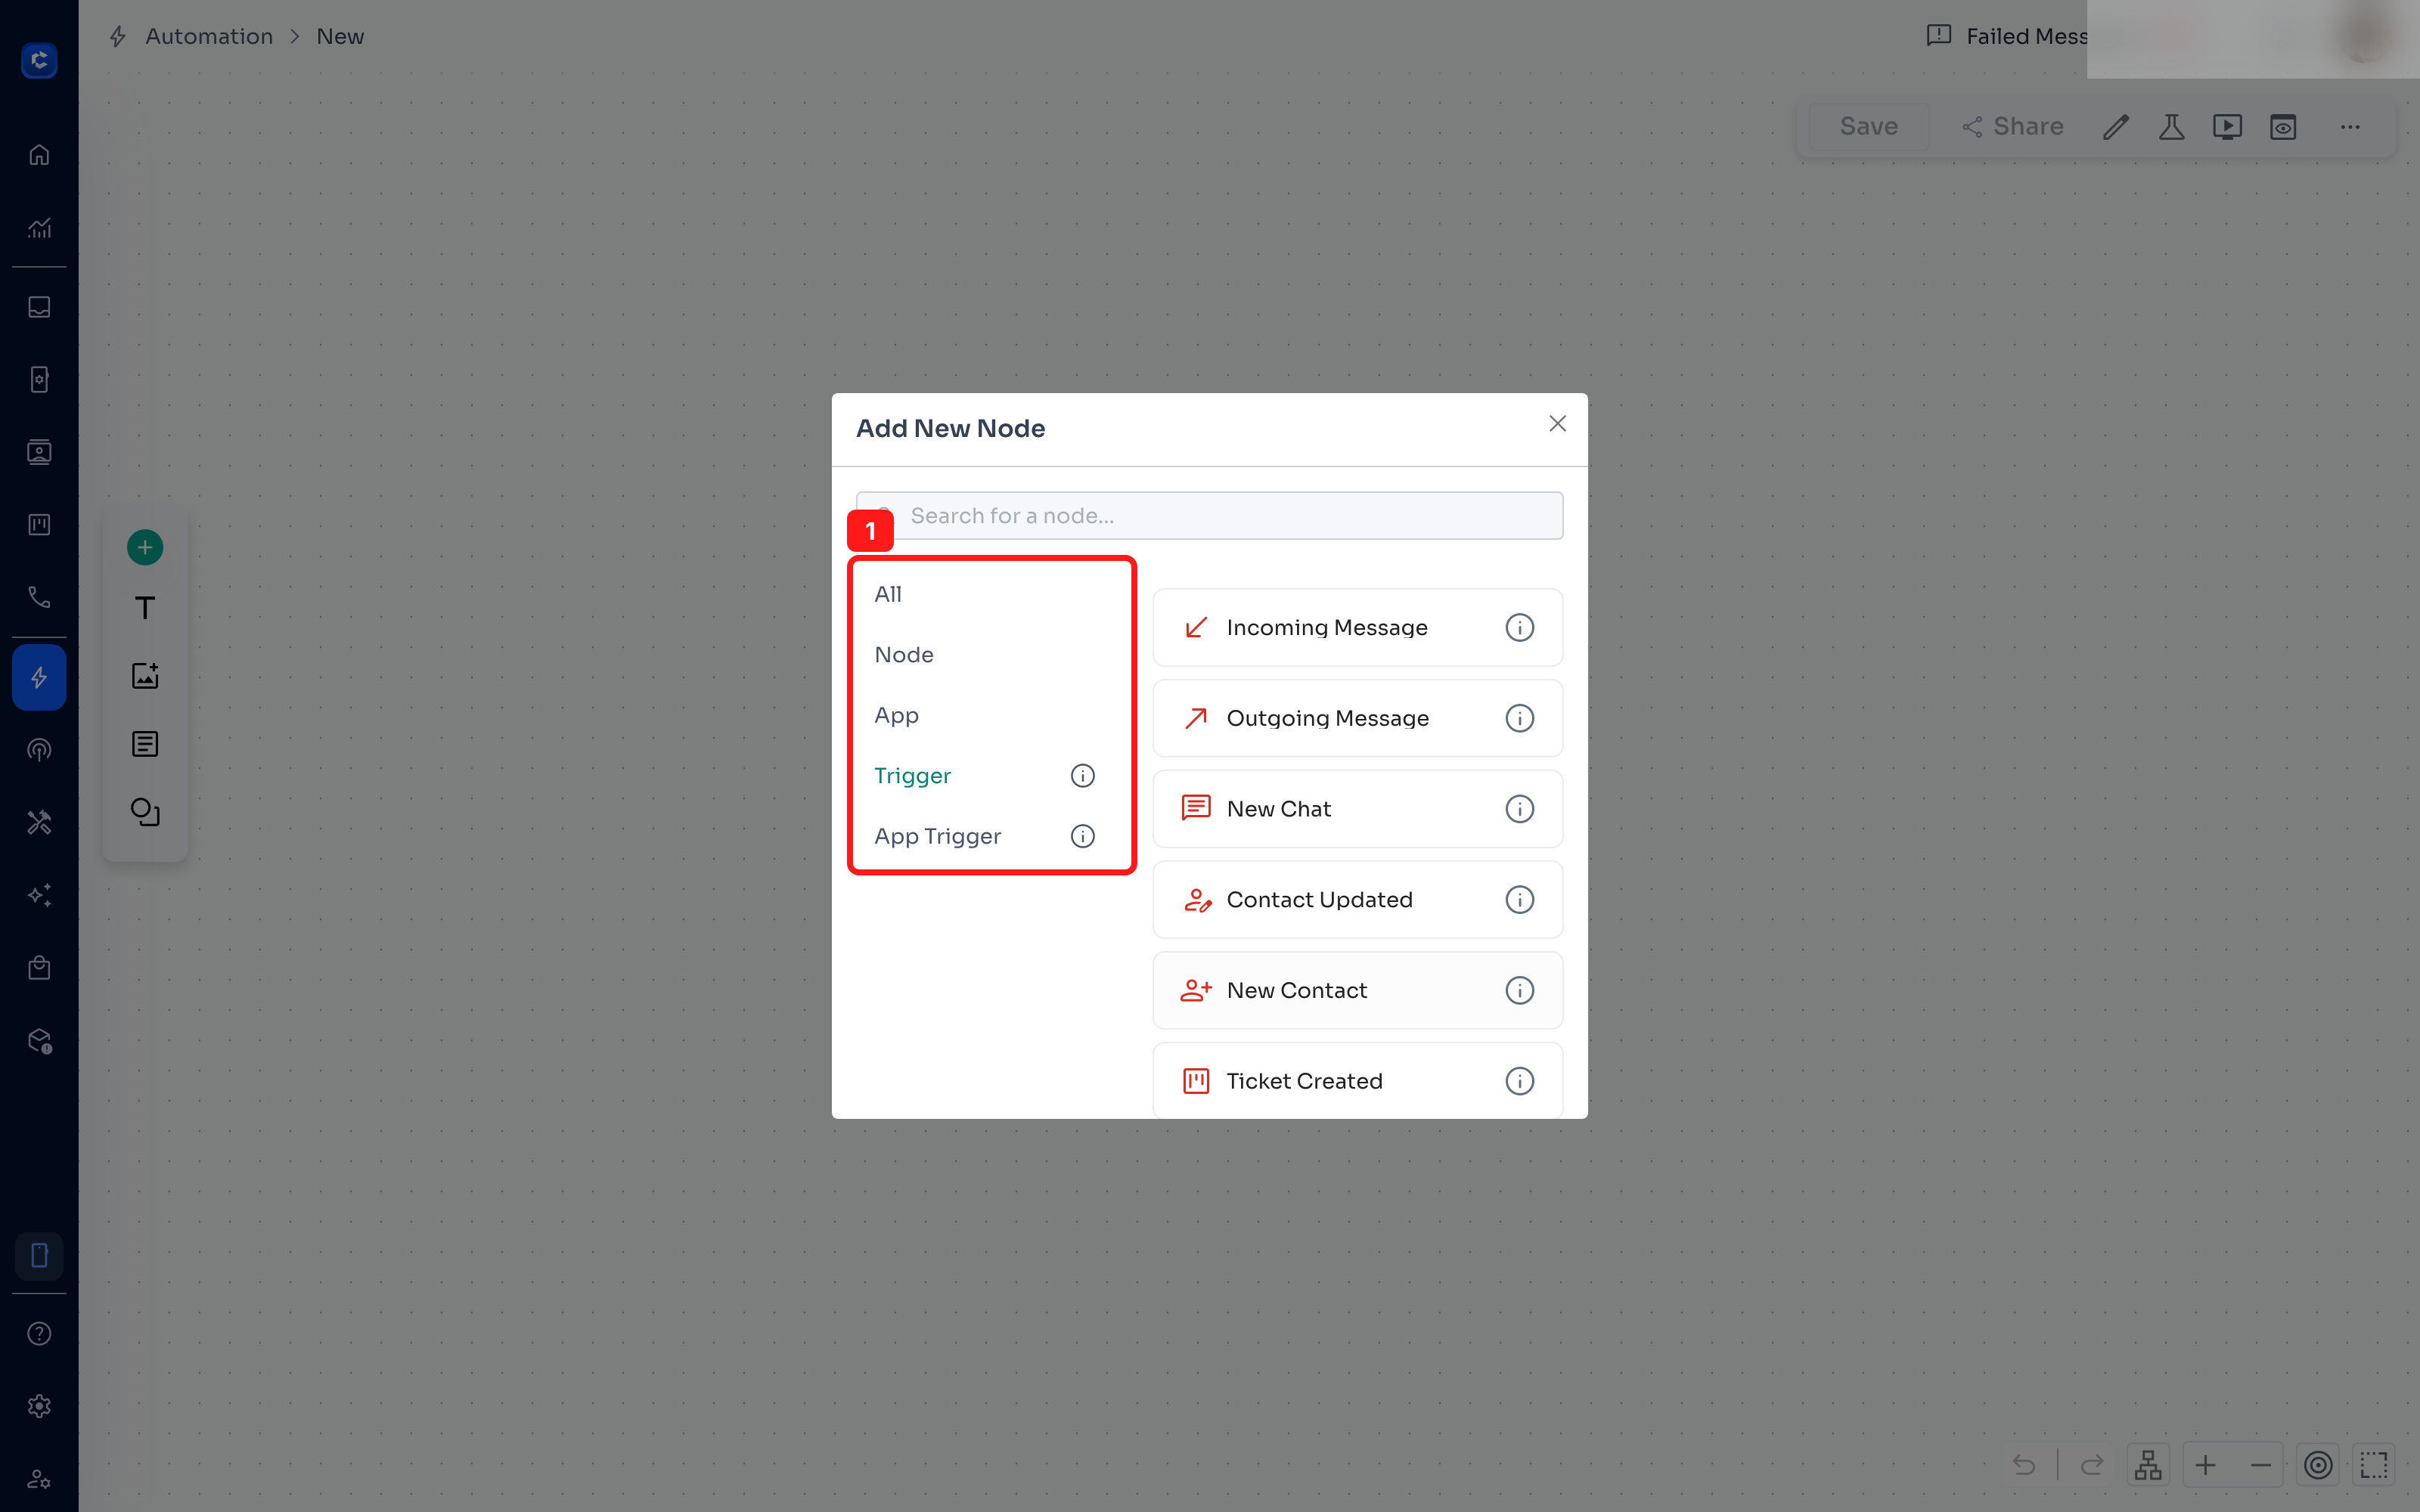 The five tabs are filters over the same list:
- All — everything
- Node — the basic steps: Message, Email, Action, Delay, Input, Condition
- App — ChatDaddy's built-in apps (this article)
- Trigger — events inside ChatDaddy that can start a flow
- App Trigger — outside events that can start a flow (currently only Webhook)
Step 2: Open the App tab
Click App in the left column. The list on the right shows every app you can add.
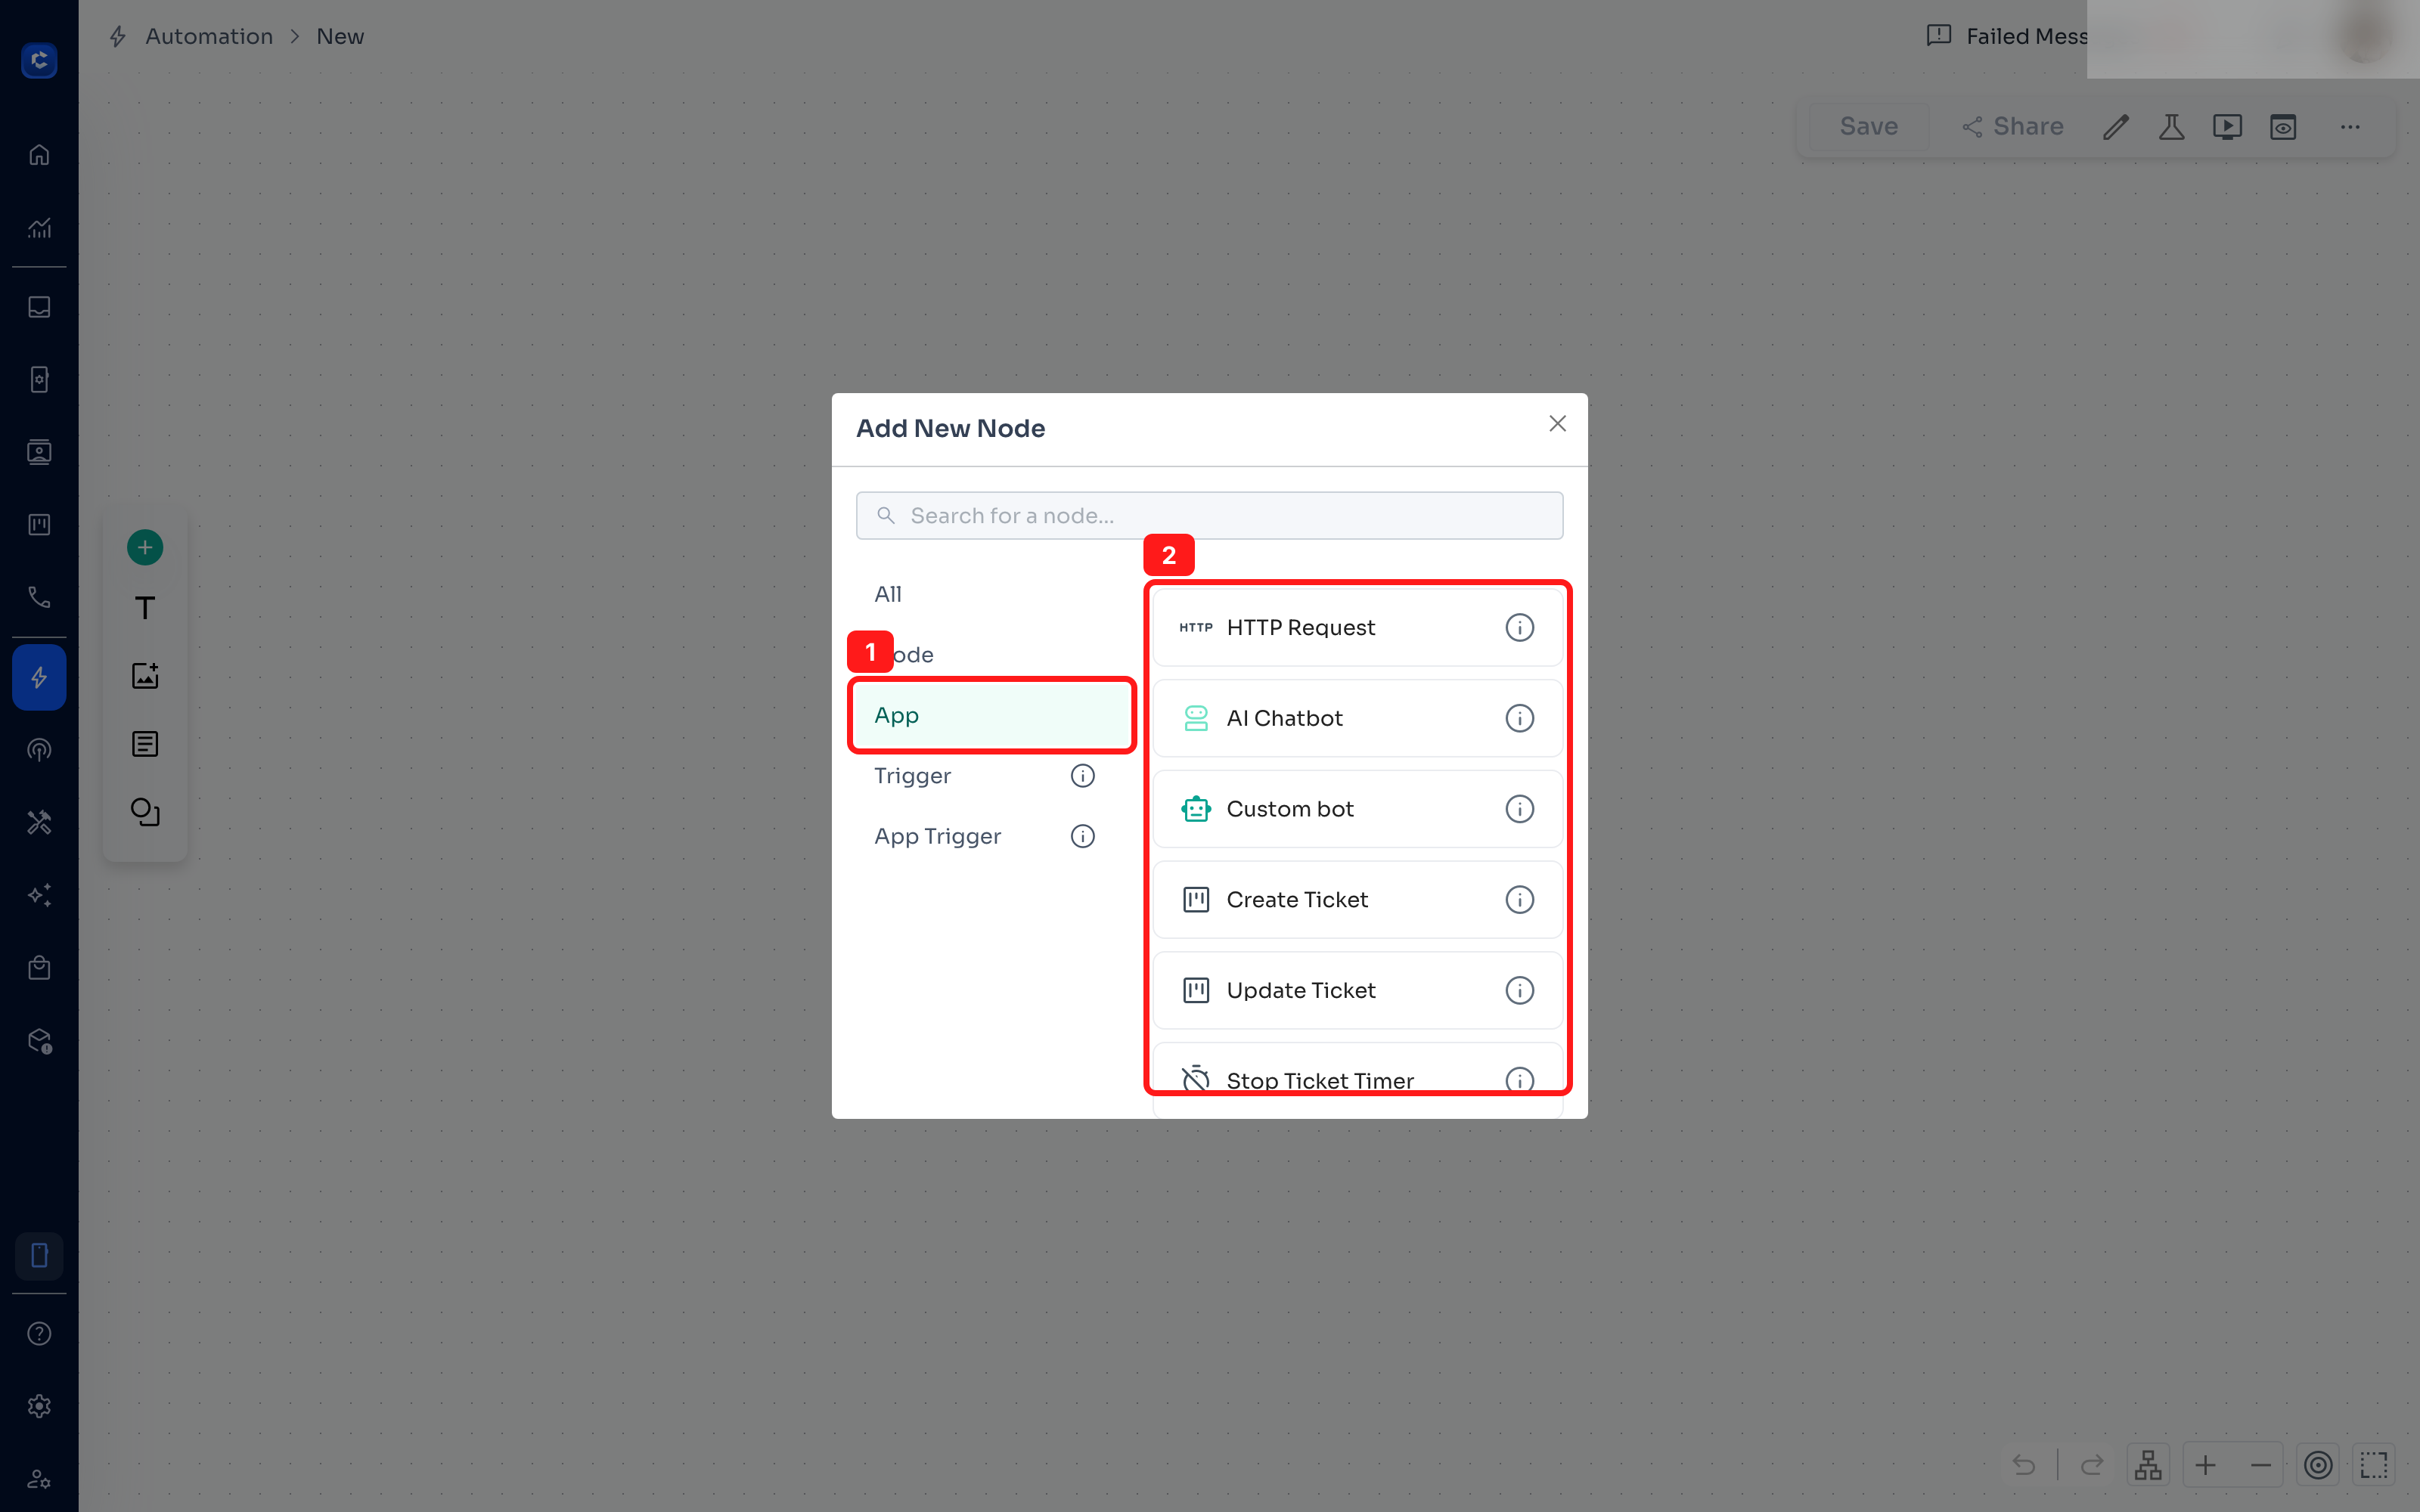 The available apps are:
| App | What it does |
|---|---|
| HTTP Request | Sends a GET or POST request to any URL |
| AI Chatbot | Sends the message to a trained AI chatbot and returns its answer |
| Custom bot | Runs a custom bot you have configured |
| Create Ticket | Creates a CRM ticket on a board |
| Update Ticket | Moves or updates an existing CRM ticket |
| Stop Ticket Timer | Stops the timer running on a ticket |
| Modify Contact | Updates contact fields such as name or custom fields |
| Notify Team Member | Sends an internal notification to a teammate |
Use the search box at the top if the list is long. It matches the app name only — it does not search descriptions.
Step 3: Add the app to your flow
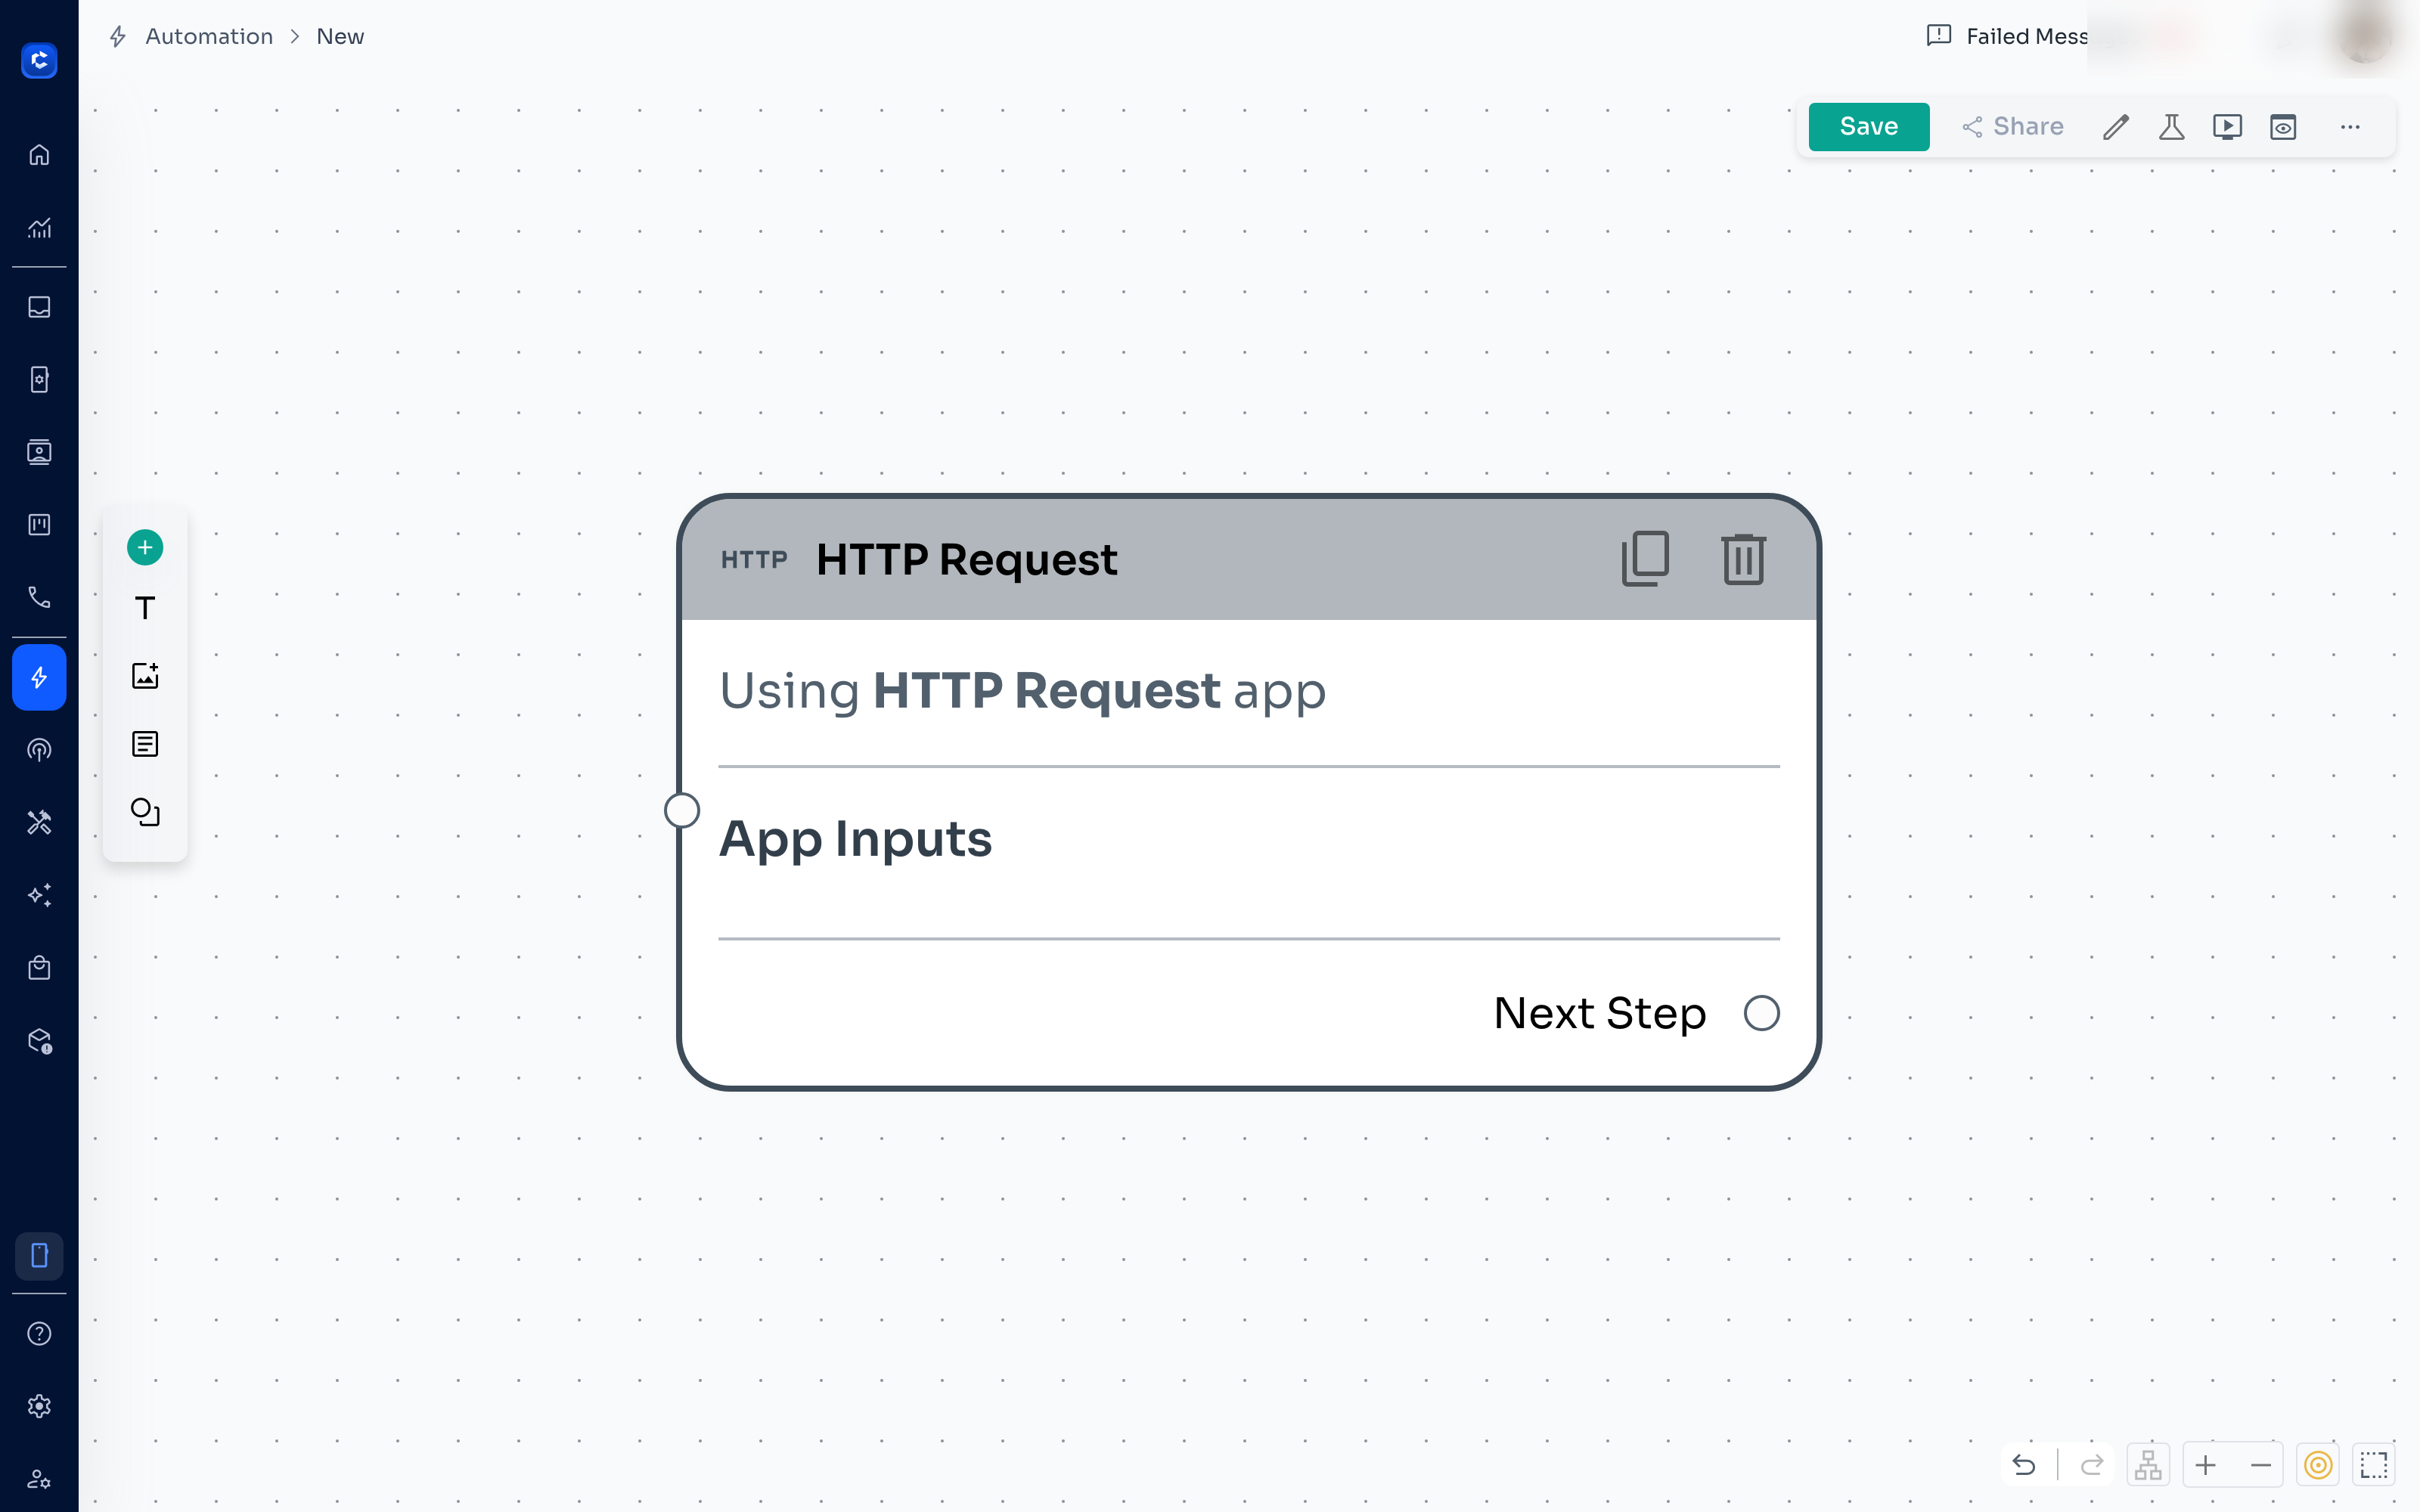
Click the app you want. ChatDaddy places it on the canvas as a node.
Step 4: Fill in the App Inputs
Click the node to open its settings panel on the left. Each app asks for different inputs — for example Create Ticket asks which board and stage to use, while HTTP Request asks for a URL and method. You can insert variables from earlier steps into most input fields, so the app acts on the specific contact or message that reached this point in the flow.
Step 5: Connect the next step
Use the Next Step connector on the right of the node to continue the flow. Anything the app returns becomes available as a variable to the steps that come after it.
Remember to click Save at the top right. Until you save, the node exists only in your browser.
Frequently asked questions
I cannot find Shopify / Google Sheets / my CRM in the App tab They are not there by design. The App tab only holds ChatDaddy's built-in apps. Use the App Store for supported services, or Zapier for everything else.
Can I add the same app twice? Yes. You can add as many App nodes as your flow needs, each with its own inputs.