
How to Use Zapier with ChatDaddy (Tools and the Action Node)
Zapier connects ChatDaddy to ~8,000 apps — Google Sheets, HubSpot, Pipedrive and more. There are two Zapier screens inside ChatDaddy; here is which to use and how they differ.
Also searched as: zapier, zapier integration, google sheets, hubspot, pipedrive, connect zapier, zap, tools zapier, 8000 apps, no-code integration, zapier action node
Zapier connects ChatDaddy to around 8,000 other apps — including many that ChatDaddy does not support natively, such as Google Sheets, HubSpot, Pipedrive and monday.com. There are two Zapier screens inside ChatDaddy. They do different things, and connecting on one does not connect you on the other.
Which screen should I use?
| Tools → Zapier | Action node → Zapier | |
|---|---|---|
| What it is | Zapier's own editor, built into ChatDaddy | A shortcut that builds one small Zap for you |
| Direction | Both — any app can start or receive | ChatDaddy only: the flow fires, the Zap runs |
| Choose your own trigger and action | Yes | No, the trigger is fixed to this flow step |
| Best for | Google Sheets rows, new leads, anything that must start a flow | Sending data out from one specific step |
Method 1: Tools → Zapier (recommended)
Go to Tools in the left menu, then open the Zapier tab. This is Zapier's full experience embedded in ChatDaddy.
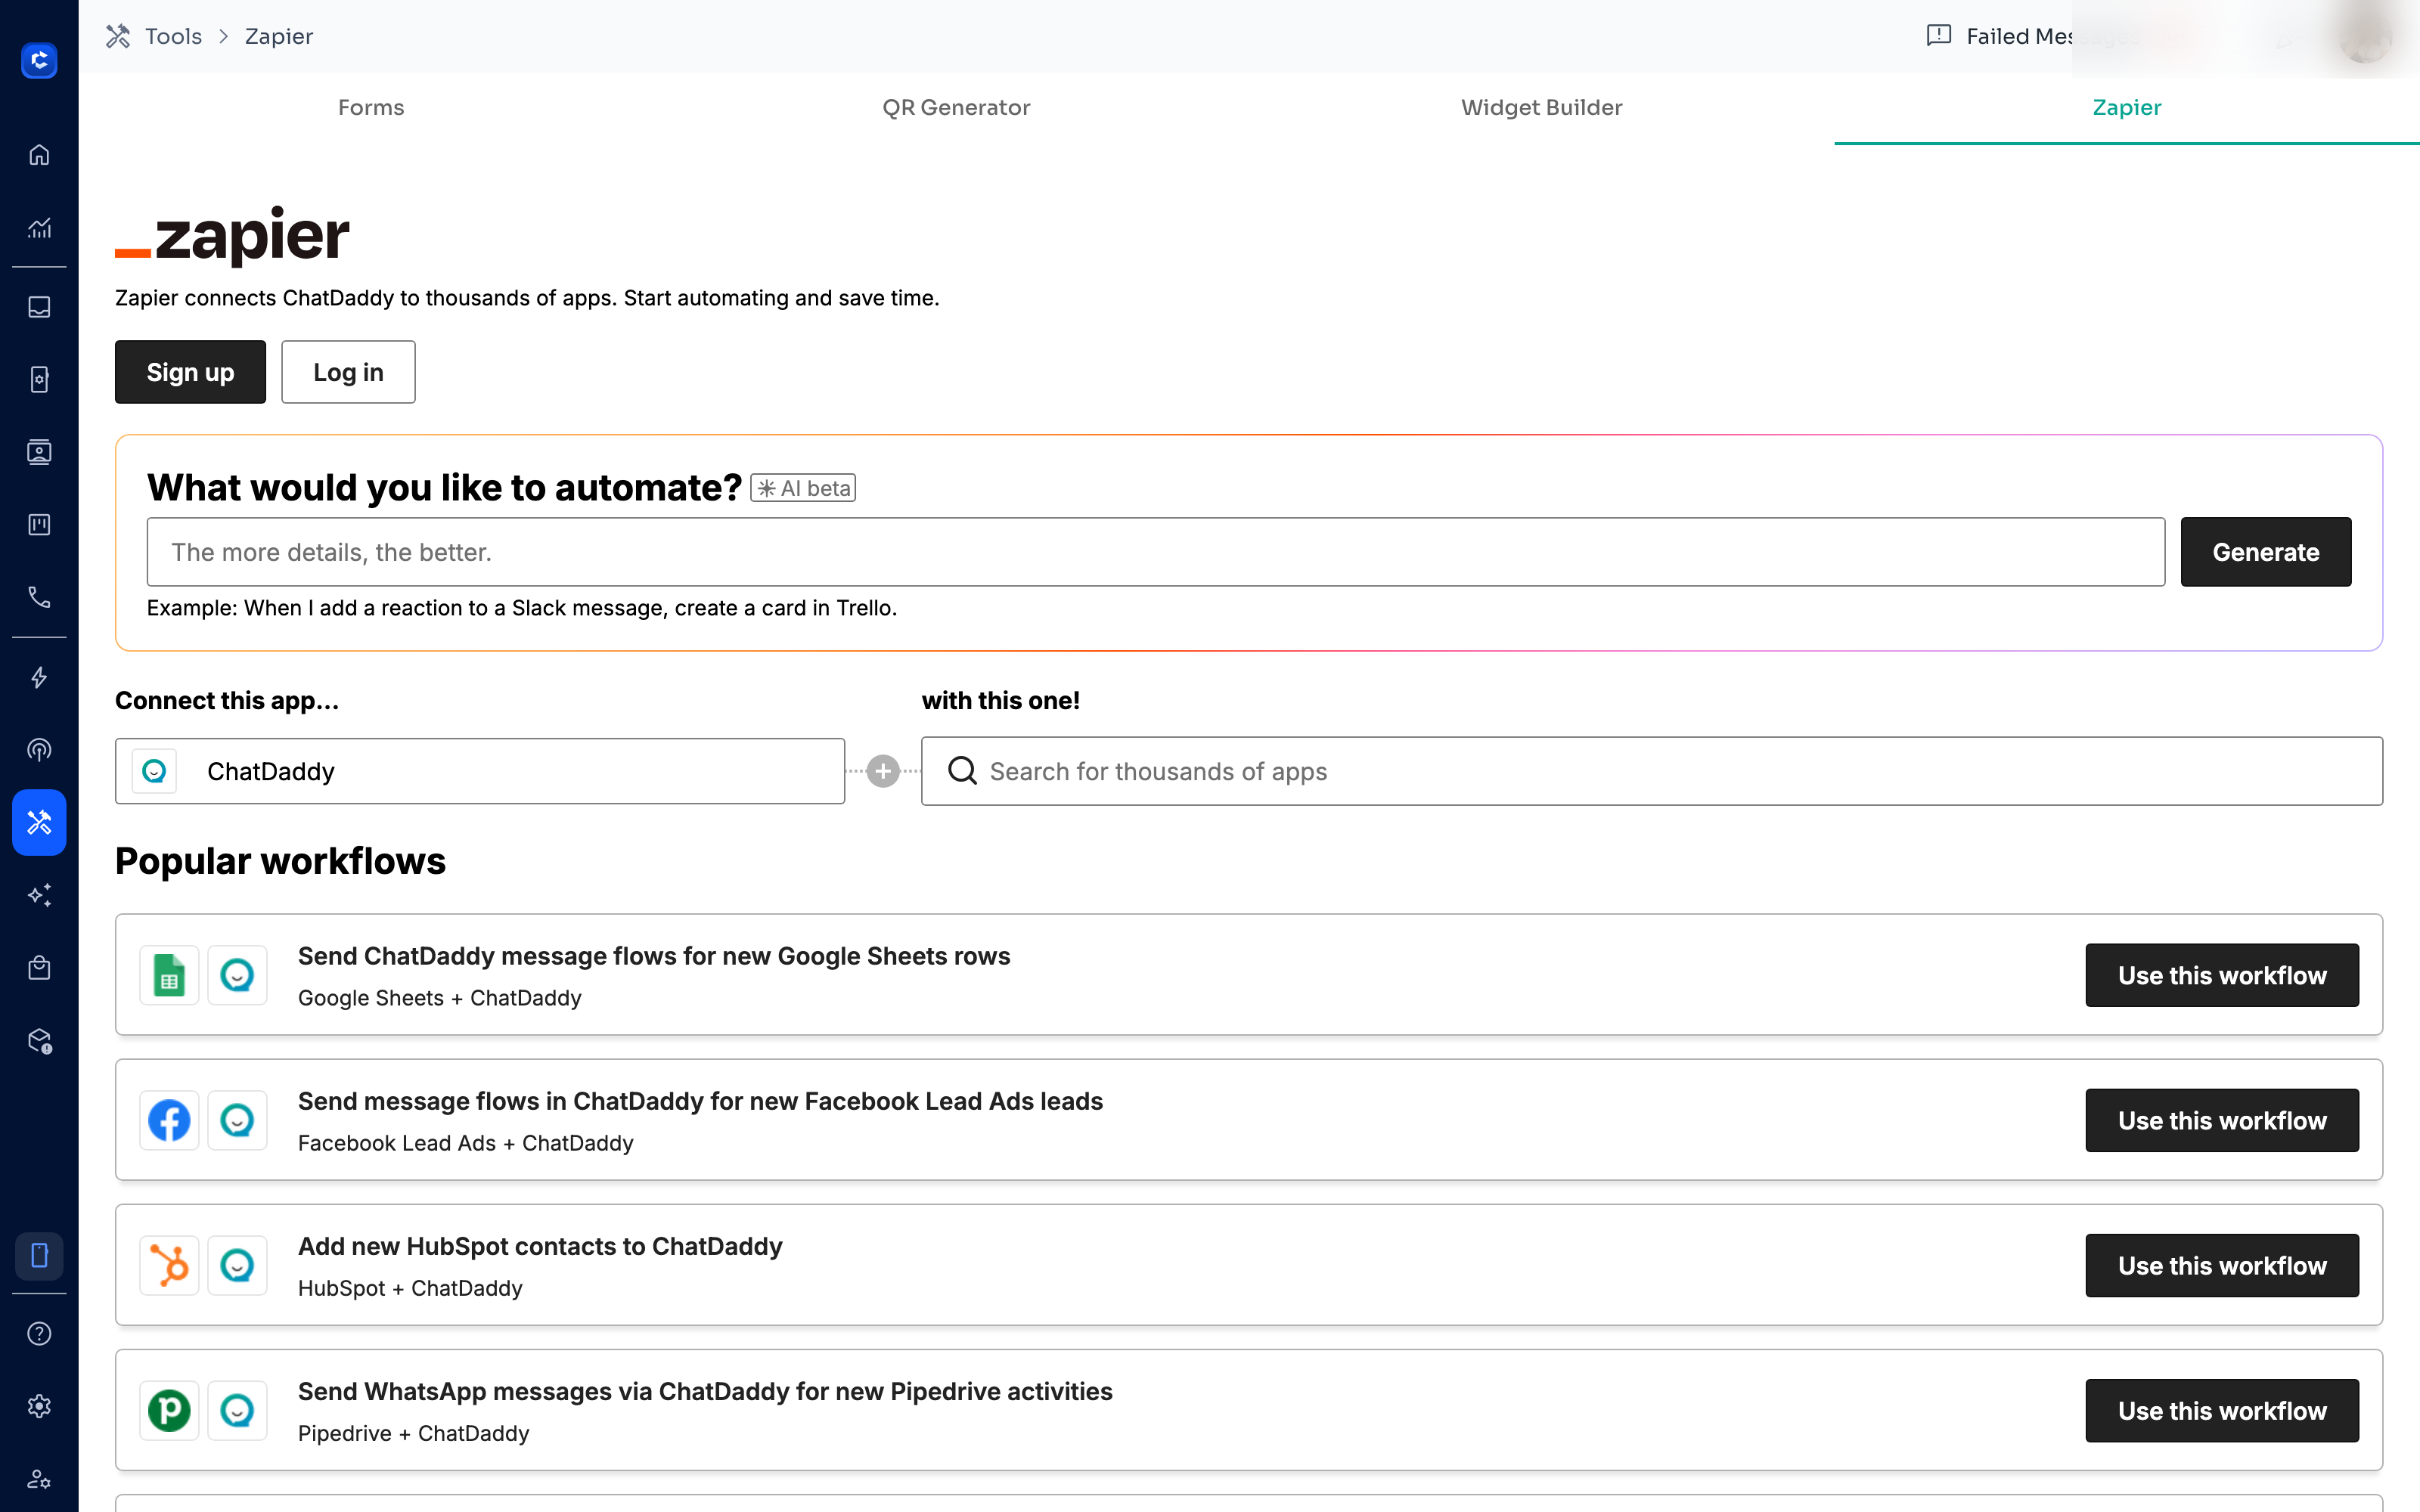
- Search for the app you want to connect in the 'with this one' box, or scroll to Popular workflows.
- Click Use this workflow on the template that matches what you need.
- Sign in to Zapier and connect both accounts when prompted.
- Choose the details — which spreadsheet, which message flow — and turn the Zap on.
This is the route for Google Sheets. The first ready-made workflow on the page is 'Send ChatDaddy message flows for new Google Sheets rows', which starts a ChatDaddy flow every time a new row is added.
Method 2: Action node → Zapier
Use this when a specific step in a flow should hand off to Zapier. Add an Action node to your flow and click it. Zapier is the last option in the list.
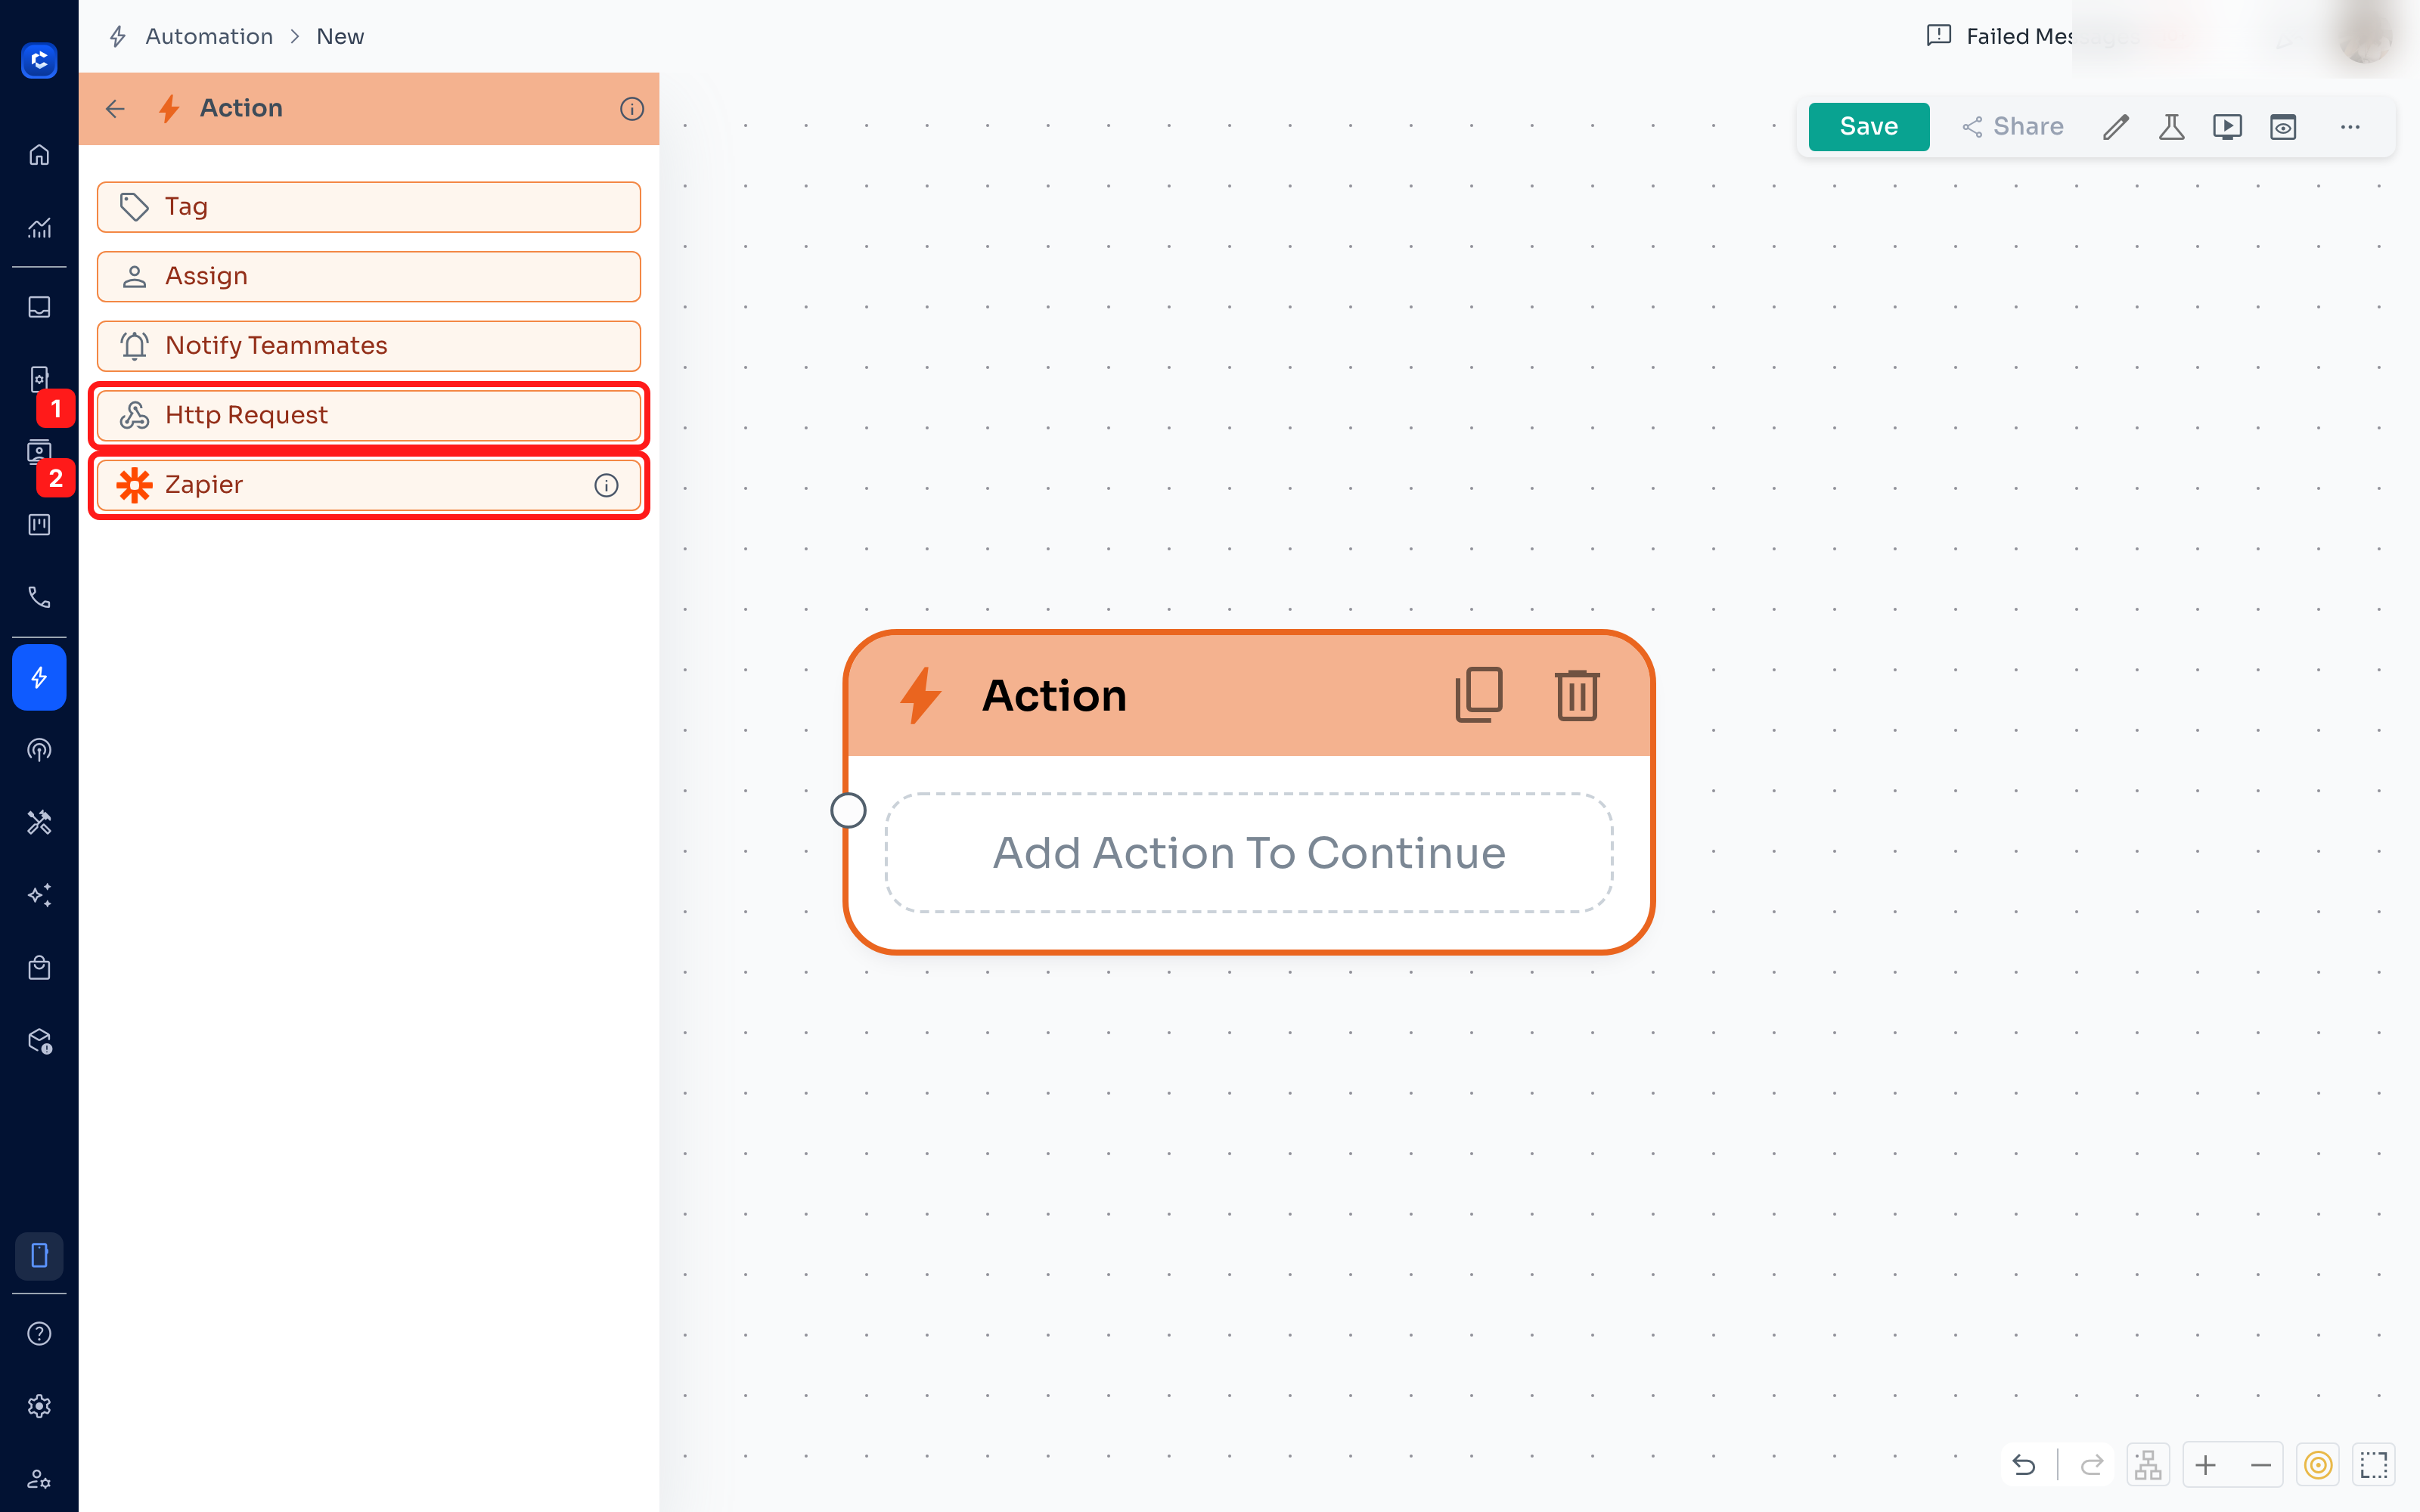 Clicking it opens the Zapier Automation window.
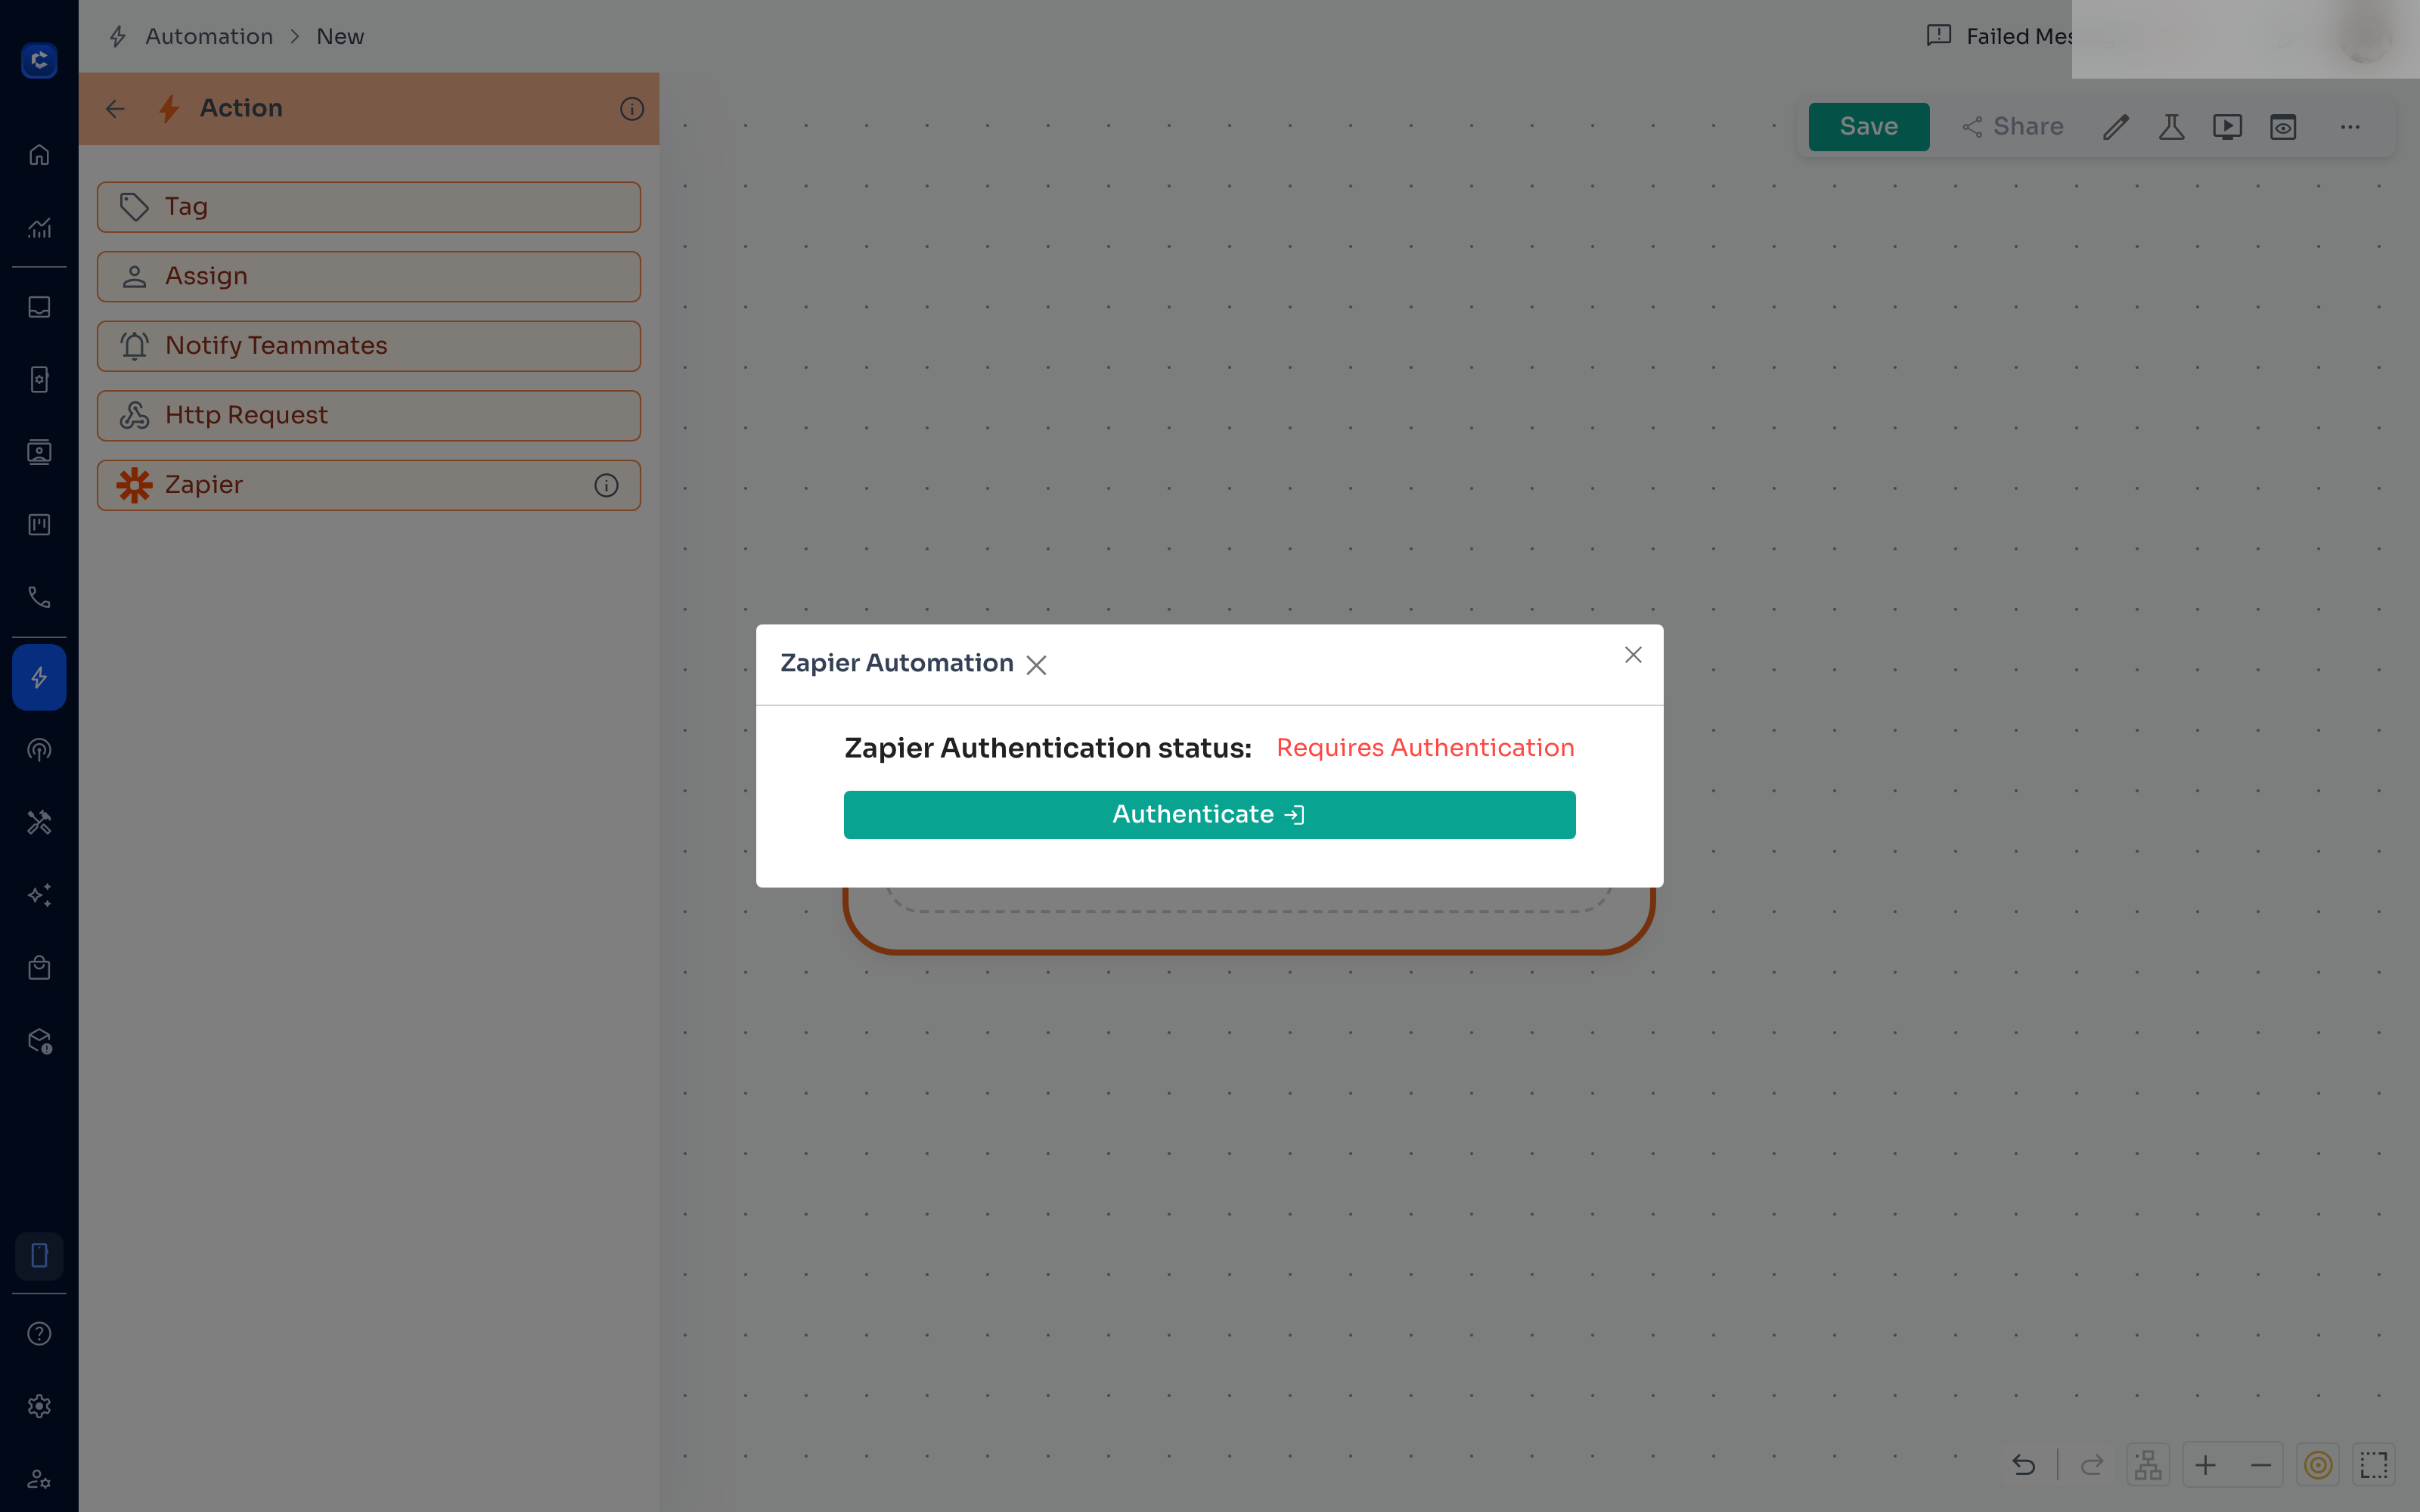
- Check the Zapier Authentication status line at the top of the window. It shows Valid, Expired, or Requires Authentication.
- Click Authenticate and sign in to Zapier in the popup.
- Click Authorize ChatDaddy App for Zap to link your ChatDaddy account inside Zapier.
- Click Setup Zap. ChatDaddy creates the Zap and links it to this action.
- Open the Zap from the node to finish building the second half in Zapier.
Things worth knowing
- The Zapier sign-in used by the Action node expires after about 10 hours. If the window says Expired, just click Authenticate again.
- Only one Zapier account can be connected at a time, and every team member shares it.
- The Action node can only create new Zaps. Existing Zaps cannot be attached to a flow step.
- Removing the Zapier action from a node does not delete the Zap — it keeps running in Zapier until you turn it off there.
- Connecting on the Tools page does not sign the Action node in, and the other way round.
Frequently asked questions
How do I connect my ChatDaddy account inside Zapier's own website? See the existing article 'How to connect Zapier to ChatDaddy?' in this collection, which covers signing in with a phone number and password, and with a Team ID and refresh token for Google sign-up accounts.
Do I need a paid Zapier plan? Not to start. Zapier's free tier covers a limited number of tasks per month. Higher volumes need a paid Zapier plan, billed by Zapier, not by ChatDaddy.
Can Zapier start a ChatDaddy flow? Yes, from Tools → Zapier. Choose the other app as the trigger and ChatDaddy as the action. The Action node method cannot do this — it always starts from ChatDaddy.